Yes it would bow in the middle after some time. Wood for transition is easy to come by, don’t skimp on this.
Maybe @Chopper can comment on the rest
Yes it would bow in the middle after some time. Wood for transition is easy to come by, don’t skimp on this.
Maybe @Chopper can comment on the rest
As a standard all ply transition former sections should be every 4ft and no more.
If you scroll at the pioneer mini pic above, they are set at 4ft.
Indoor , yes . WISA spruce ply is great quality. It’s not the same as cheap shuttering/structural ply which uses shite glue.
Outdoor . ideally treated hardwood/ marine ply as it will last much longer in the weather.
Thanks a lot. What about the surface, definitely birch? It’s indoors btw
Indoors defo birch , it’s the only surface I’d use indoor , even over skatelite .
Going ahead with building this ramp. Having a shitter of a time finding somewhere that will deliver the materials. This looks like a place that will do it but they’ve got waaay more options on types of wood and I don’t know the difference. Any plywood experts on here?
I need birch plywood for the top surface. This stuff seems to be all they have.
I then need some 9mm ply for the bottom layer of the transition, and some 18mm for the sides and platforms. They’ve got a bunch of different soft and hardwoods and I’ve no clue which type to get for which part or even whether I should choose one over the other.
Indoor or out?
For indoor use WISA spruce ( not shuttering) 18mm ply sheets for the transition formers and sides . It’s great stuff , better quality and a good price .
For outdoor marine 18mm hardwood for the formers and sides . It’s worth the extra money for the life of the ramp.
That birch is fine , BB grade is pretty standard
Thanks, it’s indoors. I’m pretty much limited to what’s on that website as it needs delivering to the arse end of nowhere which most places I’ve looked at won’t do
Ask them what they have that is closest to WISA, the chinese pine looks similar but I have a feeling it’s shuttering. The other Chilean looks like it could be the one.
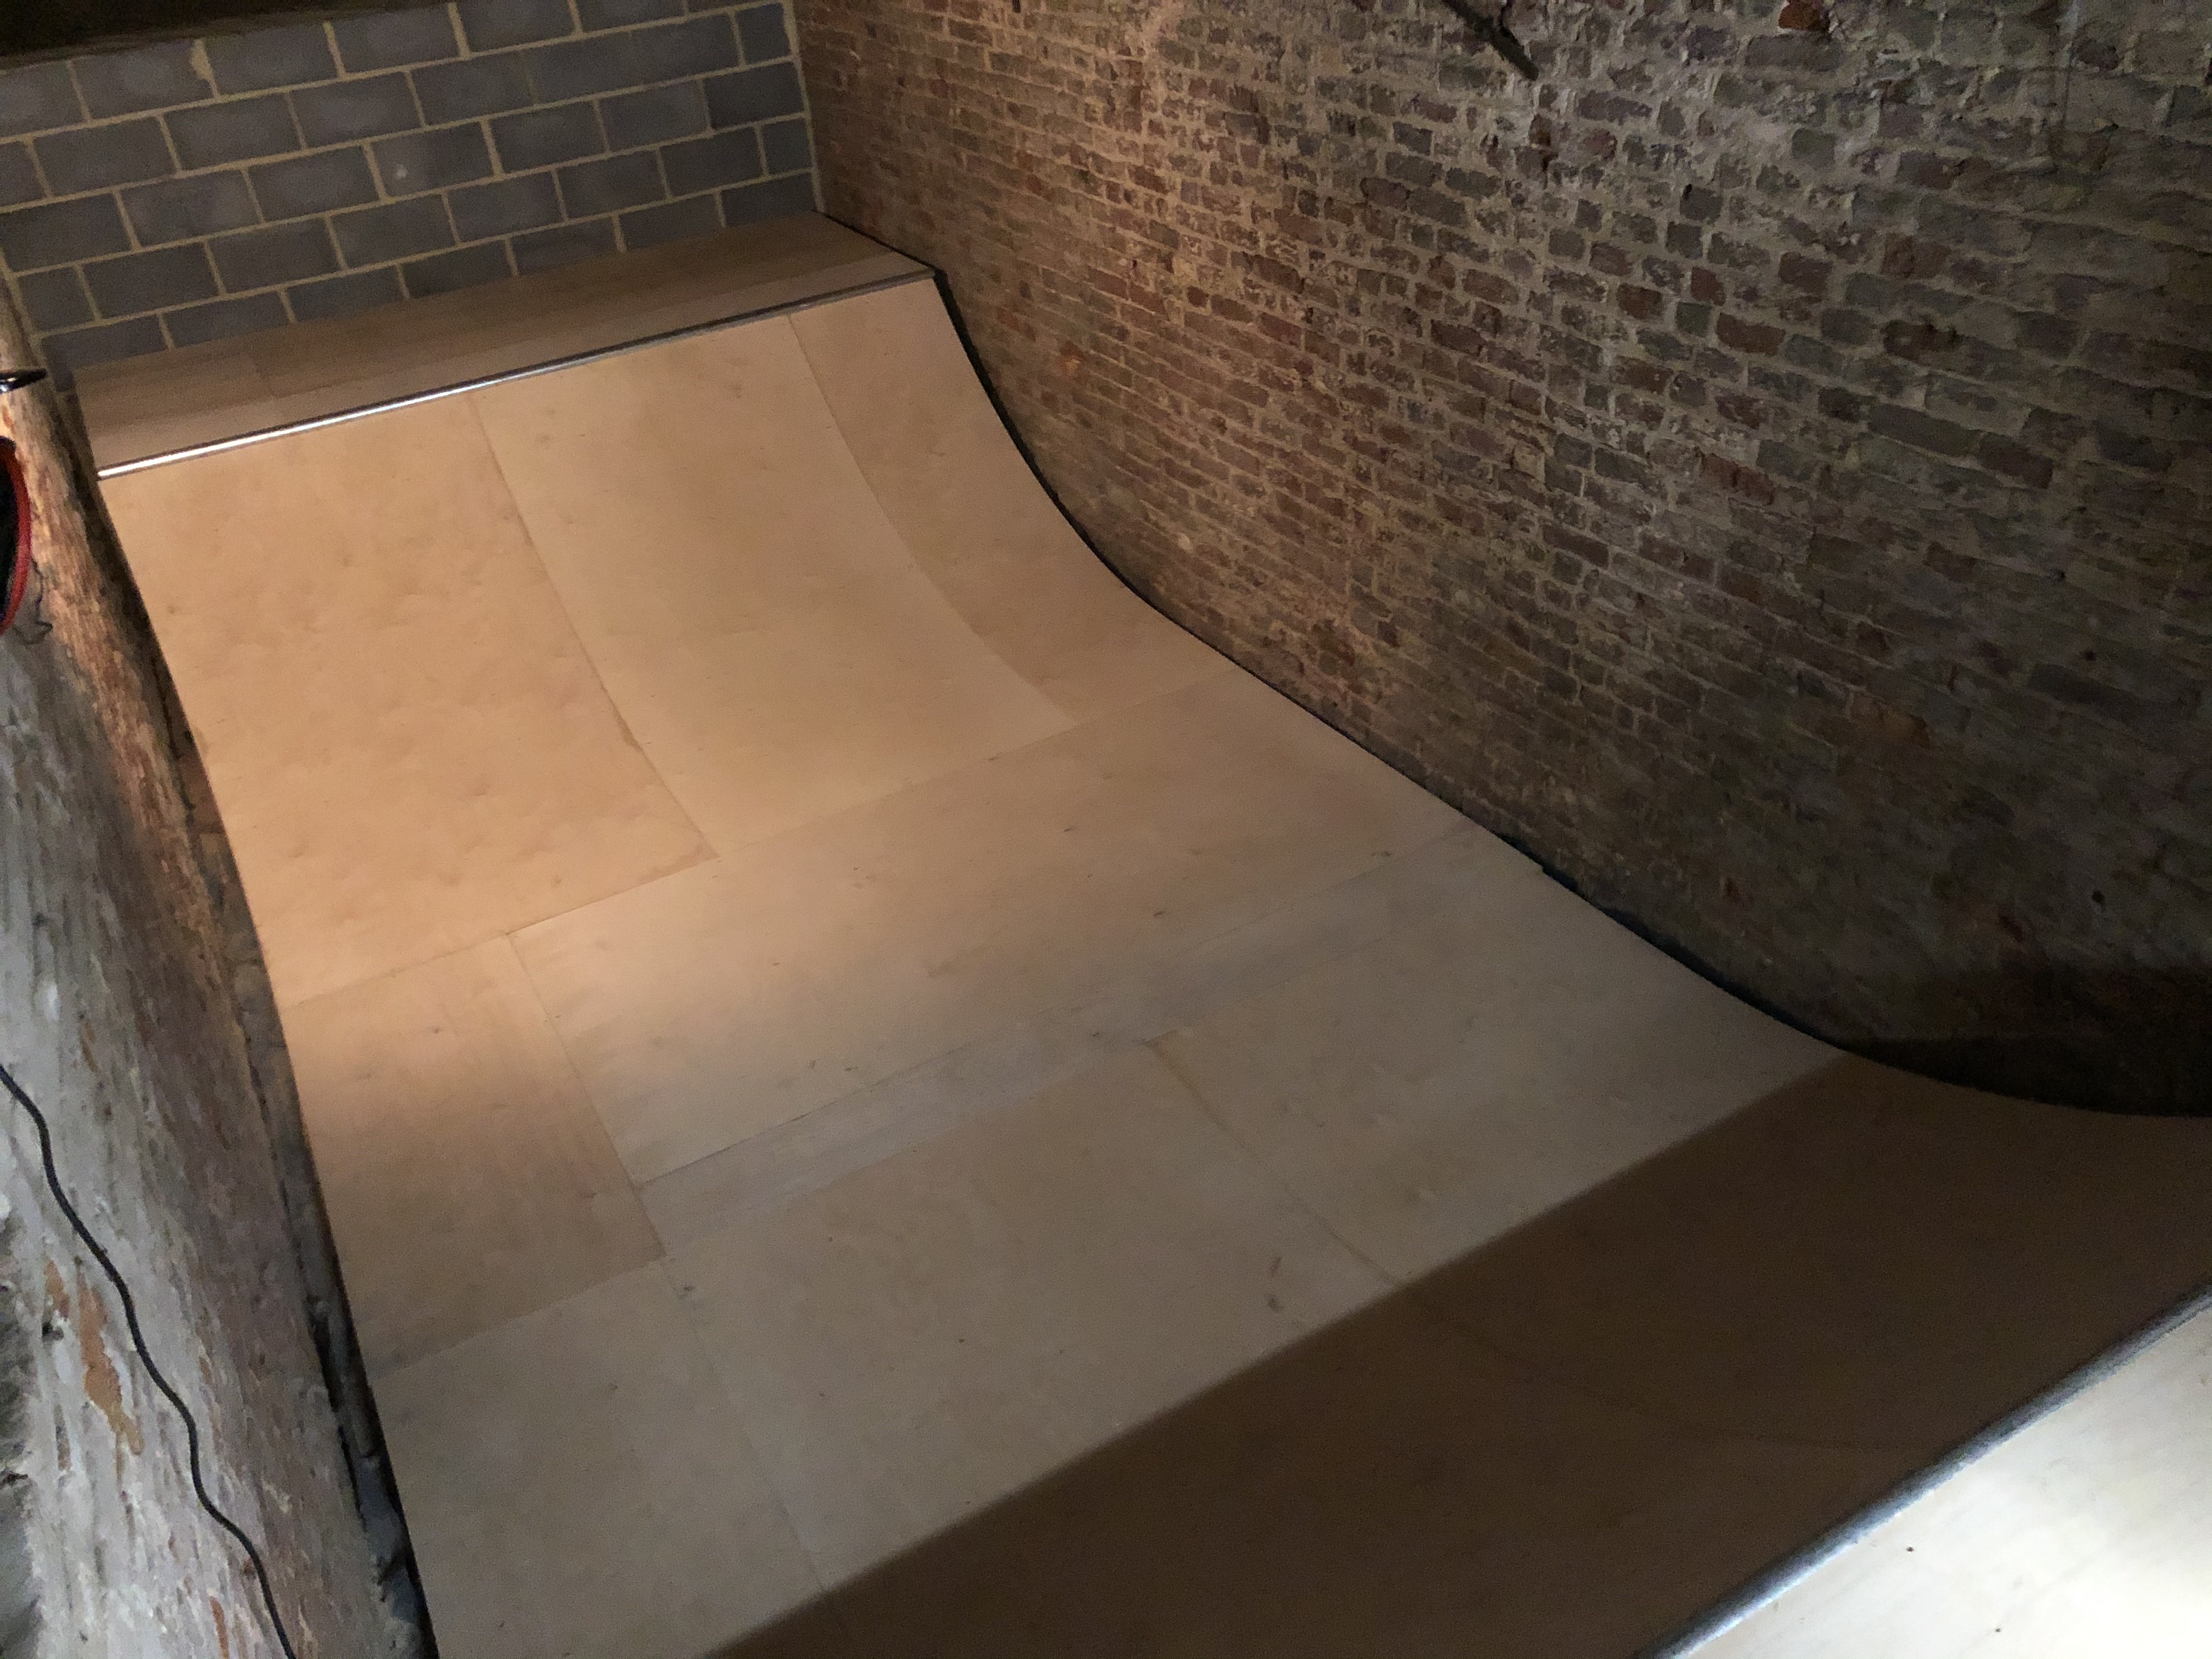
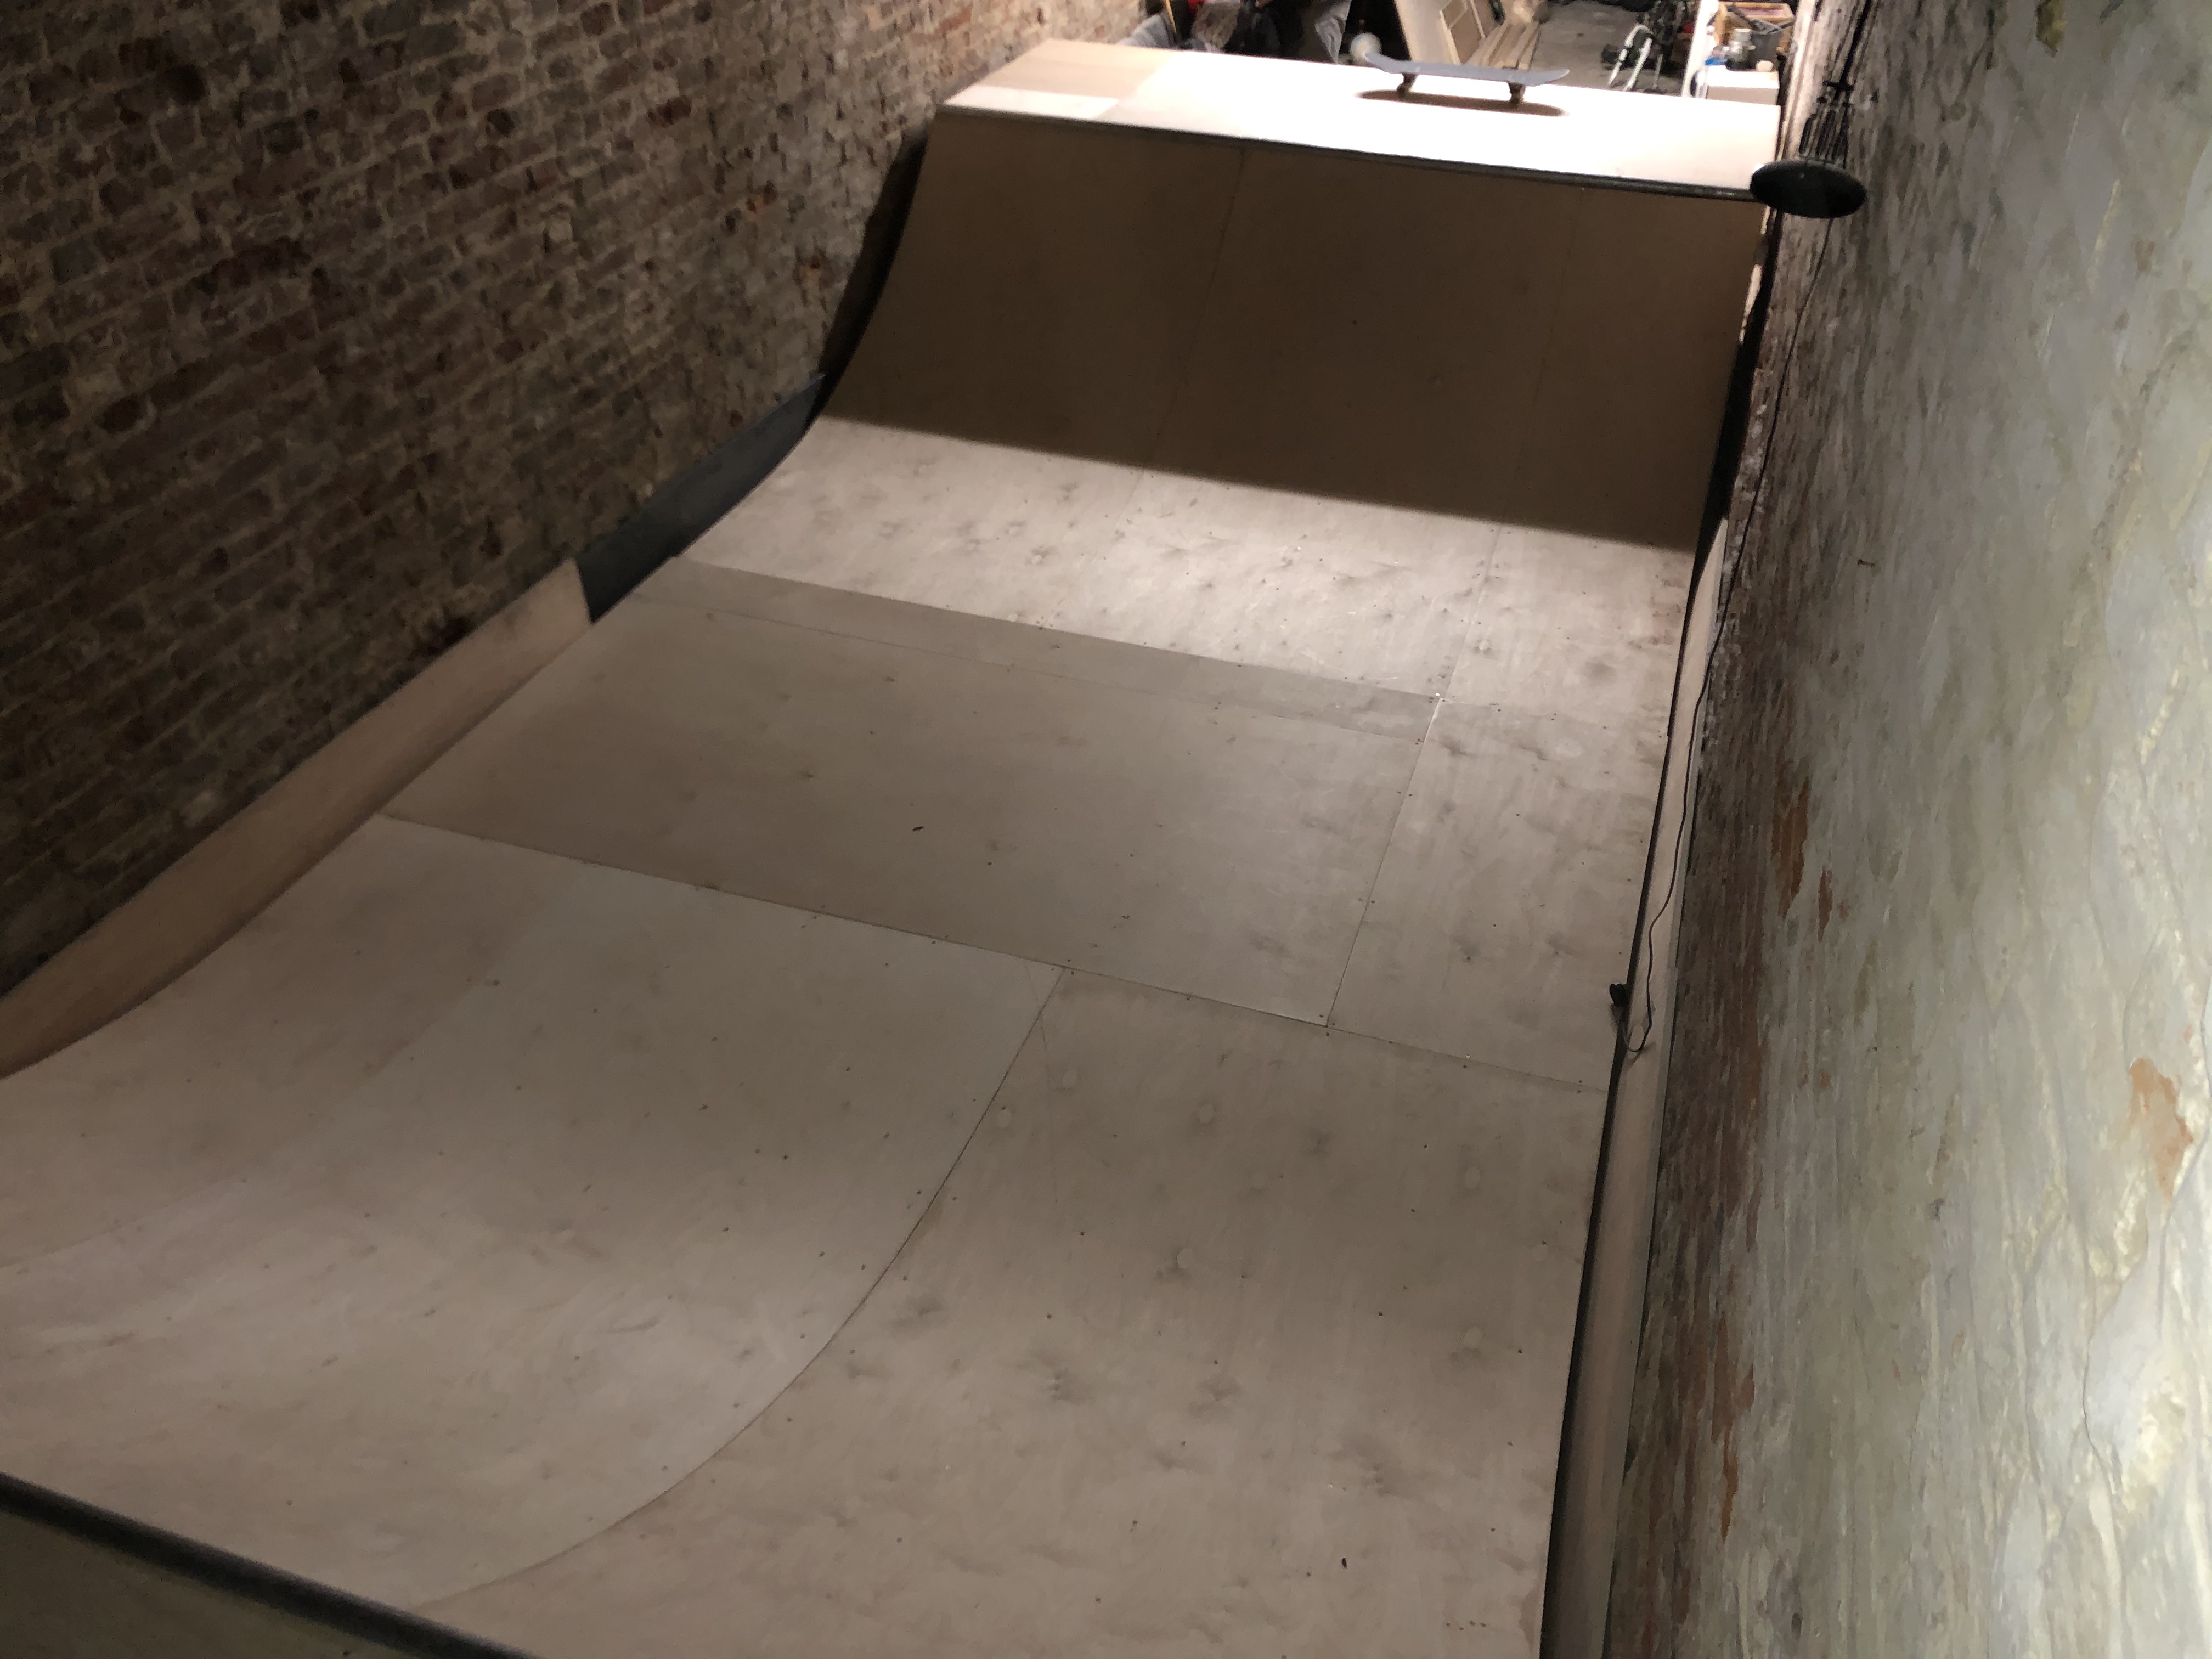
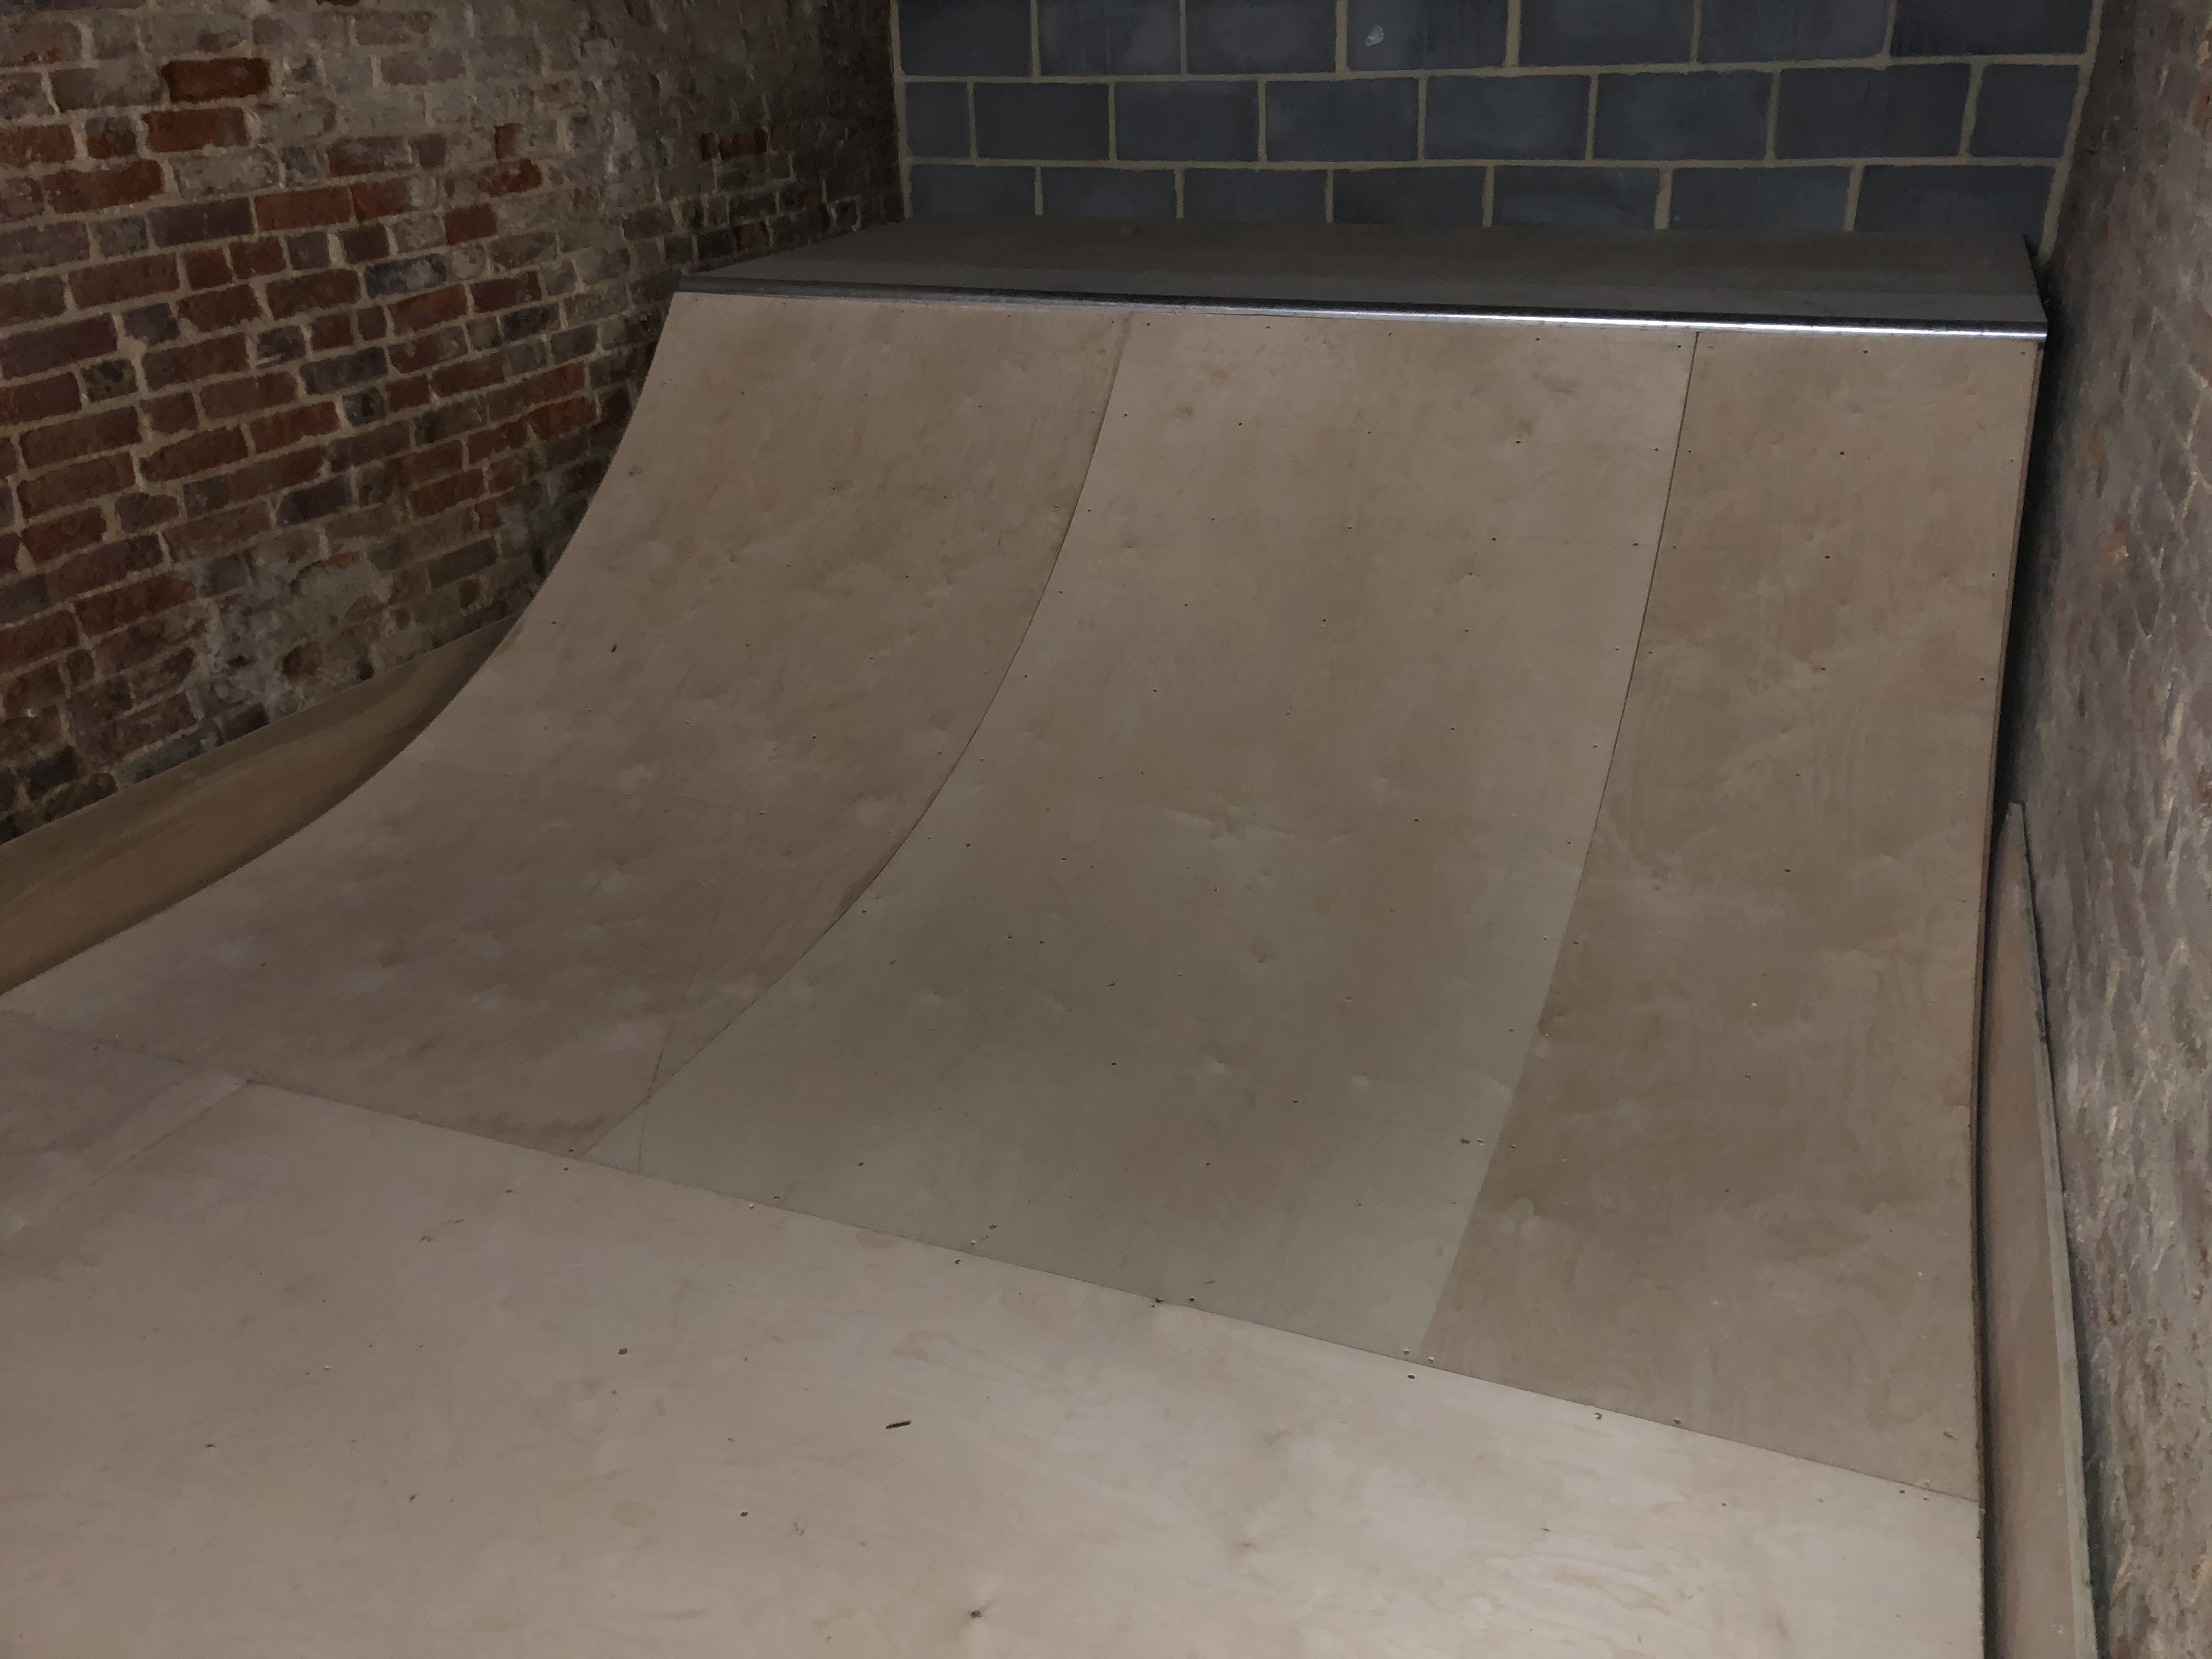
Finished building this the other day - 2’10" x 10ft. Few hiccups meant it took longer than we hoped, mainly the rail saw blowing up. Really happy with how it came out, stoked for a first attempt

Fucking rad man! Good job and great use of the space ! You must be buzzing !
Thanks! Yeah really stoked on it, bittersweet as it’s for a guy I know’s kids so won’t really get to skate it but it was great fun to make. Was a bit nervous about it as I’d only built things while under instruction from someone experienced so was happy just knowing I could pull it off. Hopefully we’ll get to do another one day
It’s actually easier than you think , the only daunting part is flexing the ply on the transition. The rest is a big jigsaw puzzle .
Stoked for you tho, great knowledge and skill to bank .
The bit we got stuck on was knowing where to pin the transition in to make it line up to the coping, since you have to start from the bottom. We just sort of guessed and it worked out somehow
Yeah that’s a fucker , I get someone to stand in the middle of the sheet to flex it in to place under the coping , see where it lines up then re adjust till its right and keep the person on it as a weight and then start screwing it down.
That looks ace!
Nice timelapse too - nice one wayout.
Hi all, been a while and I can see some pretty cool stuffs been built!! I’ve moved away from the concrete idea due mainly to the British weather and the fact it can get dark here from 4pm onwards during the winter months. I realised I only really get to ride my ramp around 4 months of the year which isn’t a lot really. I also found that there’s a full concrete skatepark, that was built at the local YMCA, that has a brilliant pool as well as vert halfpipe and a mini not 5 minutes away! I never knew!! No-one there early mornings so more or less have it to myself. I was still considering the medite wood option for my ramp but although that would reduce the need to replace the riding surface it would still only be able to use it when be dry / light. And I want to ride more - having my own ramp has been brilliant. So I’m going to be posting up the dismantling, relocating and potential alterations to make it work in my garage. It will fit ‘as is’ but I might make it slightly lower to give some more headroom and take a foot or so out the flat to maintain the speed. The garage is powered so it’ll have lighting, be warm and dry making it usable 24/7. Obviously going lower than two foot presents issues for purists of halfpipes ‘but’ my view is that as long as you can pump each side, grind or slide on the rails it’s all good. And that to me is all that matters. Point being I’d prefer a fun ‘ramp’ that has some restrictions due to the available space and that’s open all the time over a slightly taller ramp that can only be used when weather allows. Skip coming week after next (hopefully) to start clearing the space; looking to have it apart and begin the fit out January. I’ll post a CAD drawing of the side profile of what might be if I go lower. Keep y’all posted!
Hi all. So…
After a massive clear out of the garage to create the space needed and one of the best packed skips in history I took the ramp apart. Whilst the surface was not the best (expected) the osb appeared to have held up well however it was damp. And that damp didn’t dry; and later appeared to have a slime / mould beginning to form. So although it had done its job for me, and the whole point of this thread is to be honest and let others know the pros and cons of less than quality components, I wouldn’t use it on rebuilding. That said, for an indoor project or a quarter you would store inside, I’d say it was good under board if you were on a budget.
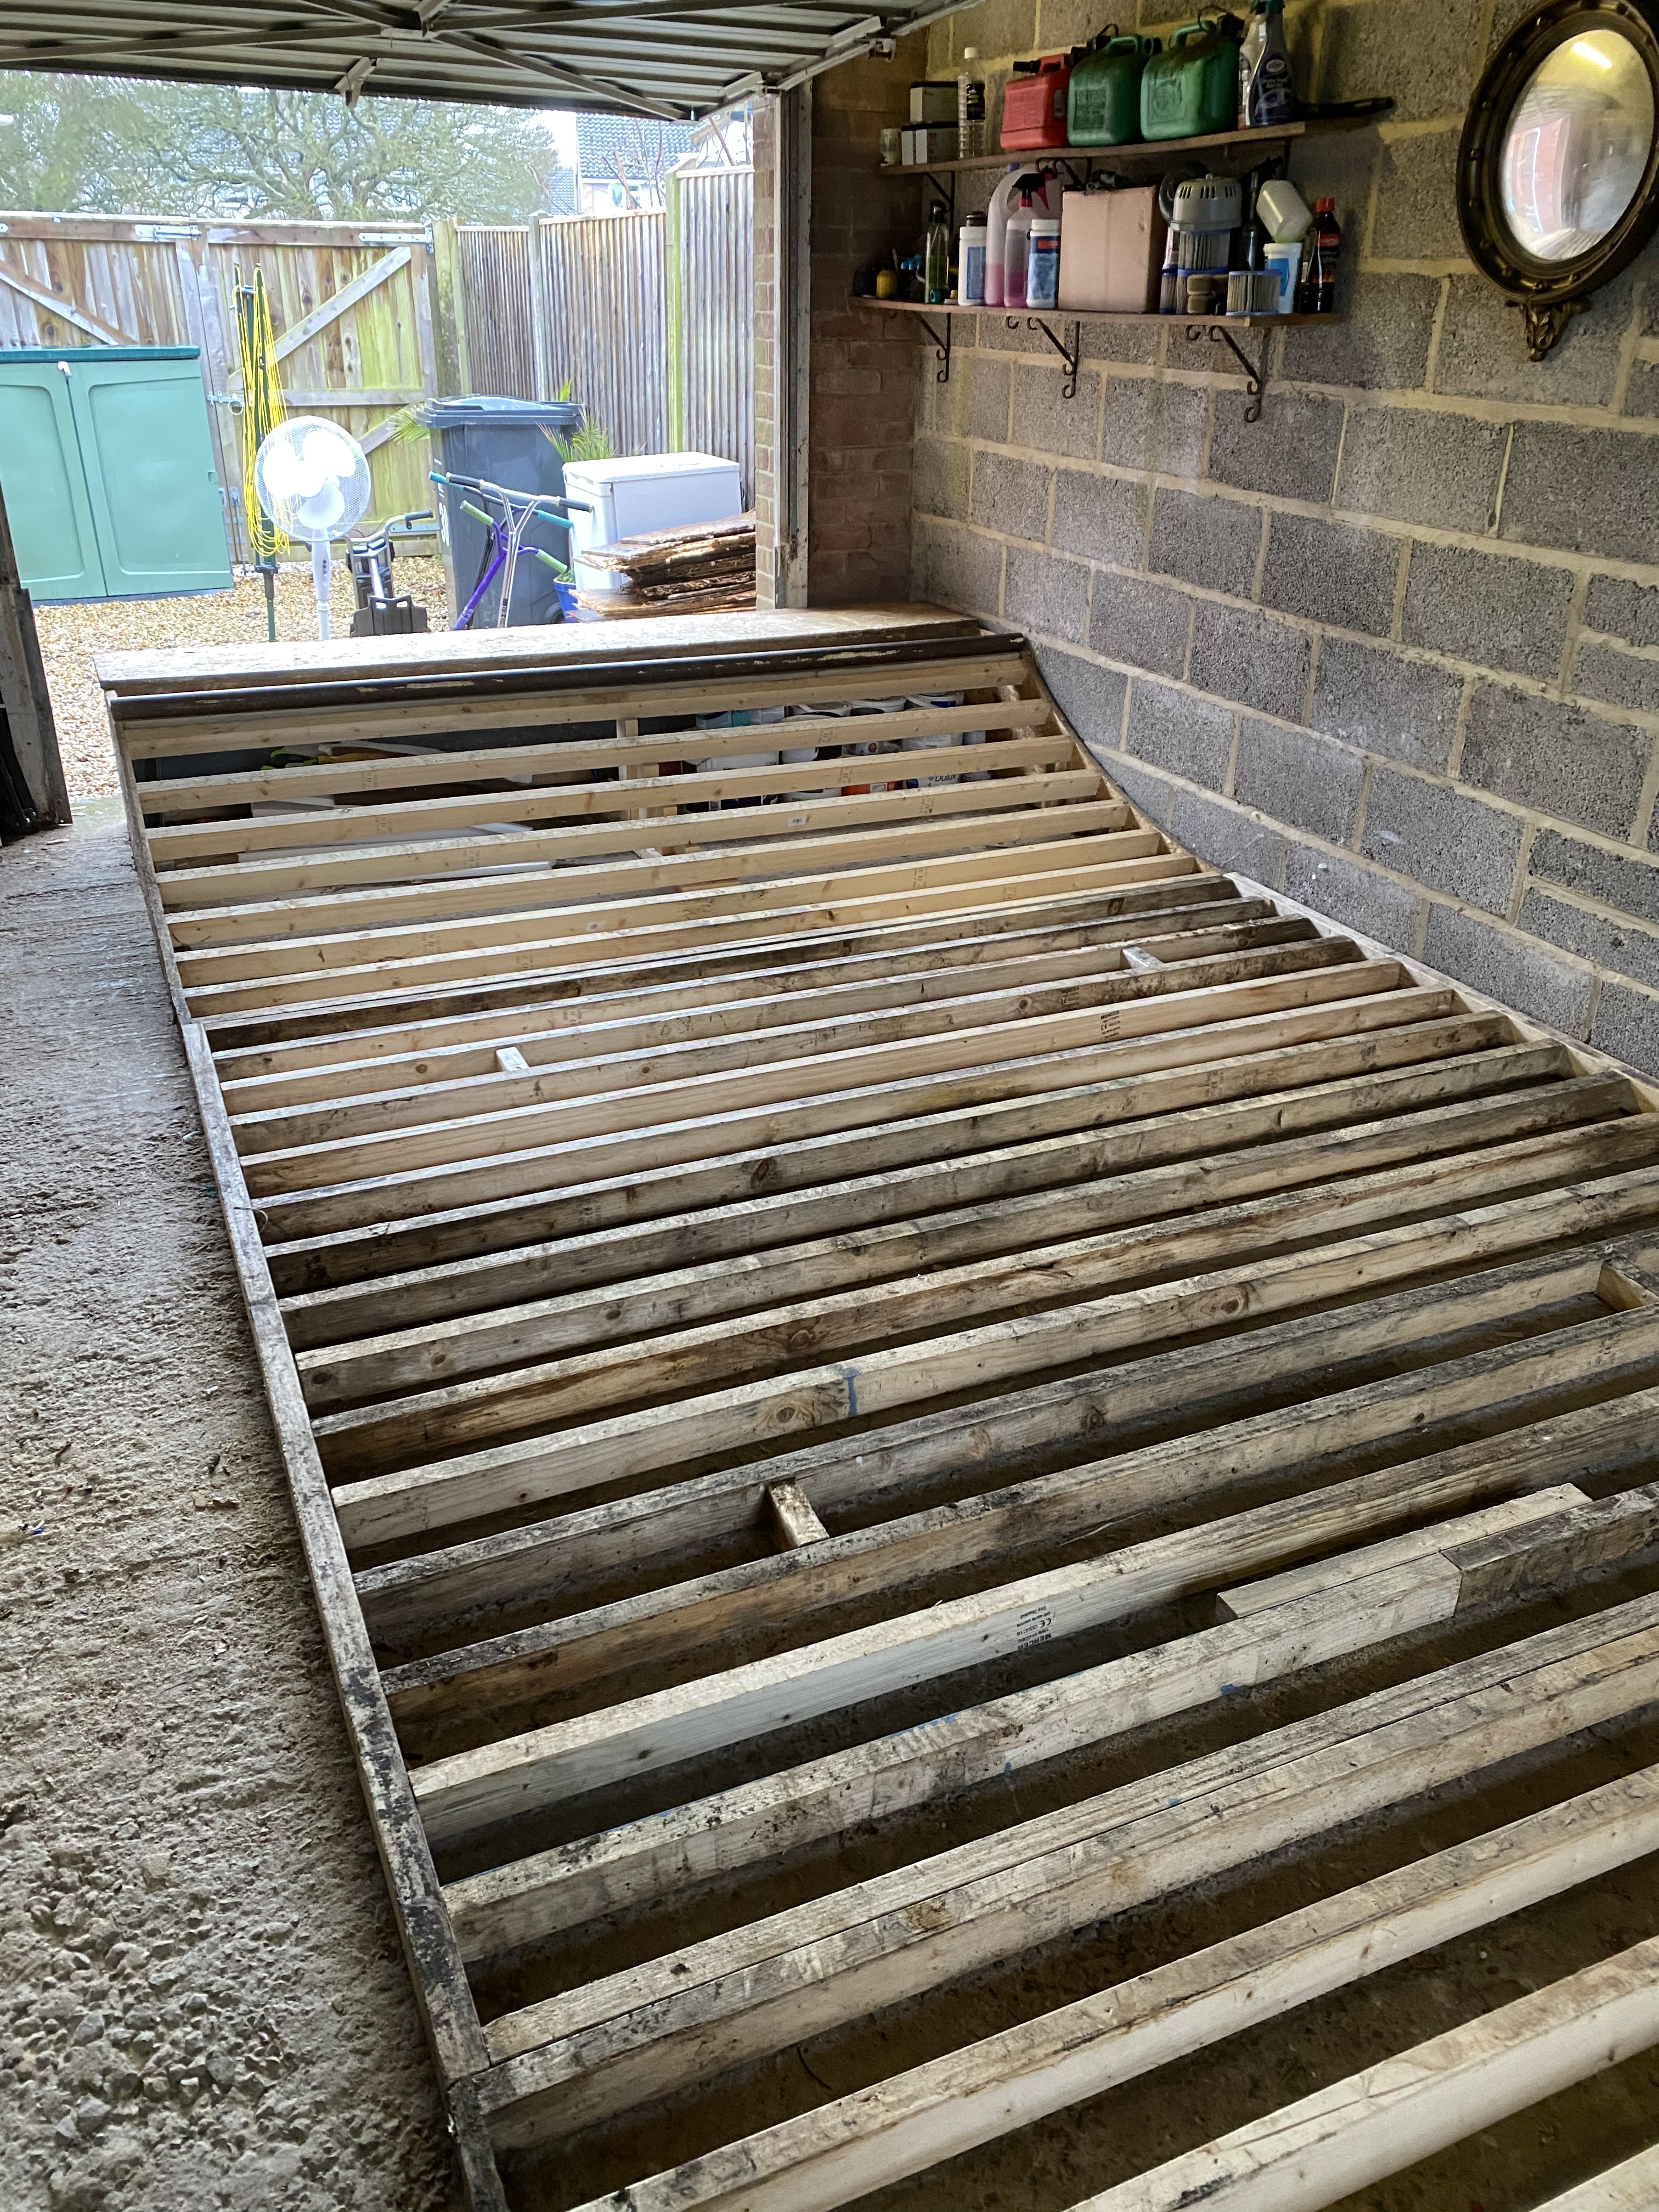
The 8ft struts were, other than a bit weathered/stained, really good as were the 18mm osb transitions. So I had the frame; took it apart in 3 (two ends and the flat) and with a bit of help got them in the garage.
Height wise I was struggling a bit as the garage slopes from from front to back so decided to lower from 2ft to 1ft 6”. This gave me head clearance (just) with a helmet on at the ‘shallow’ end. Now some would say ‘what’s the point?!’ as it’s so low but the idea was to have something fun, that’d work regardless of weather and time of day (garage has lights and is powered). It was this or only being able to use the ramp in the garden for approx 4 months per year; and spend the rest of the time attempting to keep the elements out of it. So smaller but useable anytime beats bigger but only useable for a short period in my books - for me personally an acceptable trade off.
The transitions remain 6ft however as I sliced it down in height I gained platform depth; there’s now more to stand on. I’ve attempted to set the coping to give me a good grind and board slide on the rails. When the new surface comes and I attach it I’ll find out pretty quickly - might be a need for some fettling to be done.
I could’ve gained some flat by cutting the length of the transitions but conscious I’ll be loosing a bit of speed due to the loss of height so figured I’d go with it as it was - I think I prefer a deeper platform, the original 18” ones were ok but not great. Especially for my lad and his scooter. The platforms on this are 2ft.
The flat section has been slightly reduced - it now stands at a little over 7ft. Originally it was 8ft. This will allow me an area to still practice my ollie’s and hopefully begin landing kickflips regularly (as is my goal before I turn 47 in March). Again an area not affected by weather or time of day.
As of 2pm today I finished screwing it all together and making it level. The concrete floor was surprisingly chonky in some places. It’s now firm and doesn’t flex. With a bit of luck the new sheet material will arrive tomorrow or Tuesday. Once I have this it’ll be fitted and I have included new wood for the platforms. 9mm birch riding surface over a slightly lower grade 9mm hardwood ply. I intend to add a glue mix to all cut edges before fitting to keep any damp out. But the garage is super dry so don’t expect any issues here.
One challenge I know I’m already going to have is attaching the coping against the wall. I can’t get in the end of the tube to screw it in so need to be a bit creative here. But if that’s the only issue I think I’ll be doing ok!! There’s a couple of shelves to come down as I can see me hitting those and no doubt some other bits to remove but in all its looking pretty good.
The platforms will be hinged in some way to allow access to the space underneath for storage.
So once the surface is on further pictures will follow and some footage.
Hope you’re all keeping safe and well!!
Man you’ve been busy! Fair play to you!
That really has been a project and half .
When you say about attaching the coping to the wall? What do you need to do that for?
I’m assuming you got the 2 different sized holes drilled on the tube for fixing to the frame? . front facing hole bigger than a screw head and the back hole smaller ?
Brilliant. You can have a skate and load the washing machine.