Very jealous btw
Cheers Spanky! I’ll keep posting as it progresses - bit slow at the minute but hopefully it gives some ideas to others who might be thinking of the same type of thing.

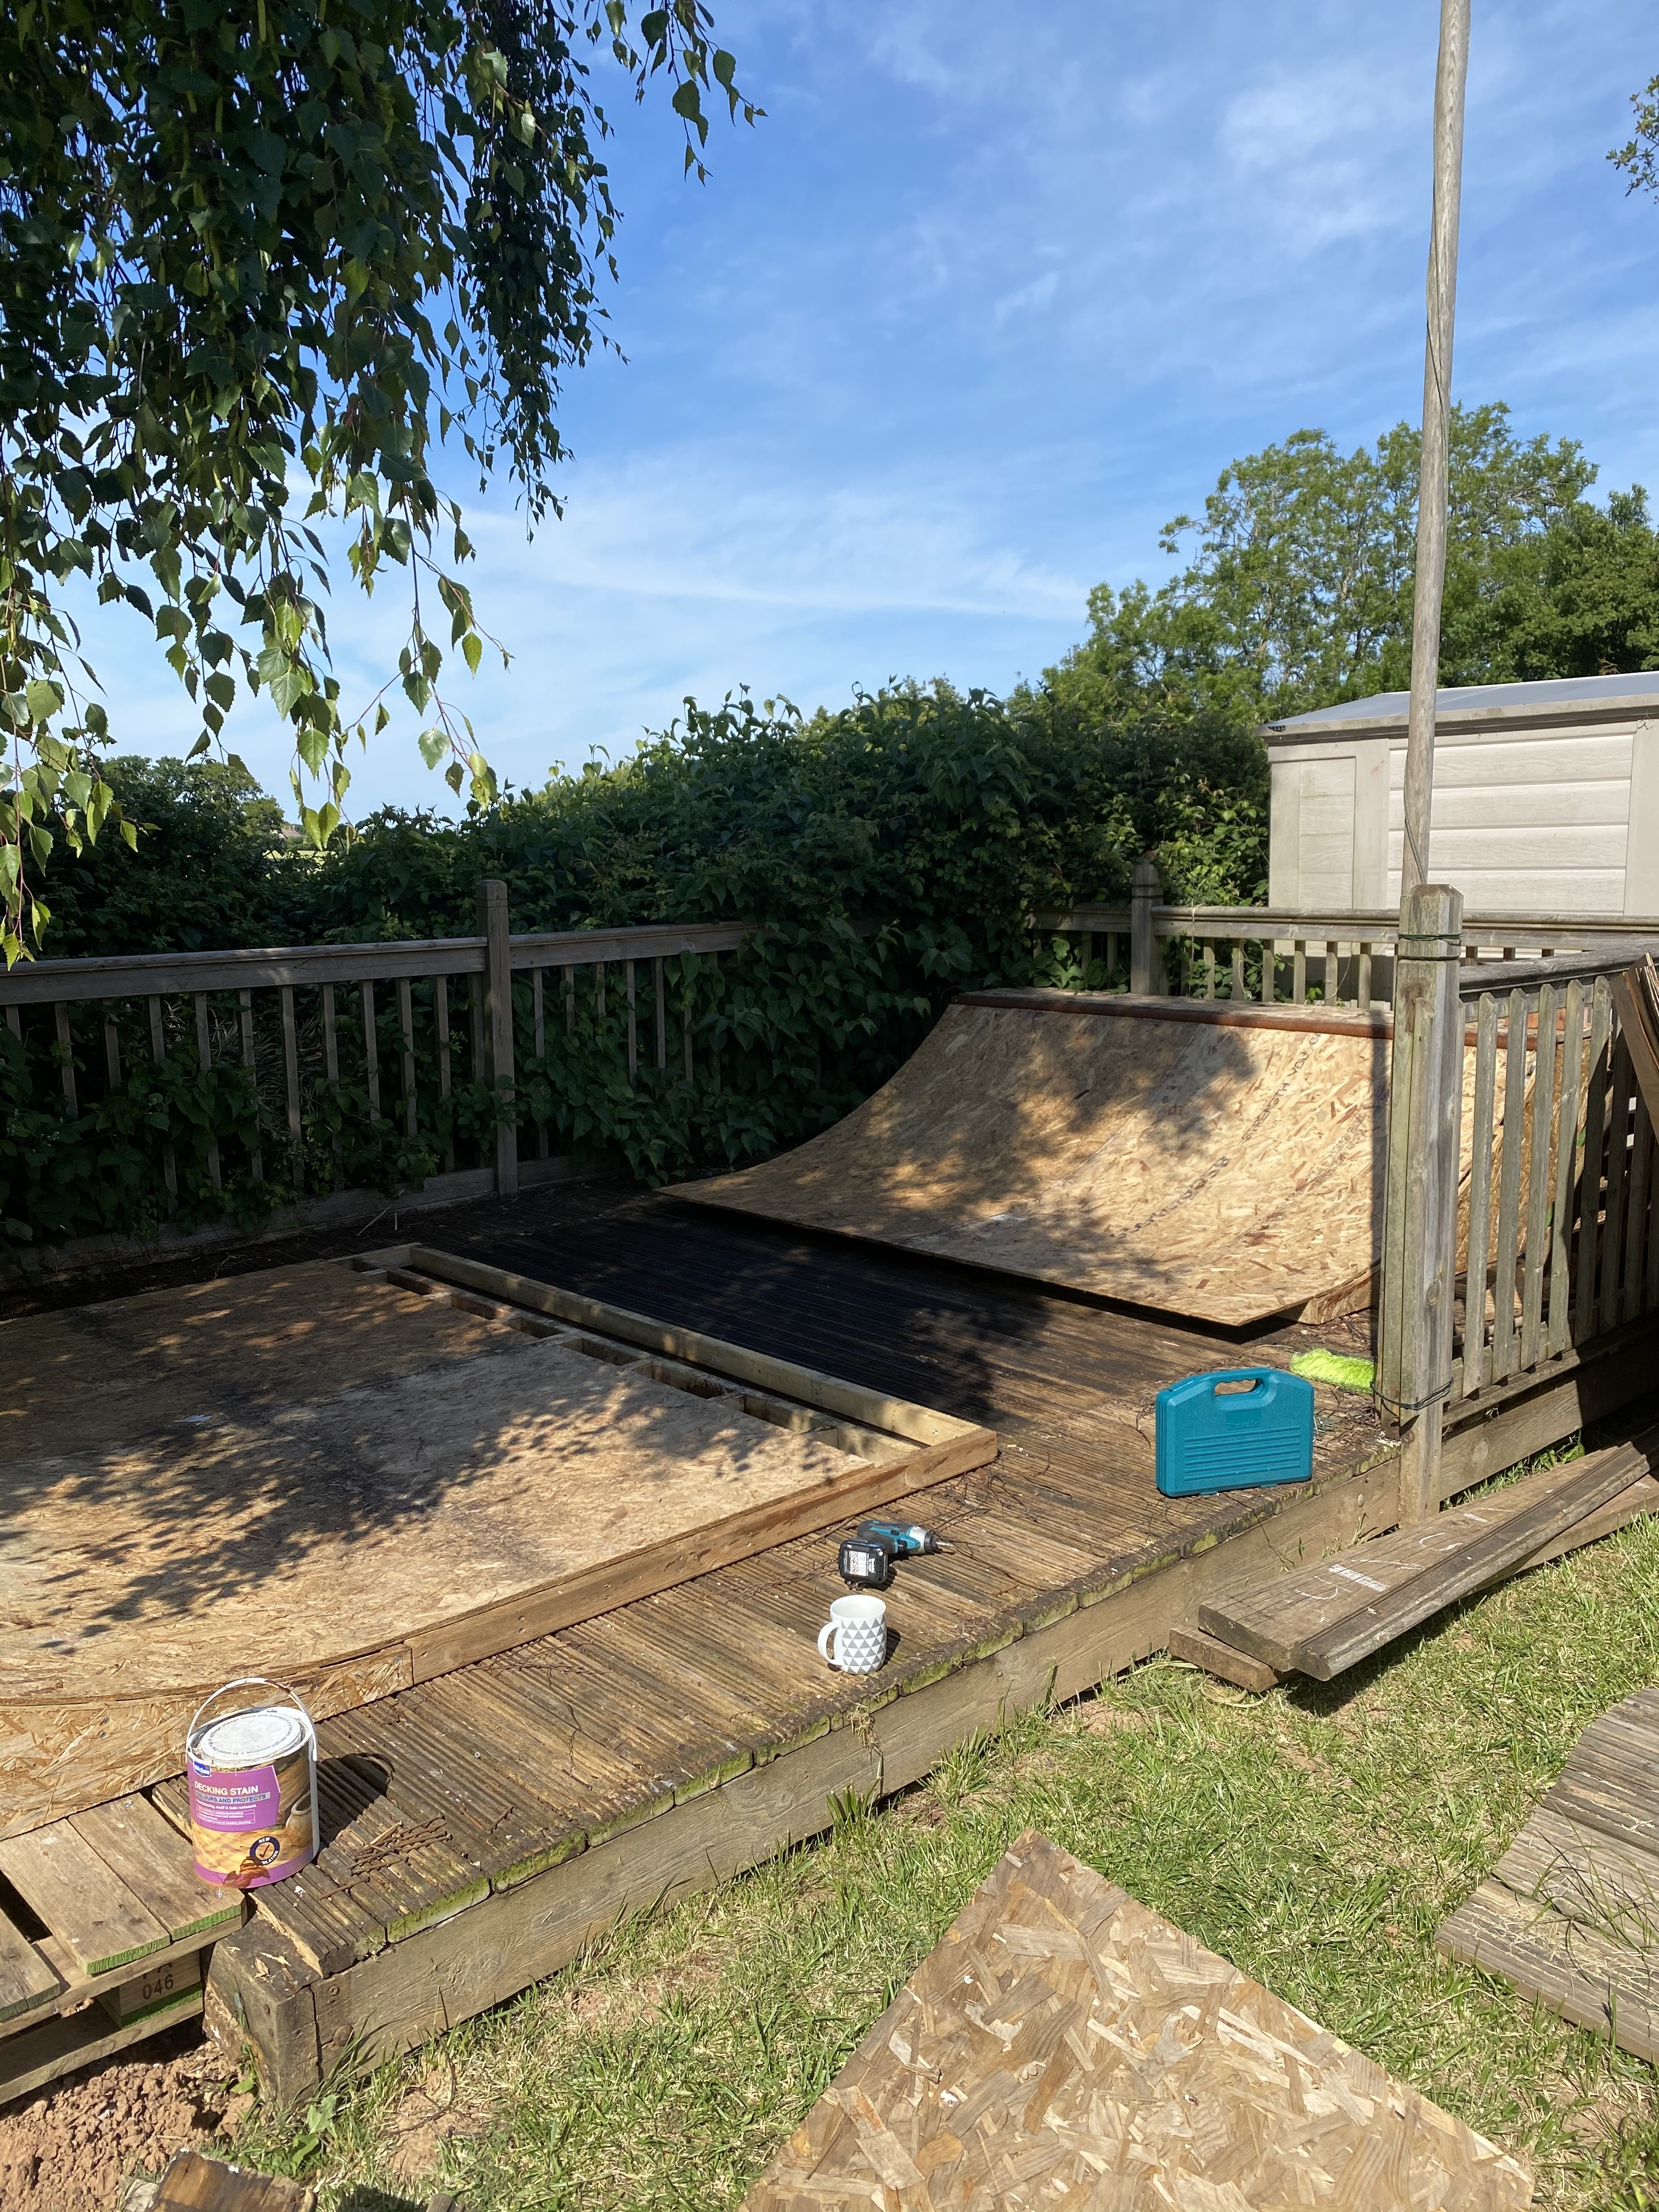
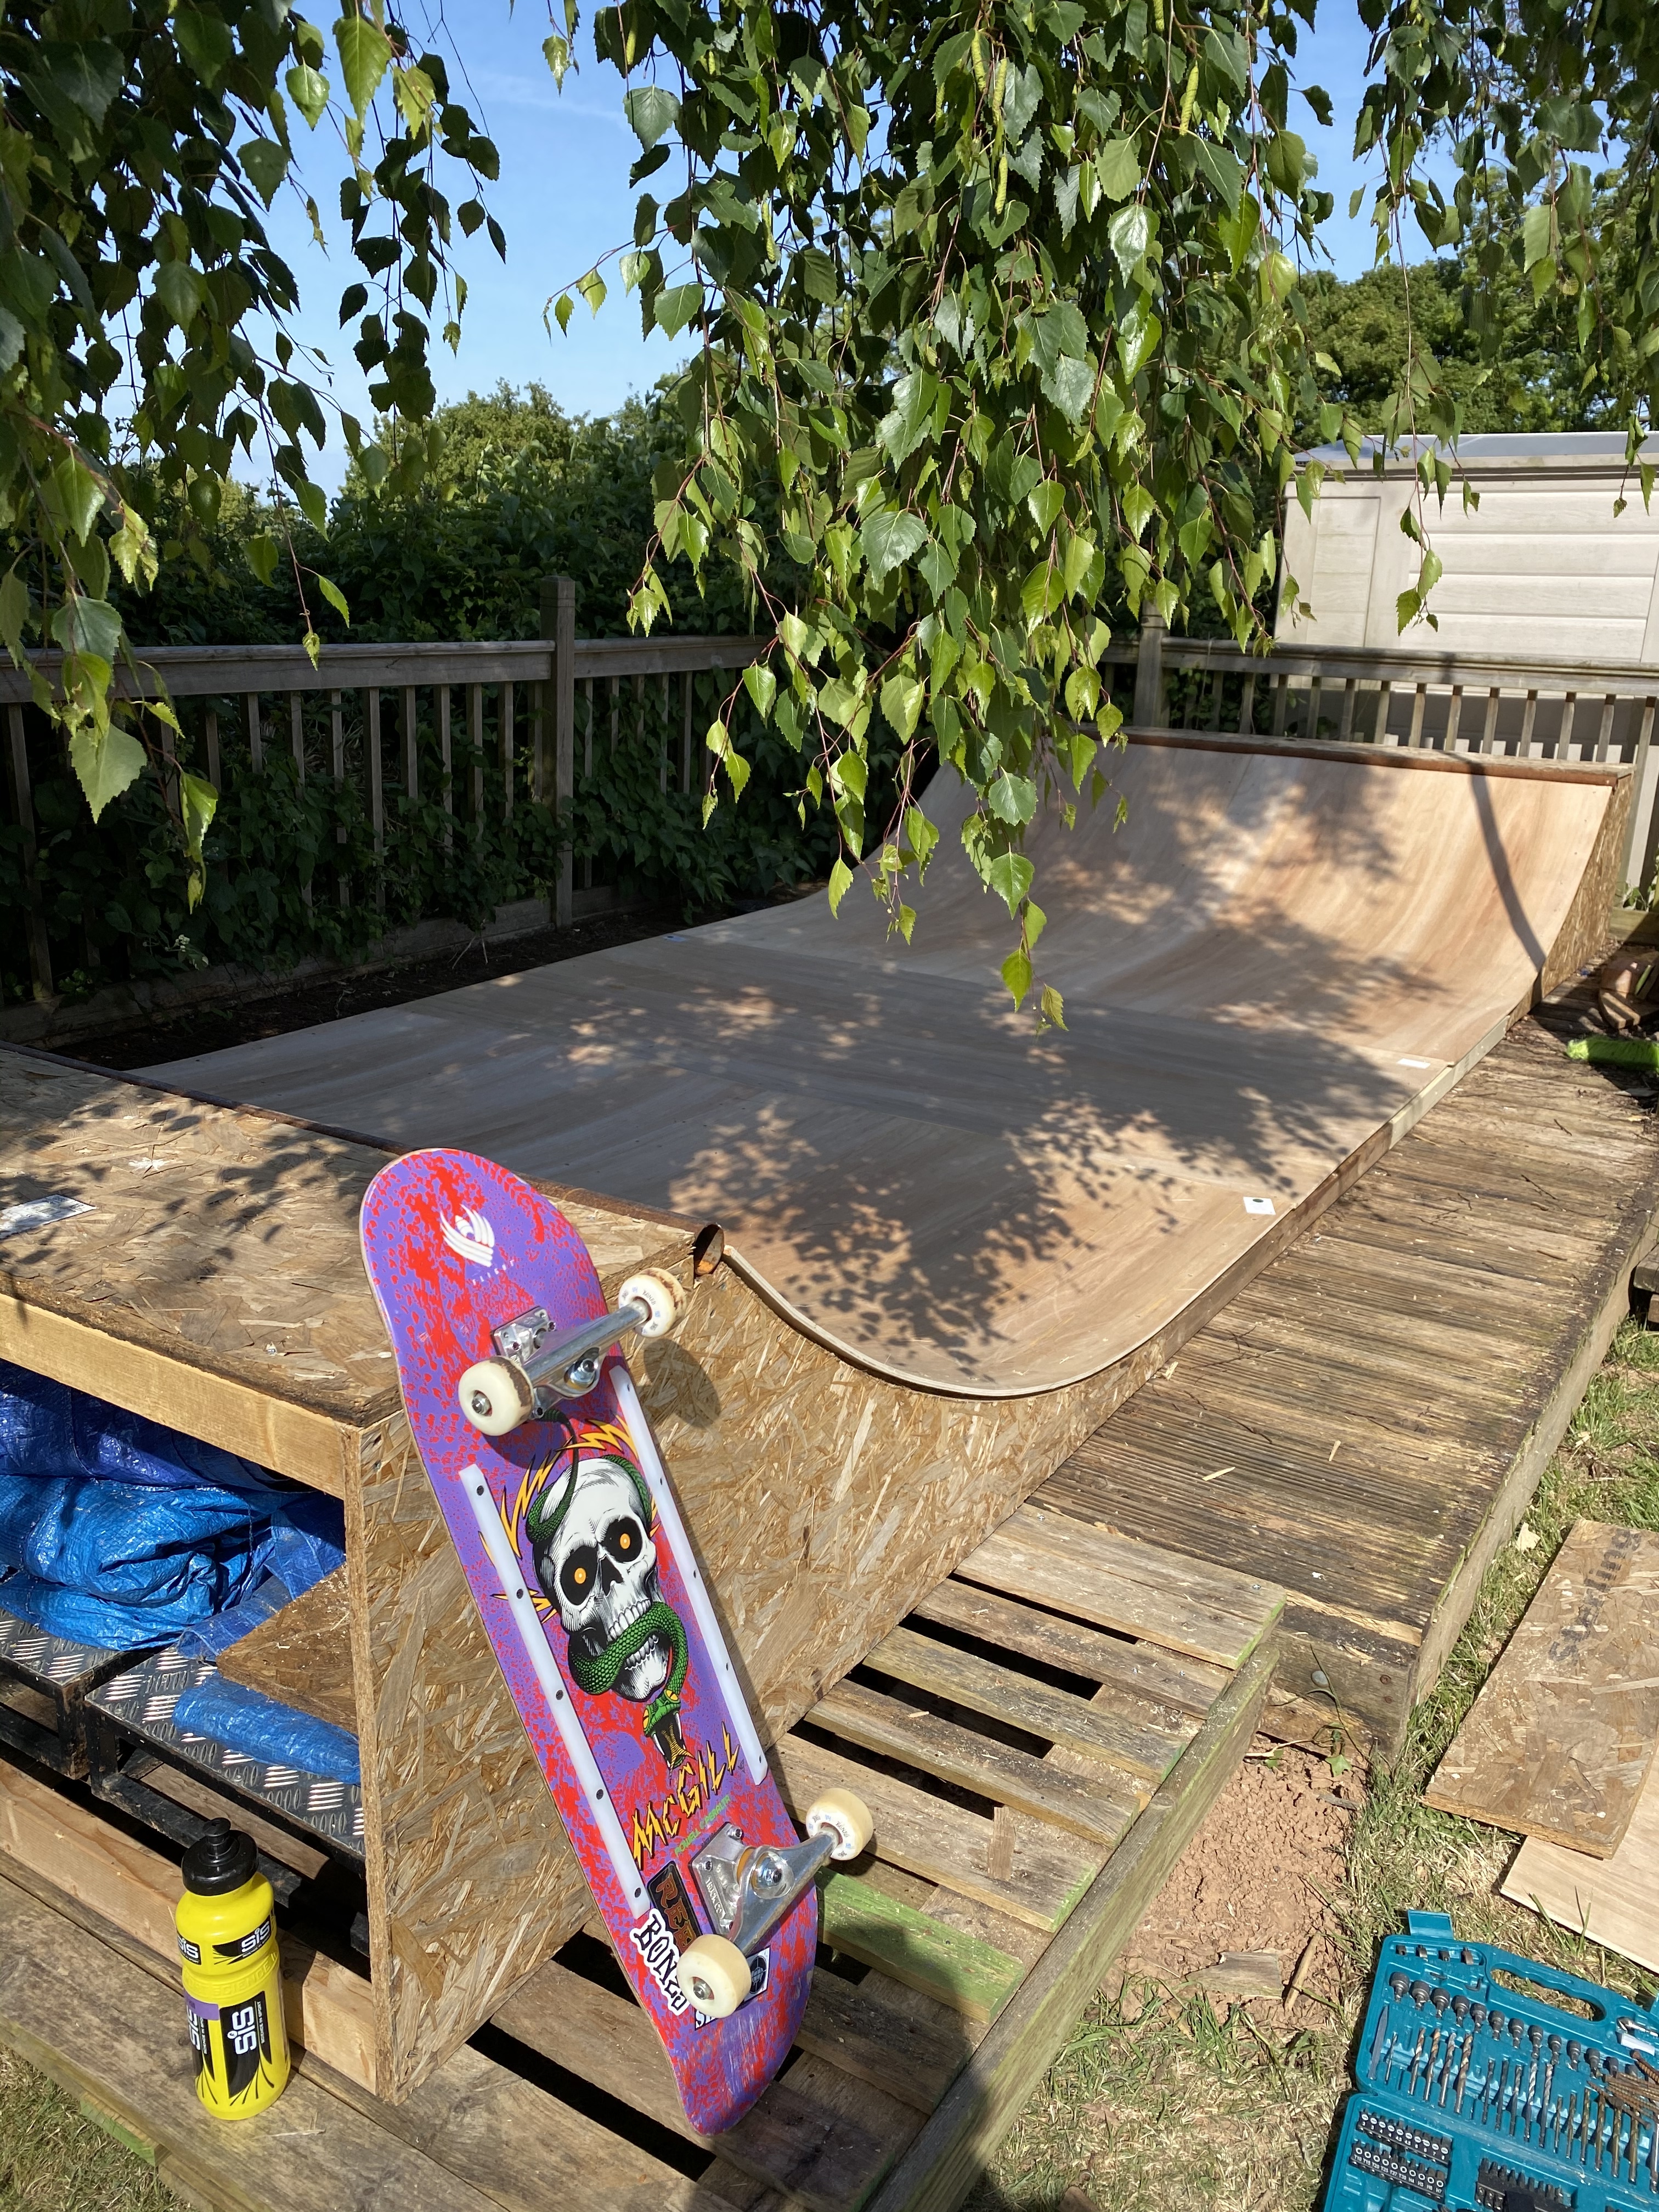
Was going to skin over what was in place but it was pretty shot so took it off. Very impressed with the osb board underneath.

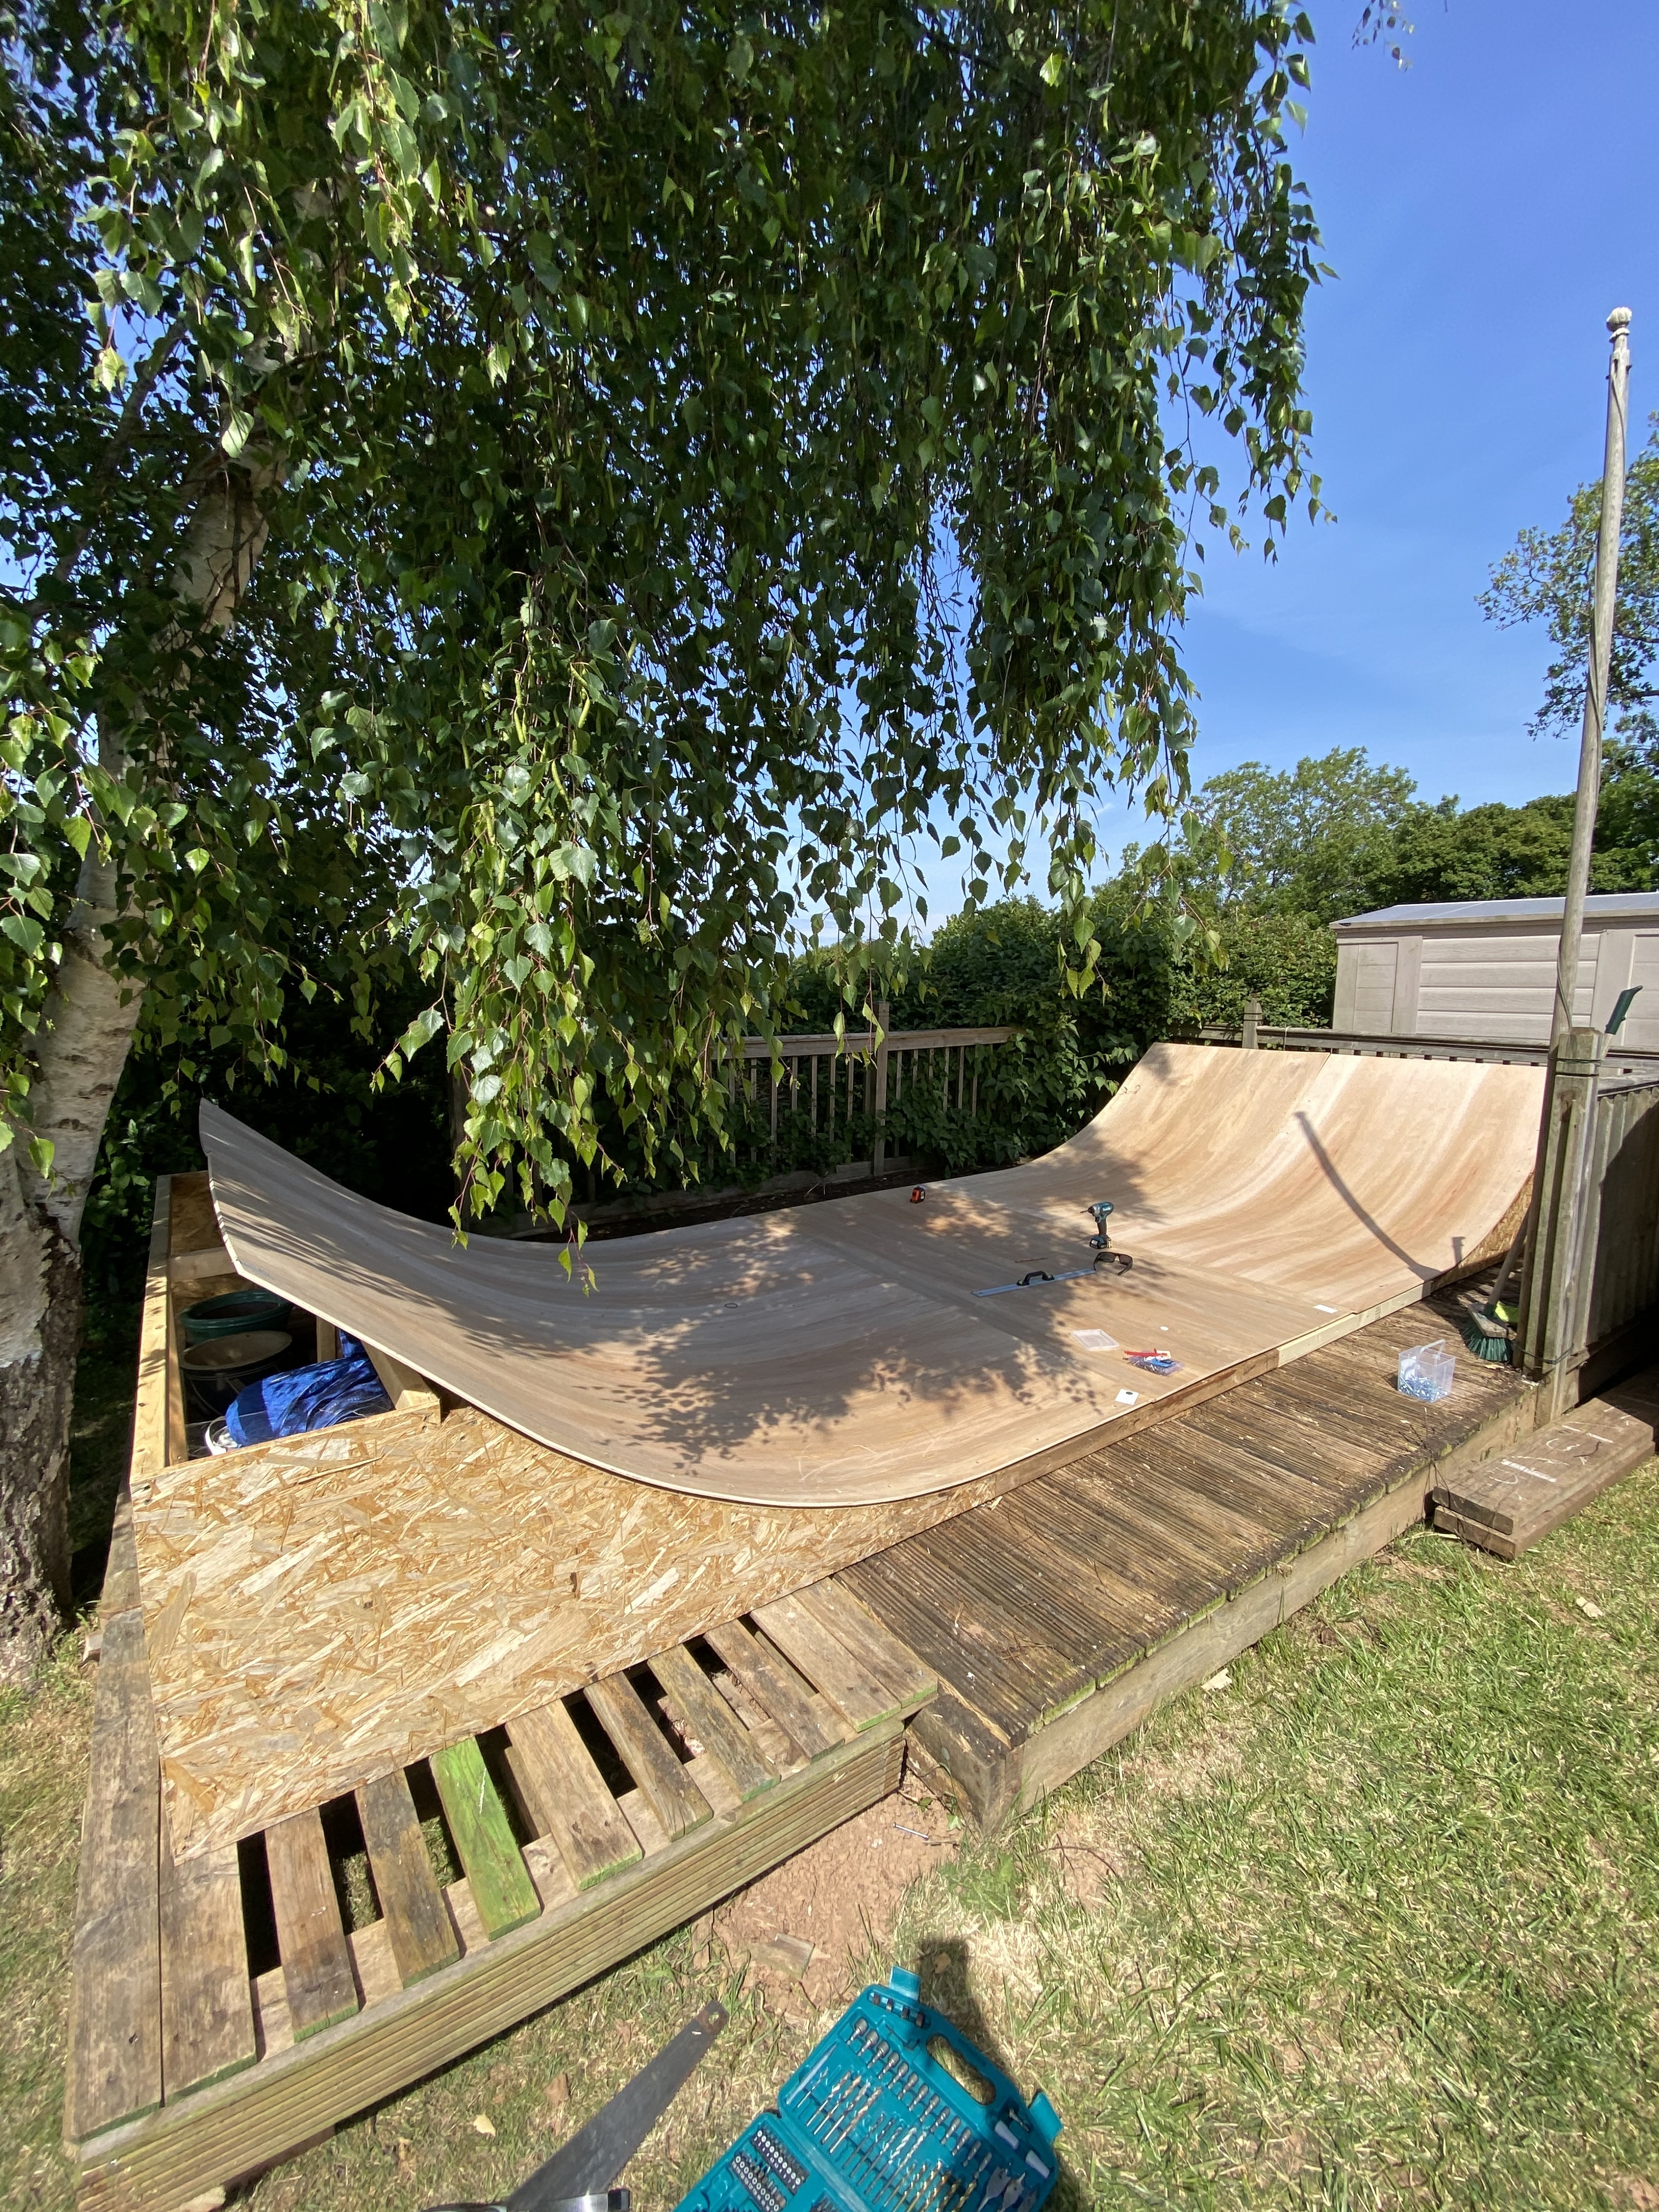
Then whacked on the new skin. Was a bit tricky but I got there…

That’s a thing of beauty! Proper lockdown sanity protection kit
Looks nice. Would love a mini. Any reason you ply’d it inline rather than horizontally? (Not that it will make that much of a difference)
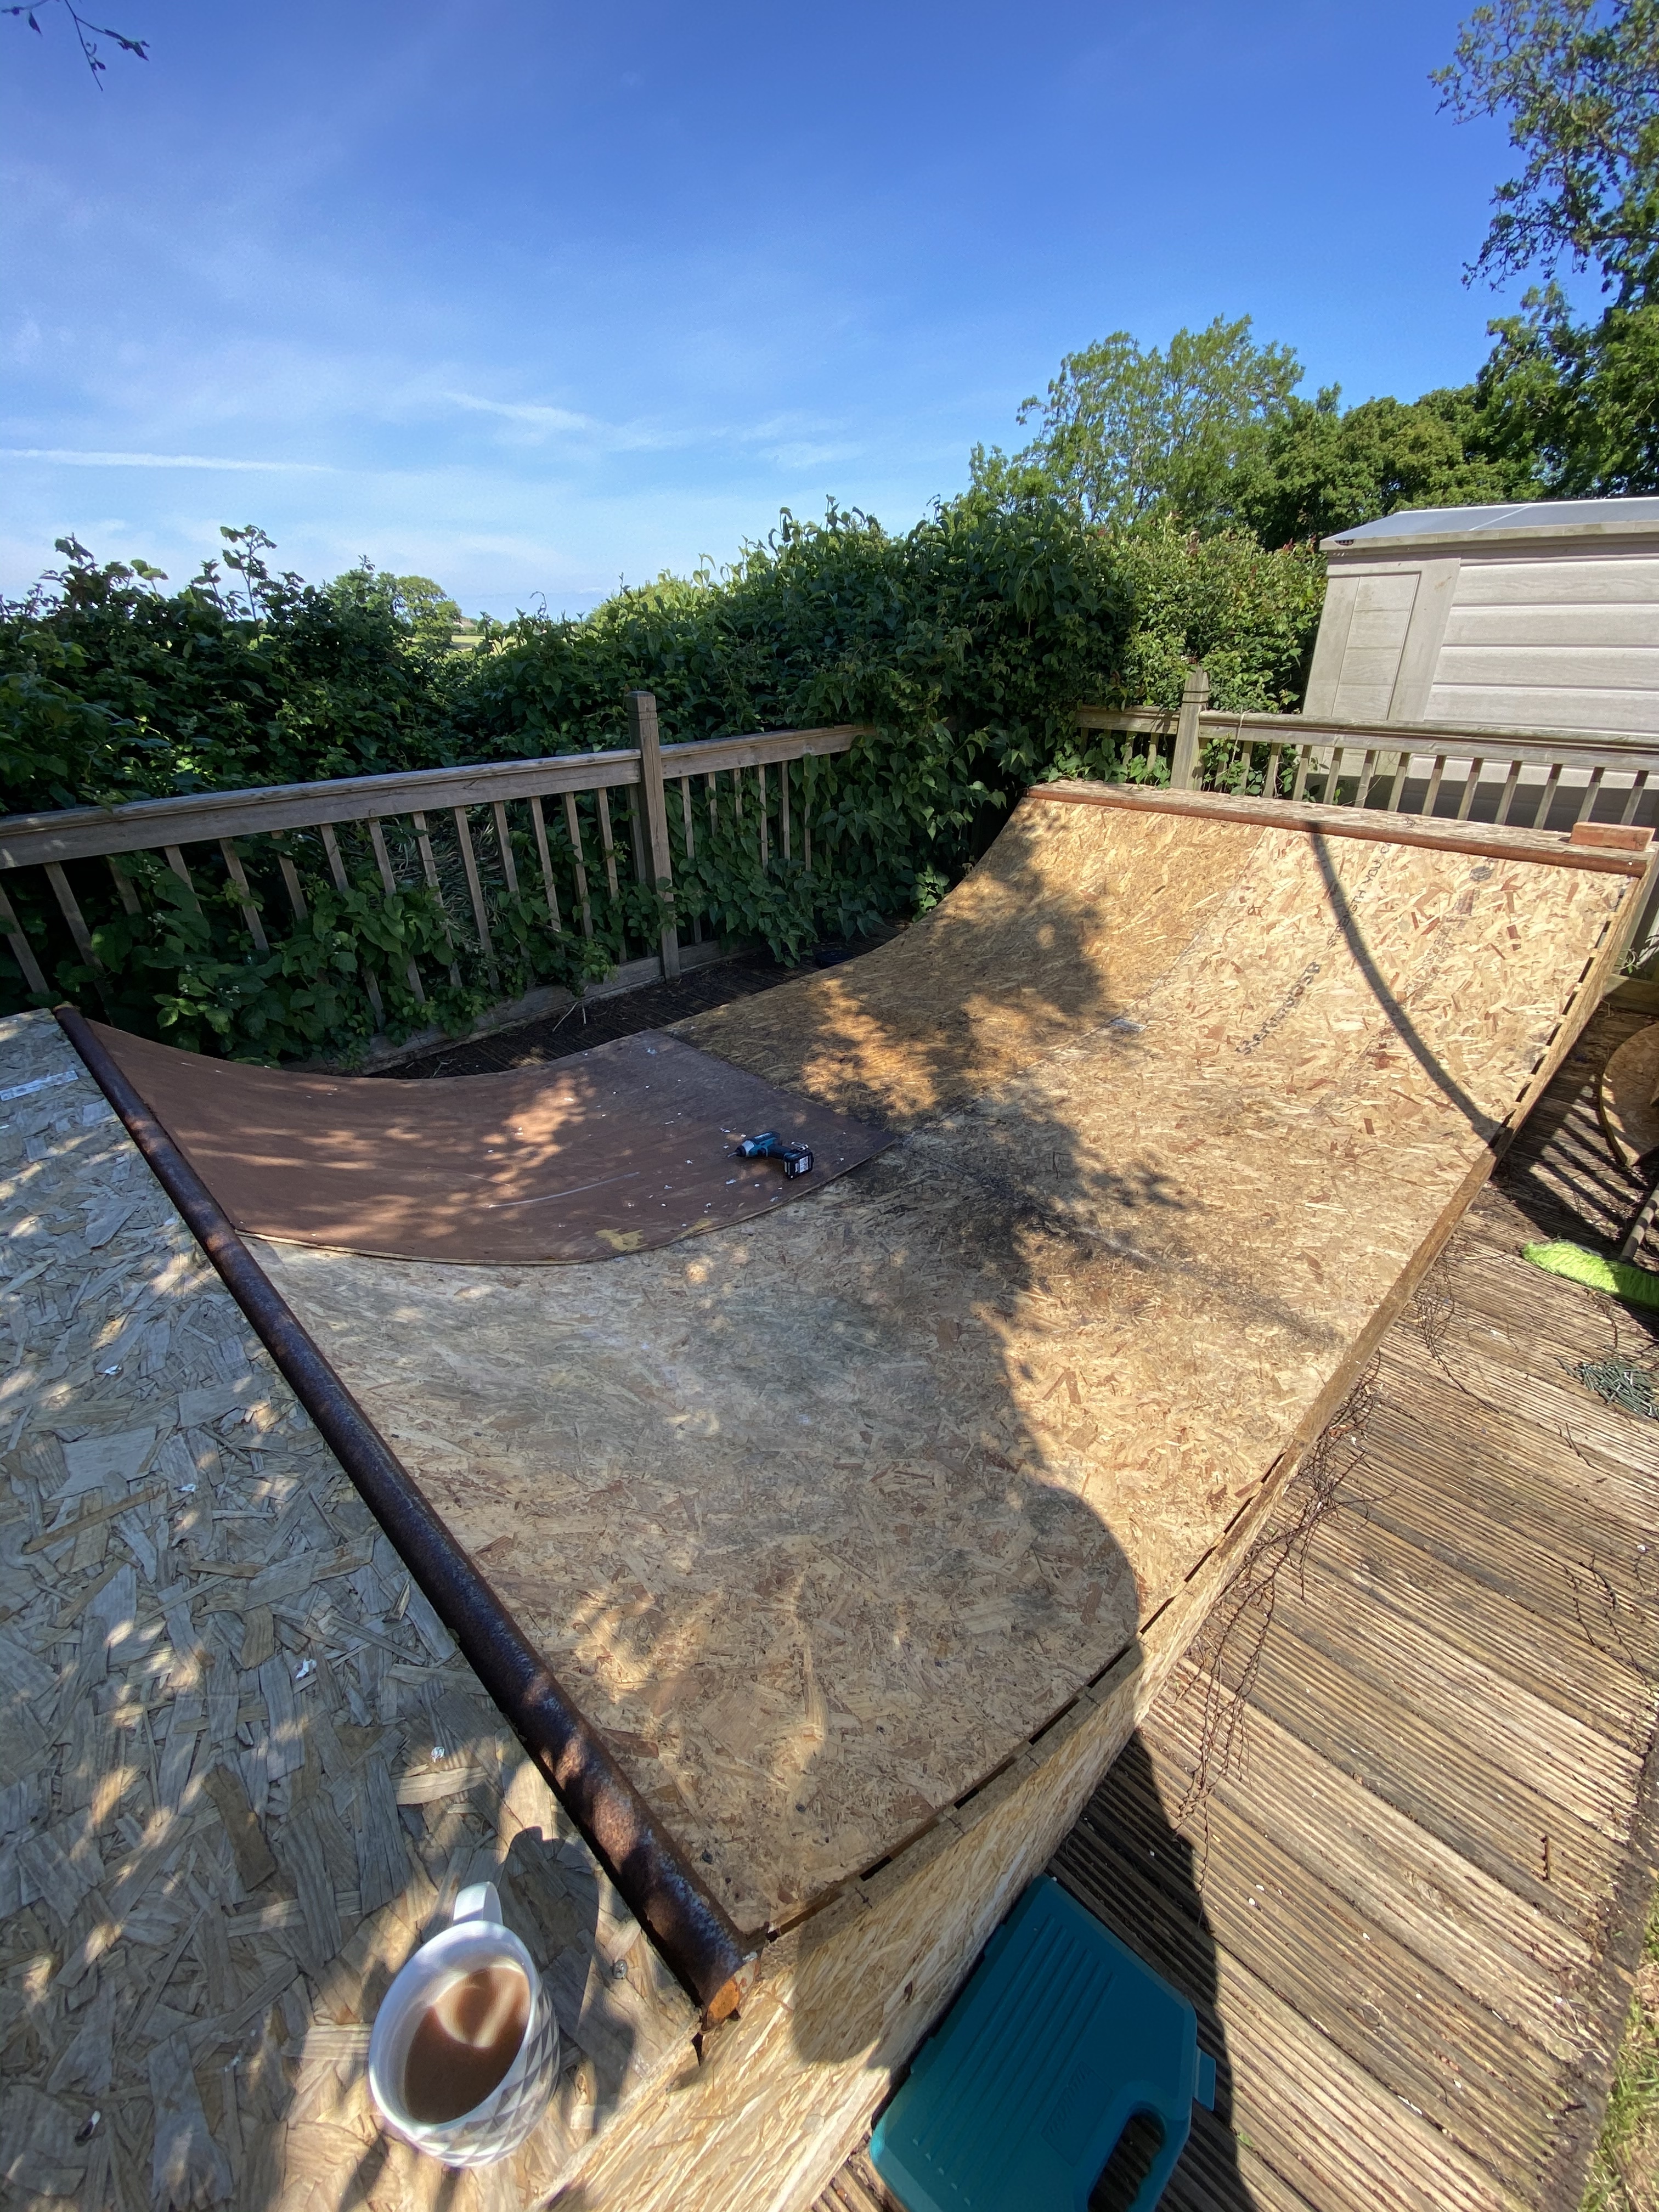
I ply’d it vertical as I figured it’d be easier to bend that way. I think the internal veneers are long as well? Travelling the length not width of the boards. Might be wrong on that but figured if I laid it with the other way the veneers might be short in width and split?? As it’s now got more flat I started with that piece. Made sure it was as straight and right angled to the edge as I could get it and then could use it to butt the vertical pieces against. I then started screwing down the transition boards from the flat and worked my way up to the coping. As long as that flat section board was straight I could get a nice seam between the boards. I was thinking about skinning it on a 45degree angle but I think something like that’d be outside my skill set. Be covering the whole thing in wood stain next but figured, as the weather is good, going to enjoy the fresh wood smell and ride it with my lad for a day (or two) first.
For those interested I bought 6 sheets of wbp board and 10 8ft long 2 1/2” x 1 1/5” struts (to make the extra flat section frame). I used 5 of the sheets and 8 of the struts. Paid £150 for all of it but used just over £100. I can get the wpb board for £20 a go with delivery cost of £15. So, now it’s lengthened re-skinning costs going forward should be £100 a time. And I have a spare sheet in case of some issue. Not bad - re-skinning definitely a do’able yearly cost if it requires it considering the fun we have. I’ll keep you all posted as to how this wood compares to the bog standard ply that was on it originally. Also when I took the skin off I couldn’t believe, considering the rain we had over the past winter months, how well the wood frame had stood up. The wood looked really good so if I were to personally do it again I still wouldn’t spend the extra cash on exterior grade wood given it’s largely protected from the sheets that are screwed to it. I get a pic of the underside and post it later.
2 Likes
I’d get some of this and a paint roller for the top sheet.
https://www.screwfix.com/p/ronseal-one-coat-fence-life-harvest-gold-9ltr/550ht
This stuff is great , soaks into the wood without making it slippy like
Normal paint or varnish would. Then you have better rain protection and less splinters in your arse and hands further down the line. I’d paint every bit of exposed wood with it.
Protect the ramp
1 Like
The woodstain I bought cheap from Wickes (it was on offer) did the trick in keeping the osb board dry although the top sheet delaminated - but that was more down to it being internal grade. Between that and the tarp the underside stayed remarkably dry and clean.

1 Like
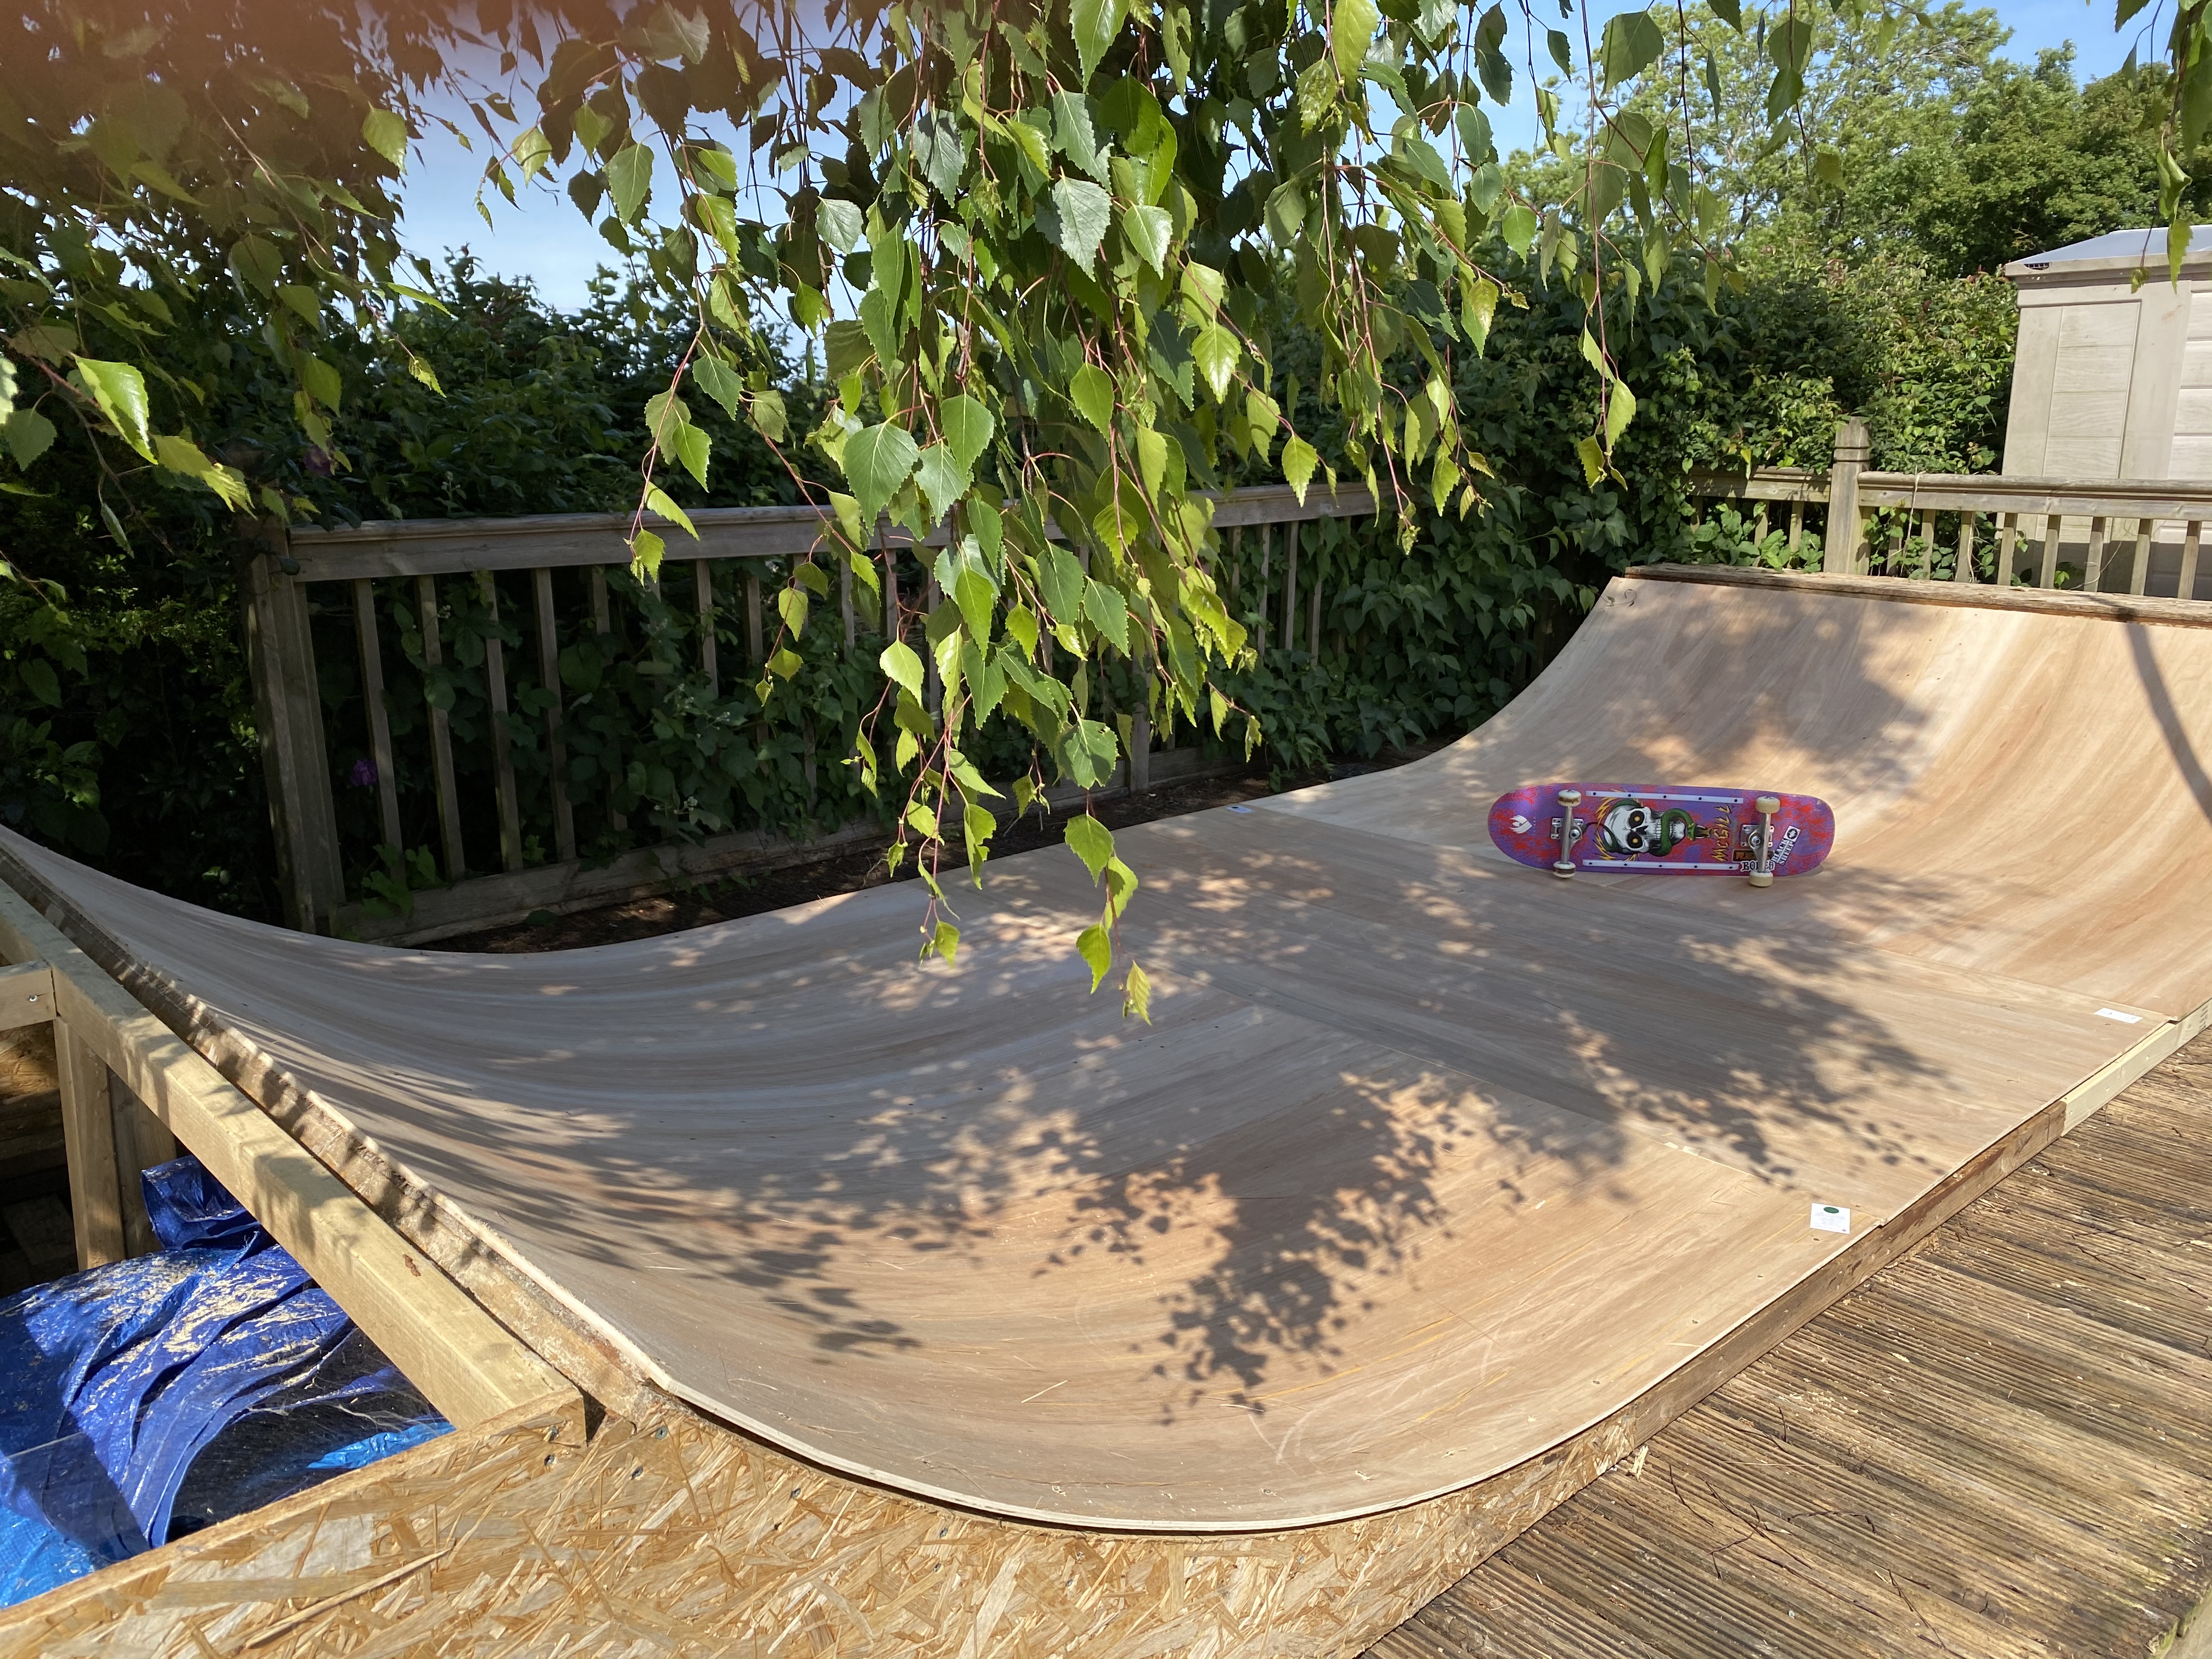
Annoyingly I ‘found’ a tub of forget-me-not blue fence stain after I had stained the surface with the stain I got cheap in a sale. Otherwise I would’ve painted the whole thing blue and let my daughter who’s super into art draw waves on it. Maybe I’ll whack a coat of blue over the top anyway to give it as much protection as I can. I’ll be doing some GoPro footage shortly so watch this space…
3 Likes
Jealous!! Looking good. And great weather for that right now. Enjoy.
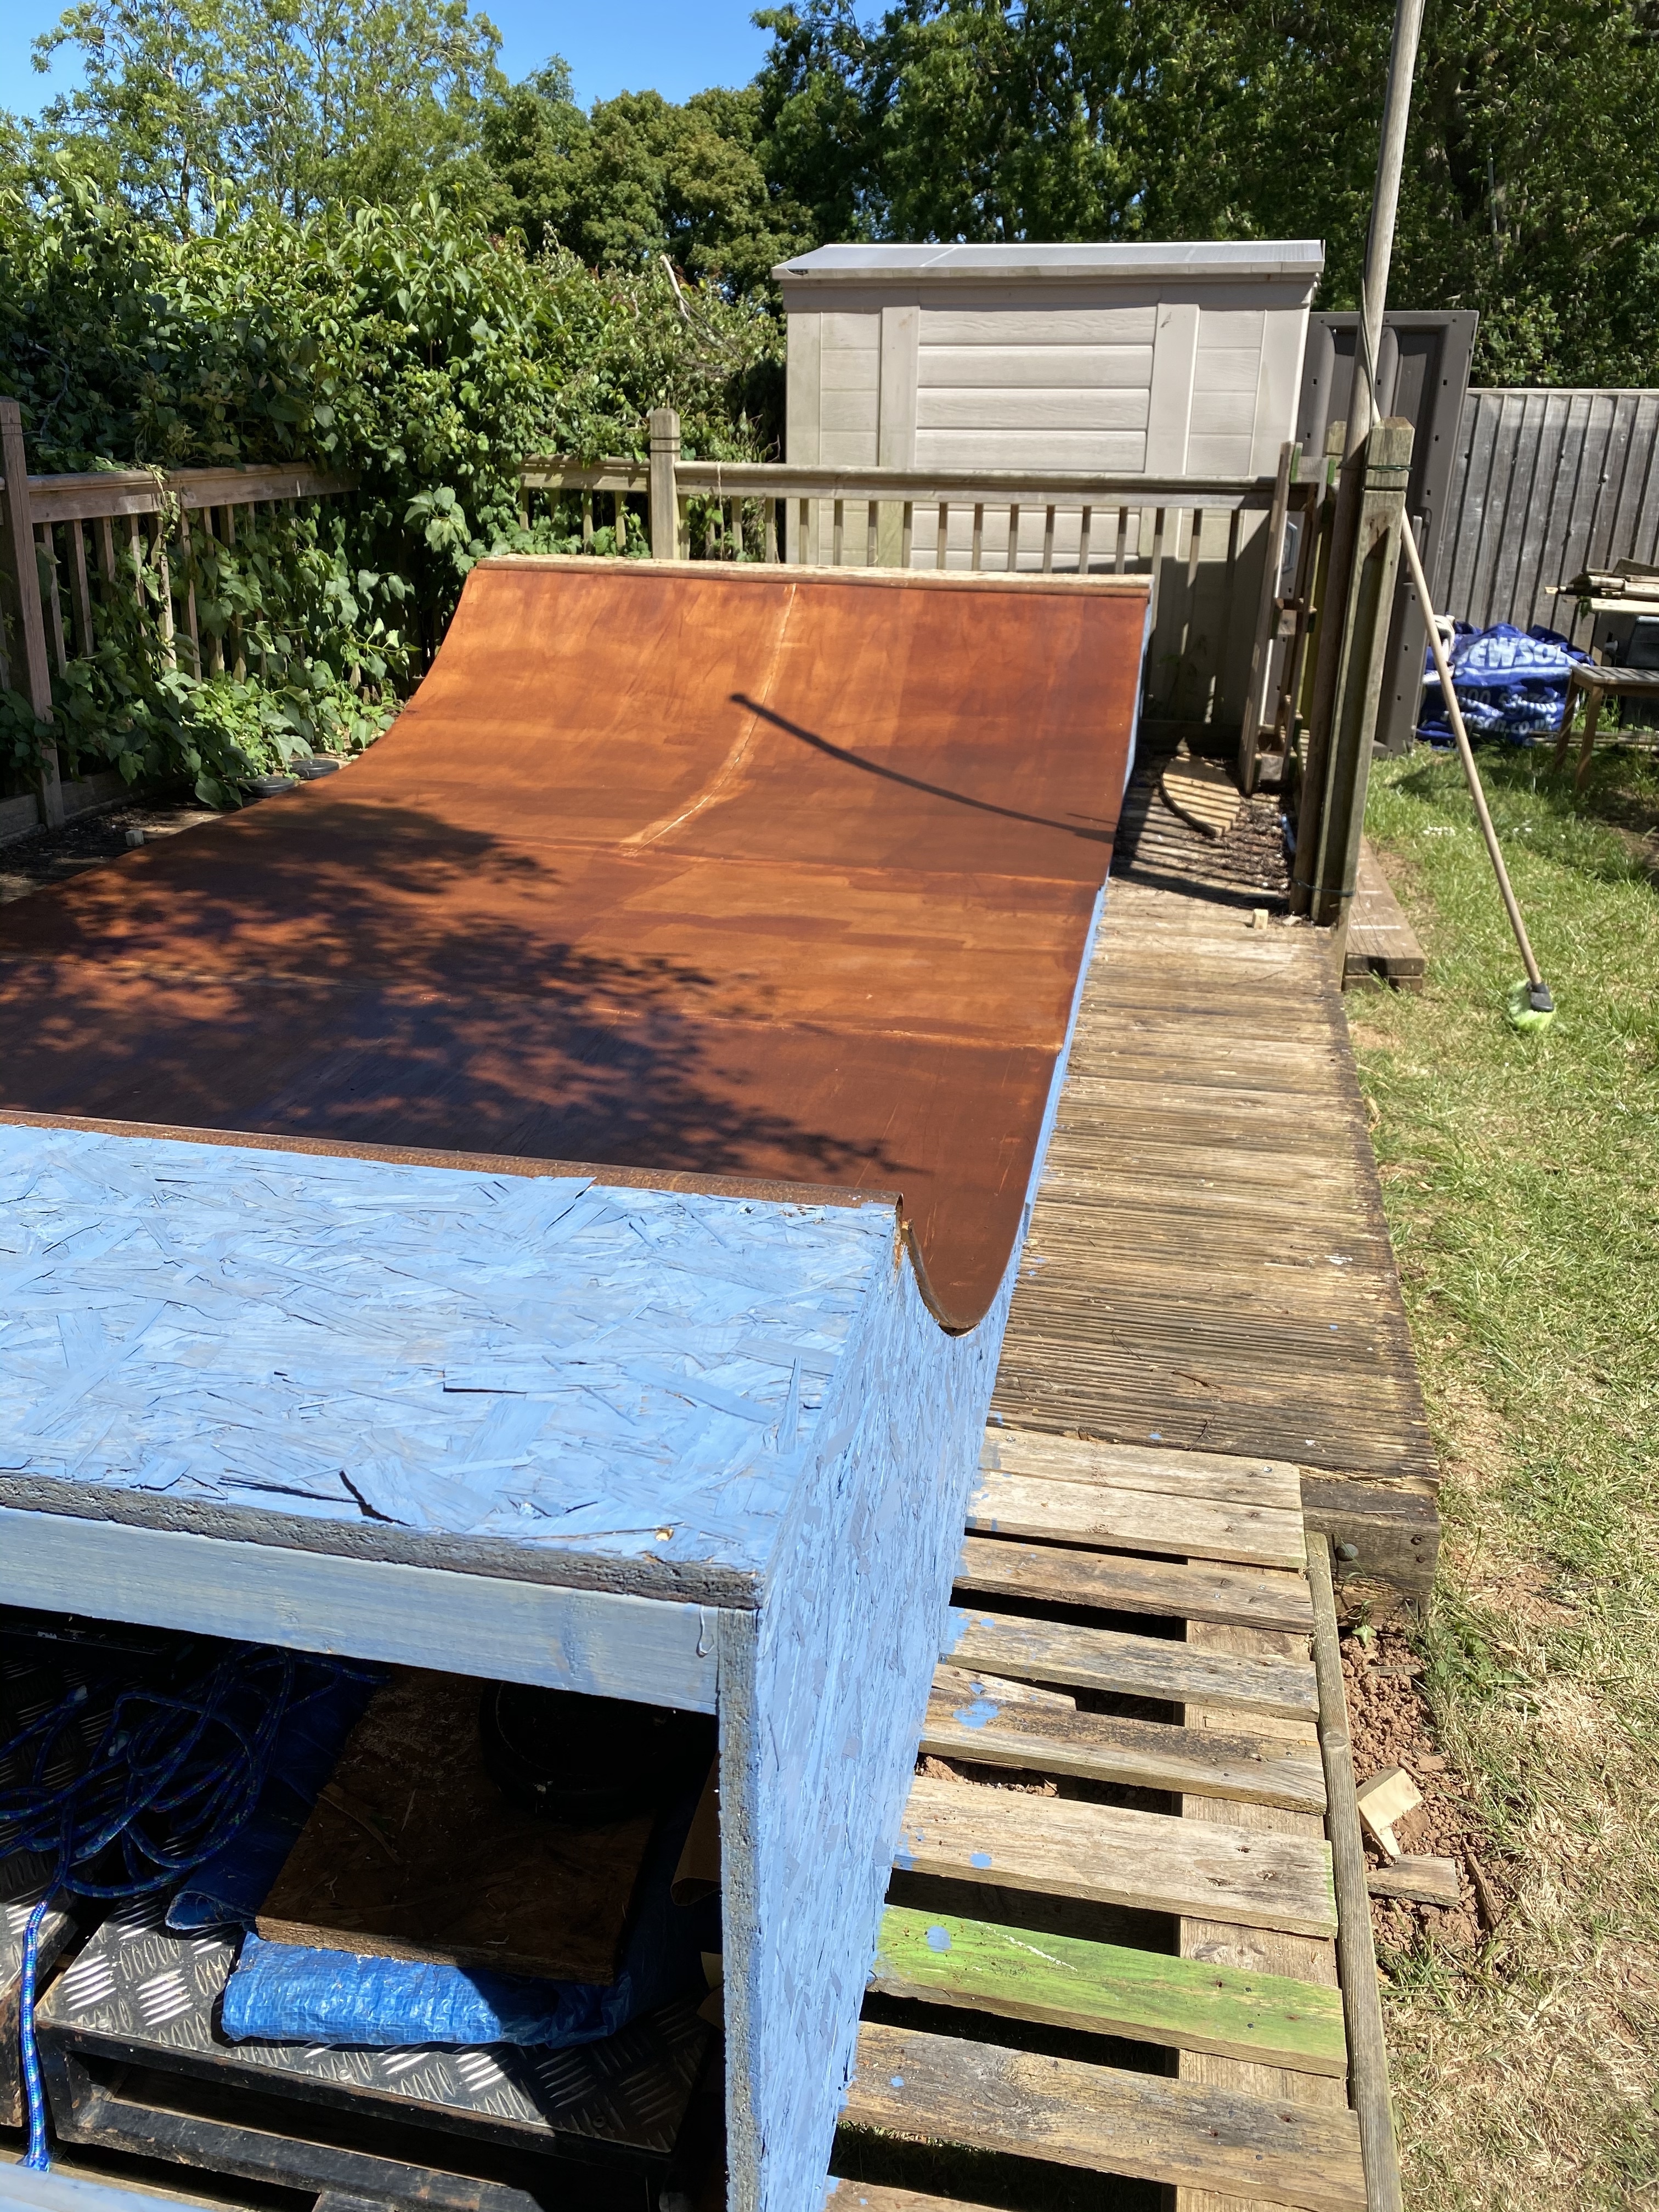
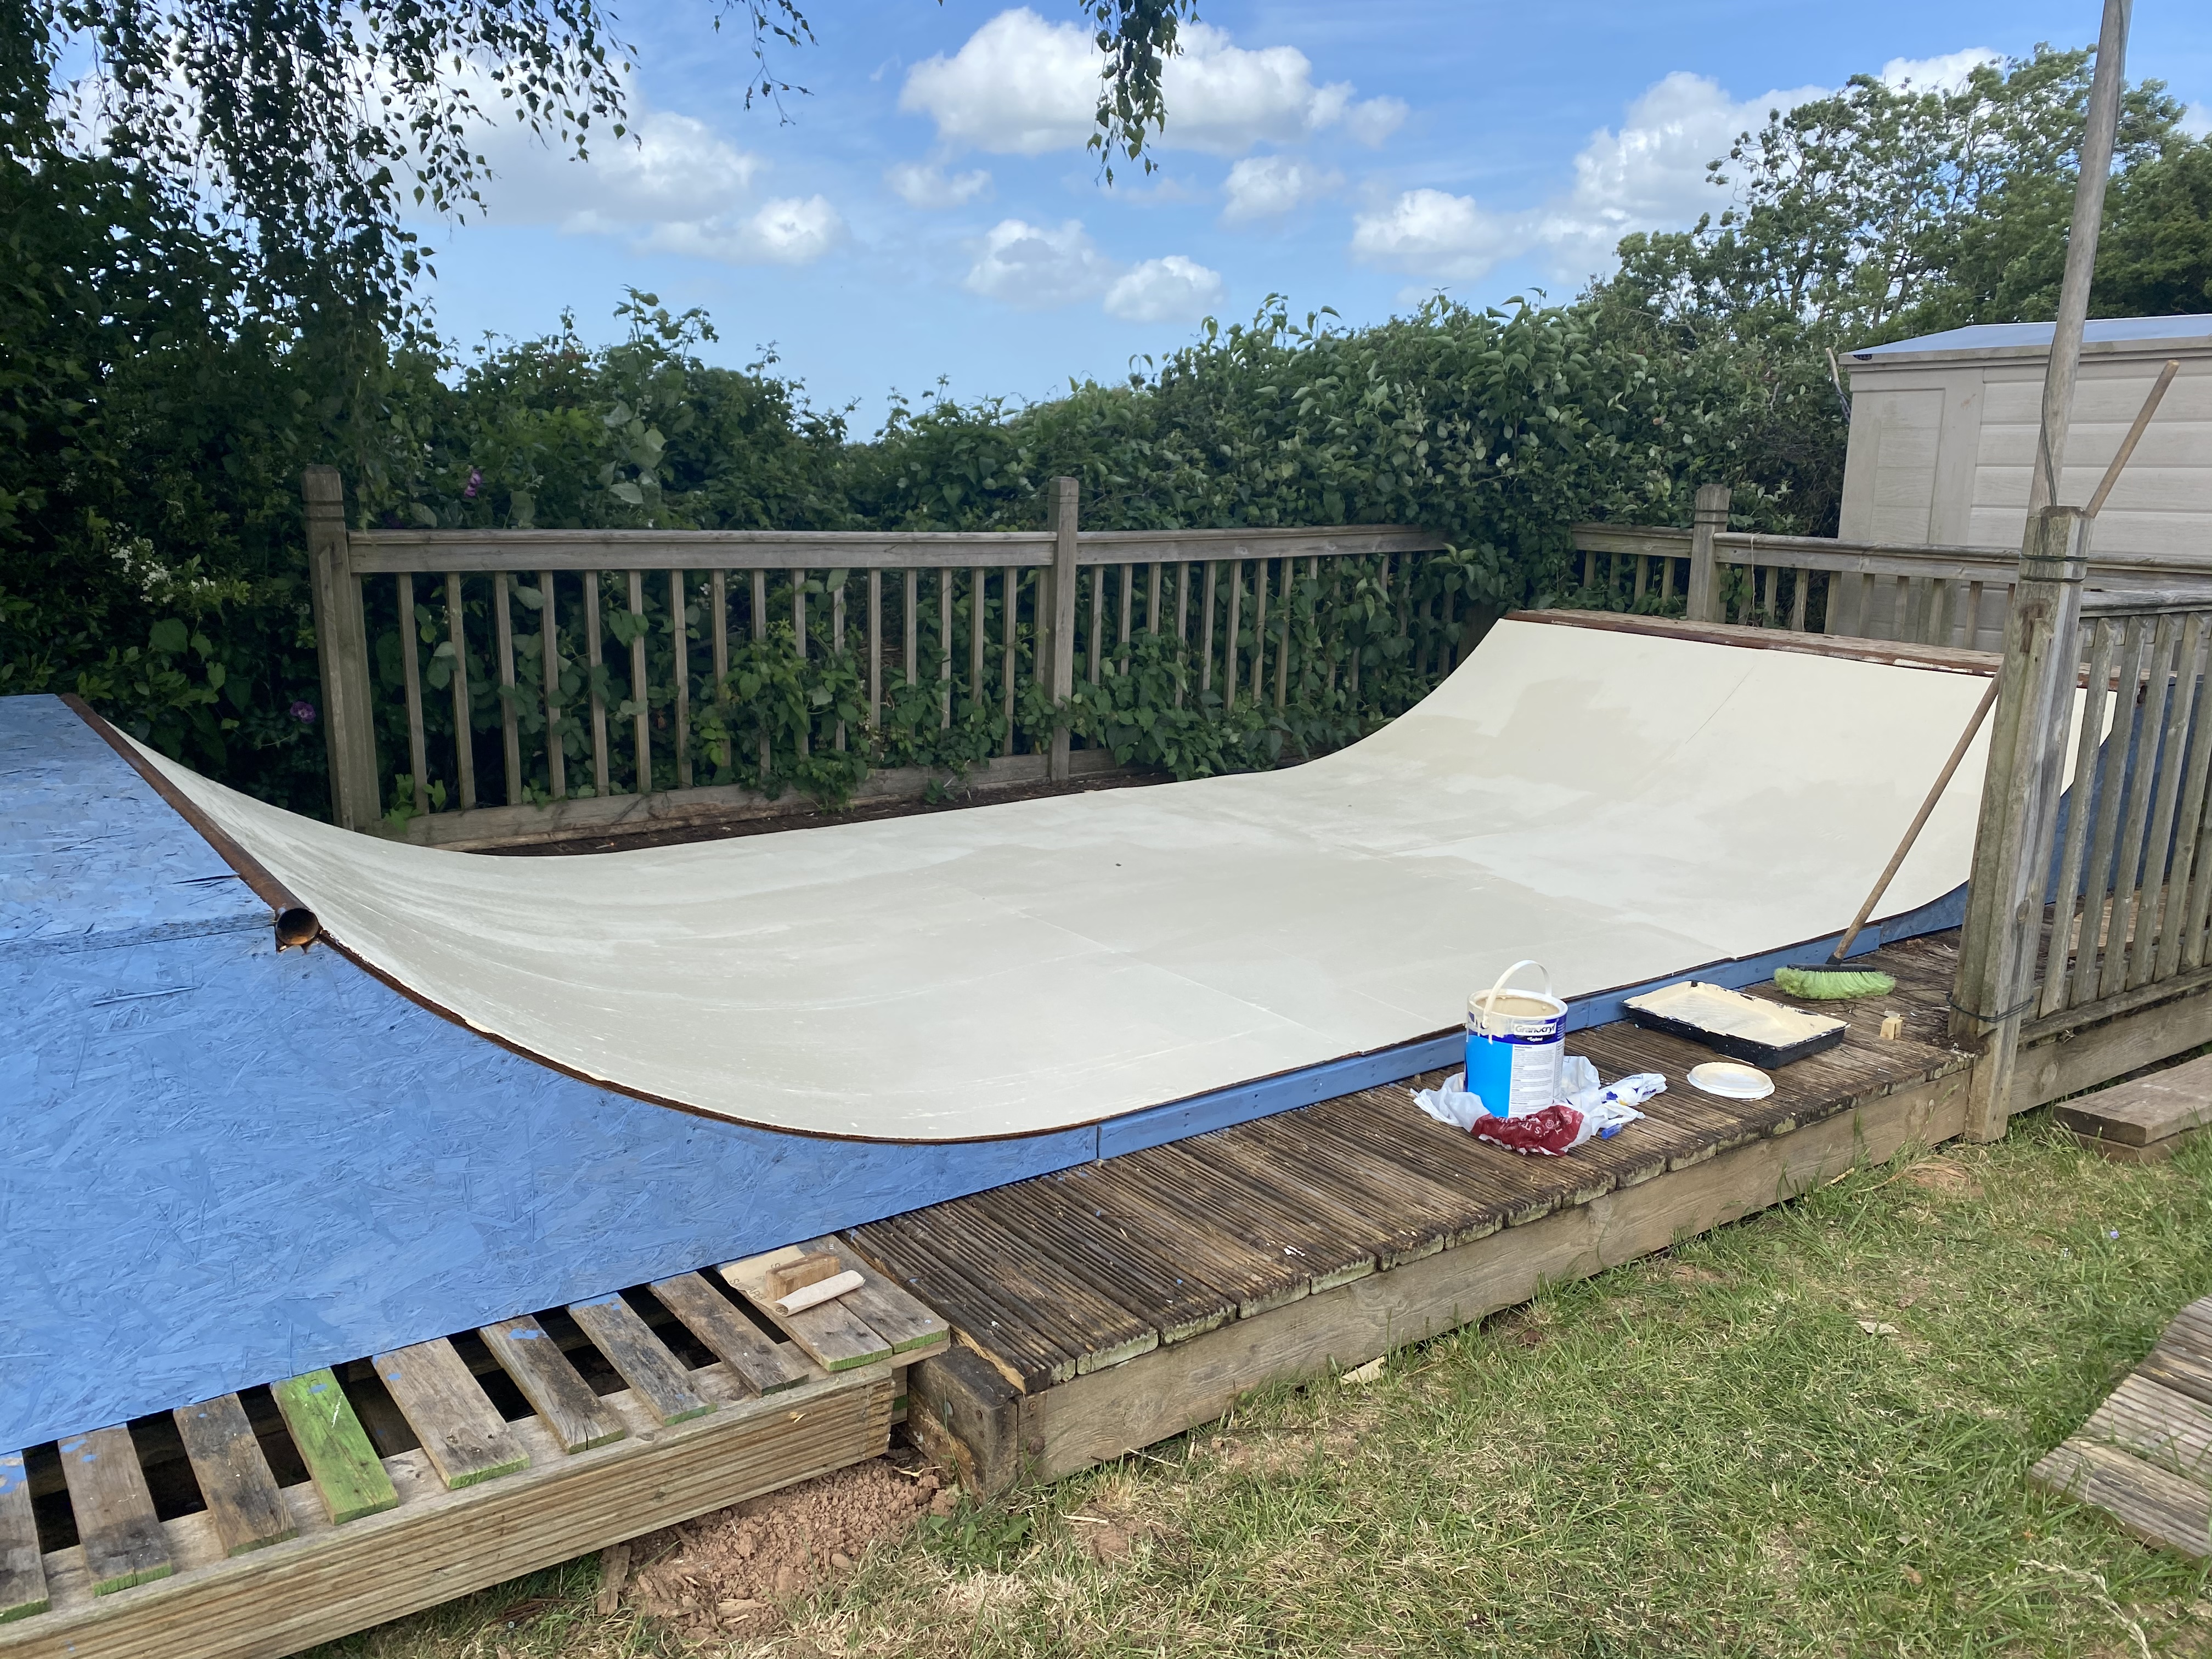
Well the weather changed and it got super wet. Had a few issues with some of the sheet material bubbling - nothing terrible but given it was only in there a day or so I was a bit annoyed given the weather report showed nothing of bad weather (if it did I’d have covered it with the tarp. The 2nd coat of stain also made the surface slippy, or I’d become super sketchy on rock’n’rolls!! Good news is I sanded back the blistered areas, removed the worst bits of ‘stringy’ veneer and painted the whole lot with a smooth masonry paint. I filled the joins with a flexible filler prior to painting too. Outcome is an awesome, extremely durable, water resistant riding surface.
So, this has now become an exterior sheet material / top covering ‘test’ ramp. I’m going to try various different ideas over time, paints, stains, filler, etc as and when needed. And make it a fun process as opposed to a frustrating one. I can’t beat the weather but if I can come up with a cheap, simple and effective riding surface or easily repairable one then I’ll share what works. And what doesn’t! Thanks for the positive responses - mean a lot!
3 Likes