Loving following this, epic work mate. Was hoping to be moving somewhere with space for a ramp this summer but it’s looking like it’ll be another year now, but I’m making mental notes.
Hey bro, looks like a sweet Ramp. Not sure where you are based in he uk but nice posts and helpful re the weather proofing as just built a ramp and trying all the same stuff to protect it we will see how it goes.
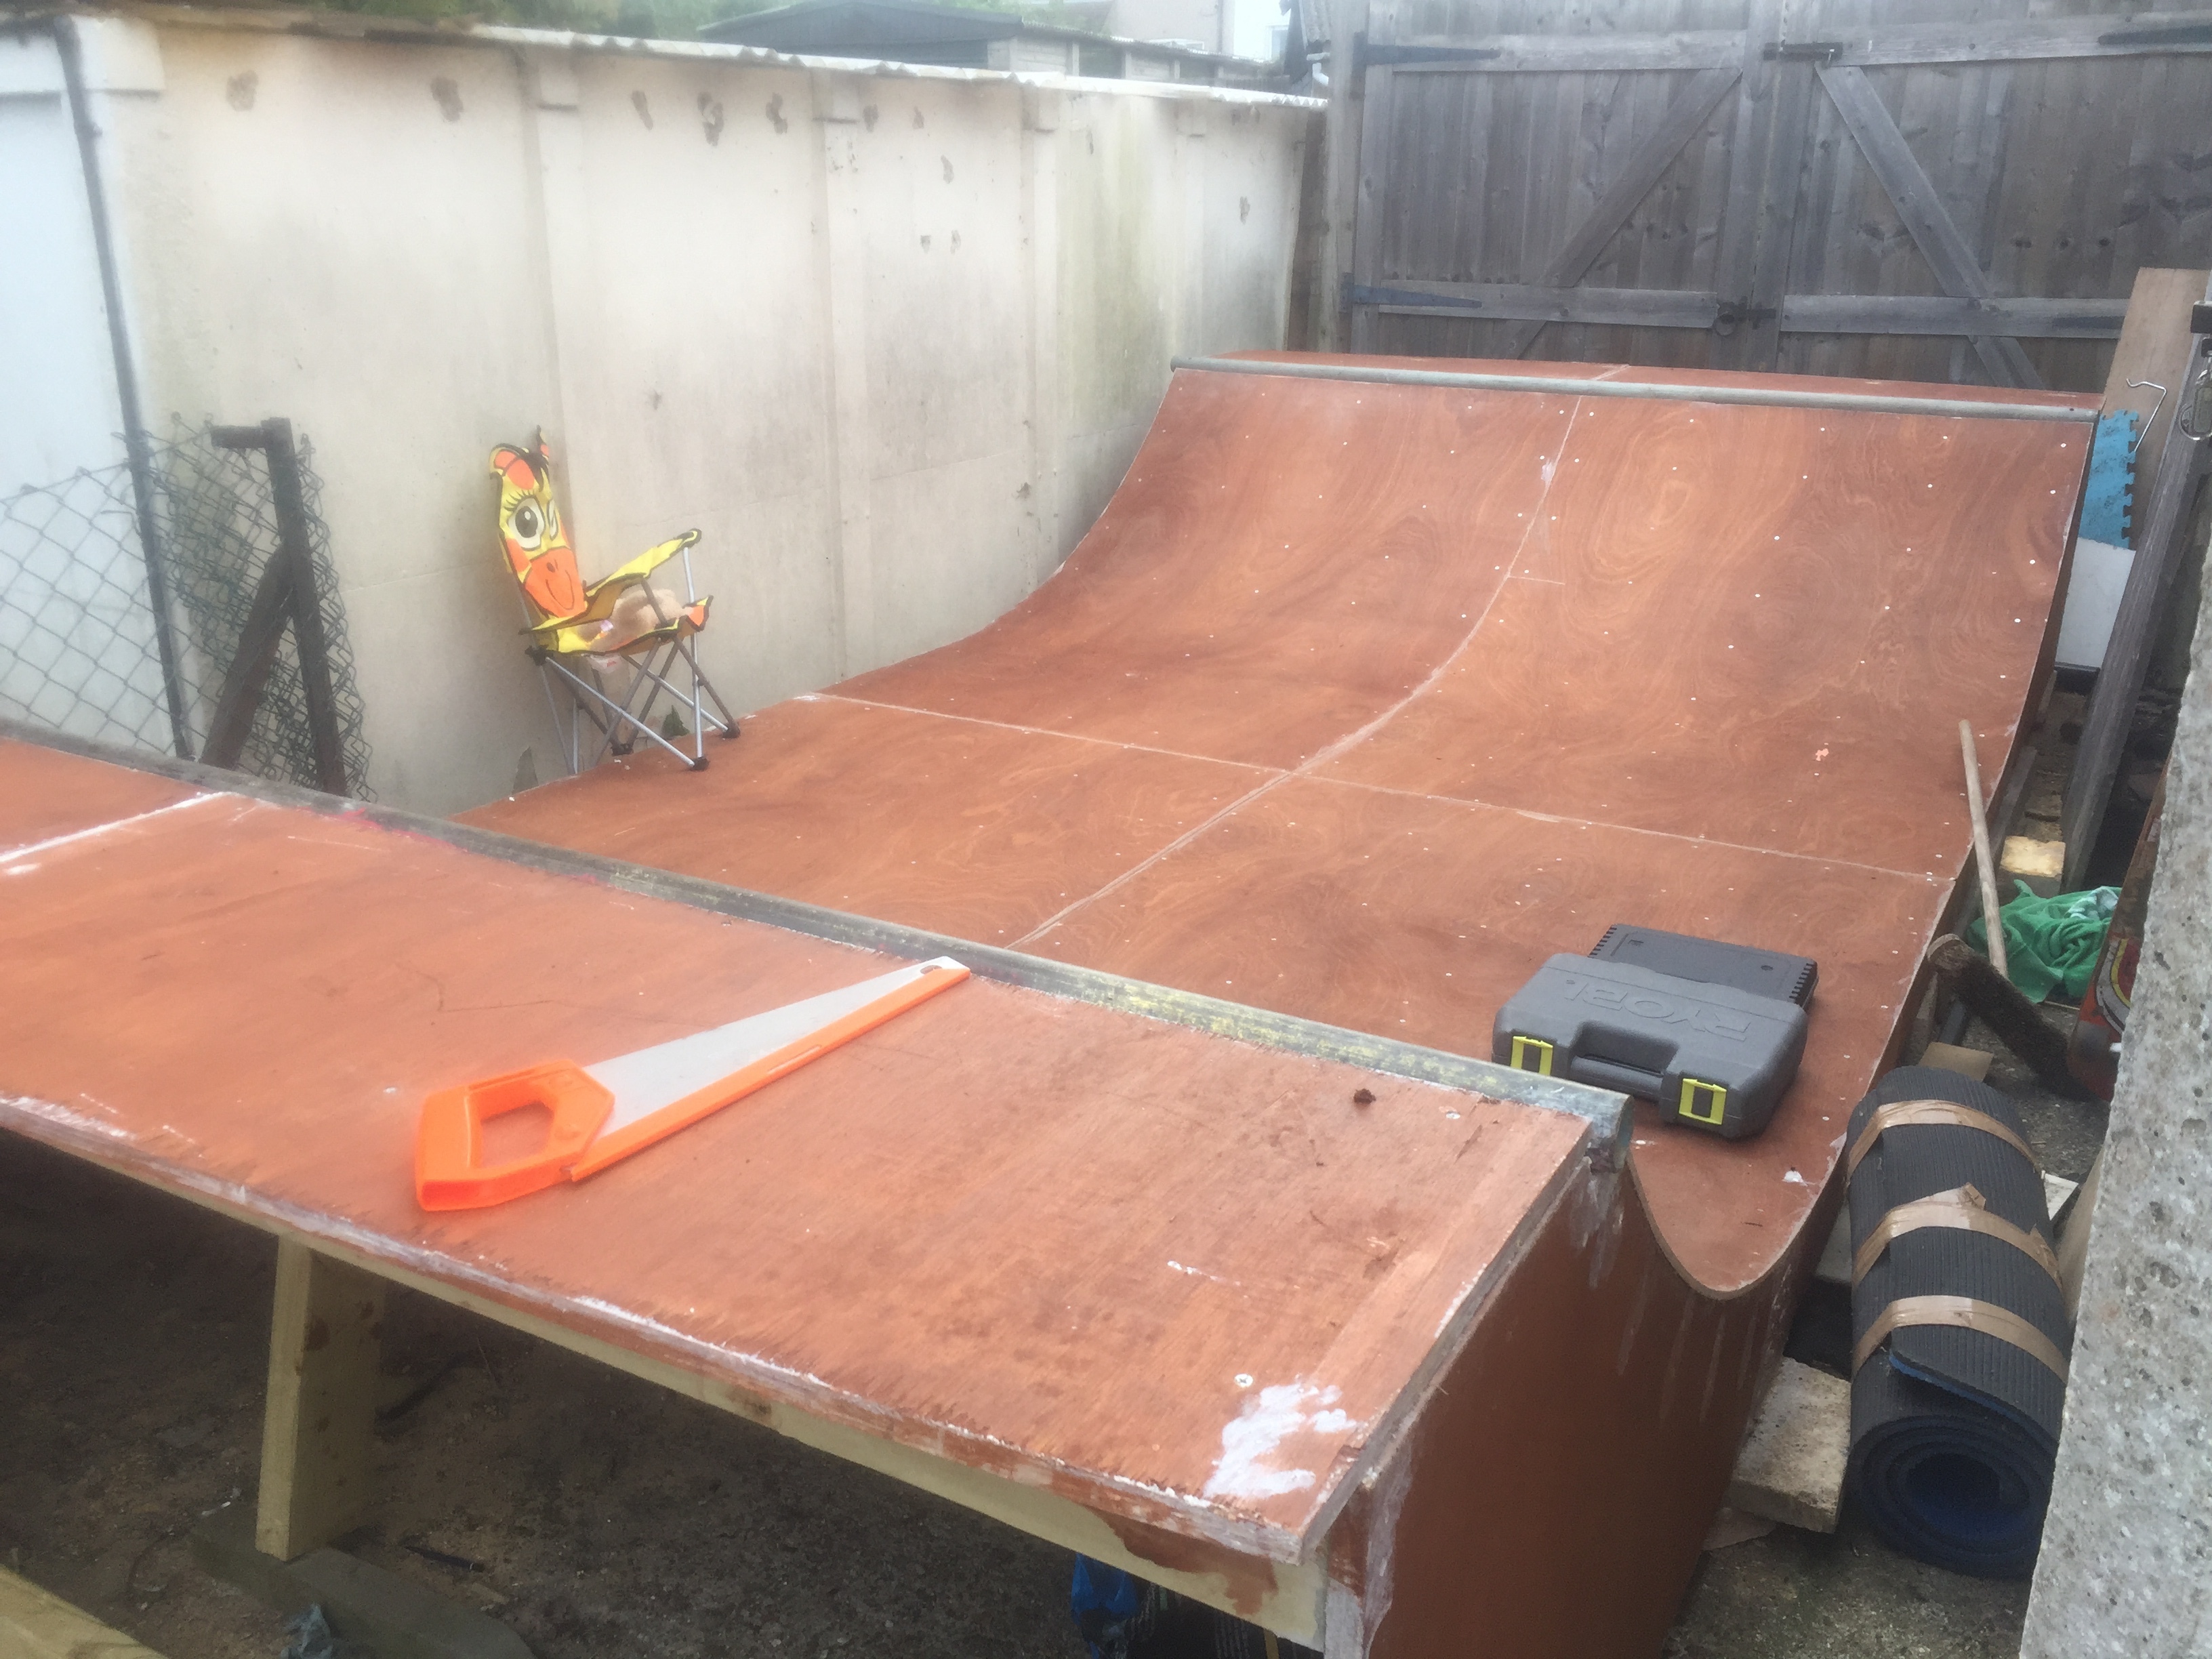
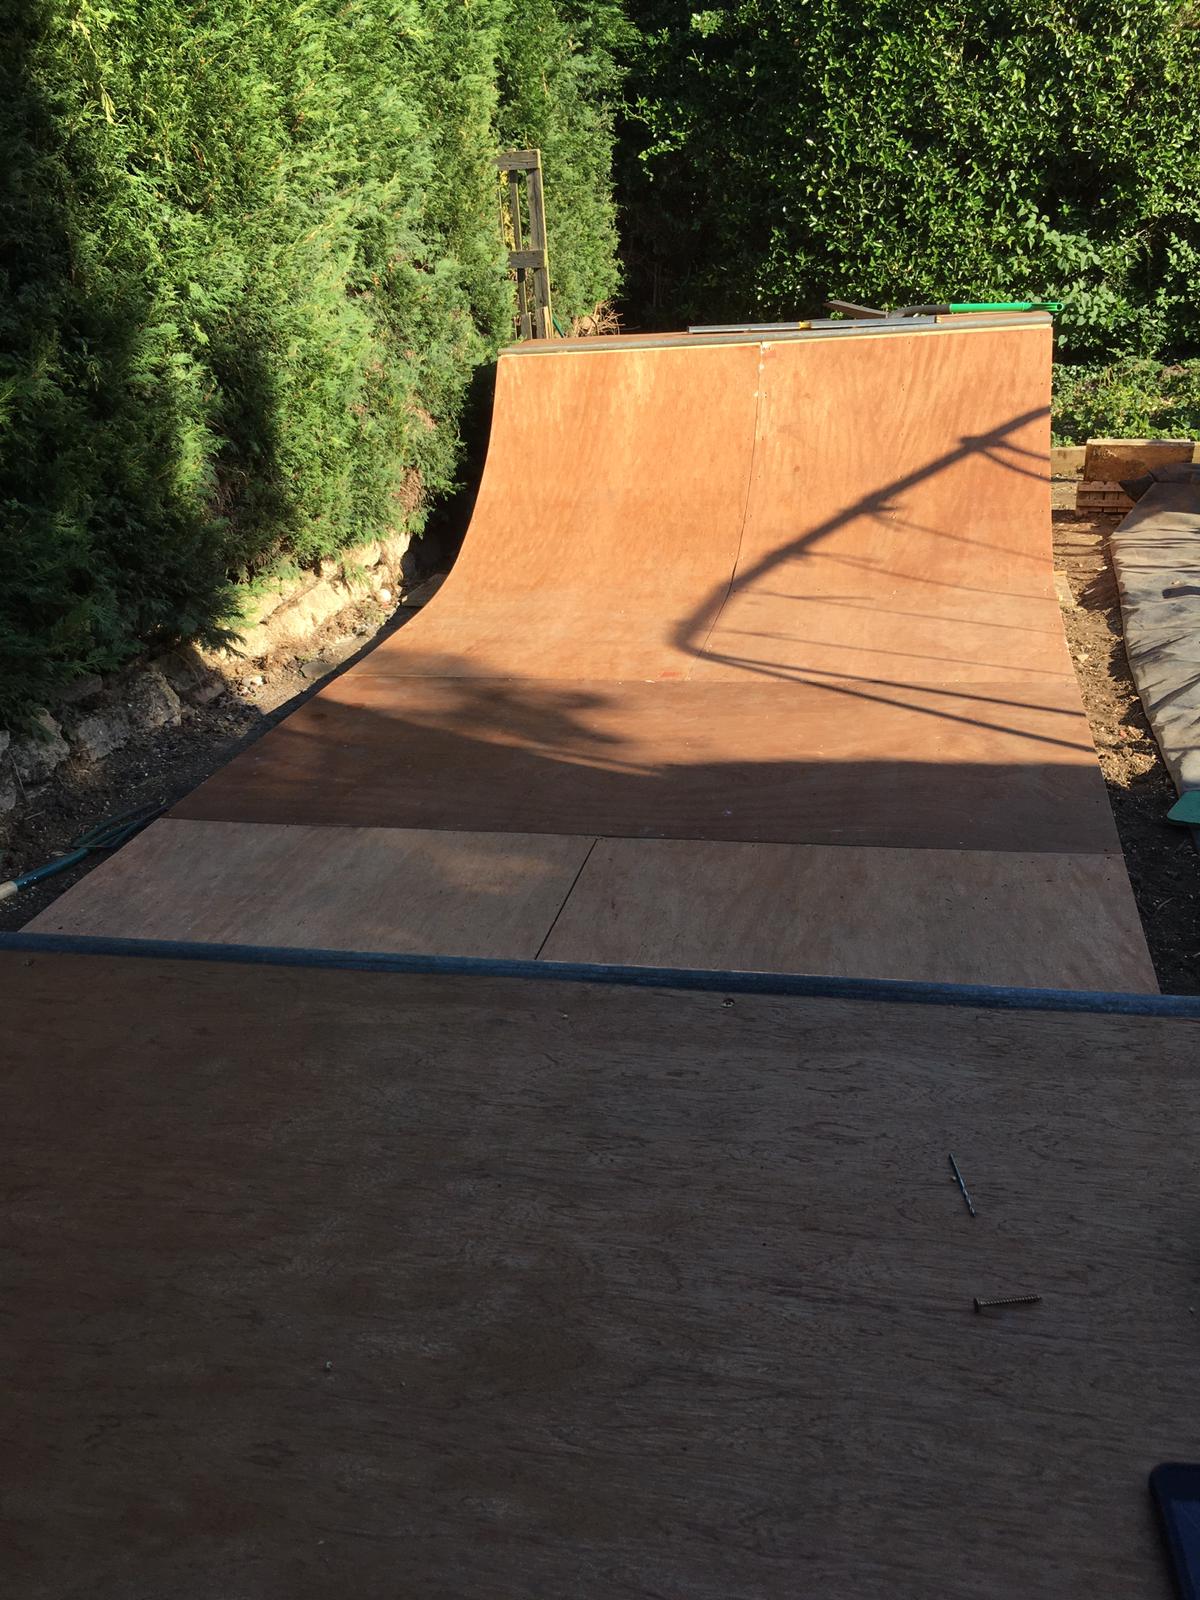
Now that looks dang nice! Is it 10ft wide?? I think if you got the space it’s awesome to have the width; I’m starting to grind (although the rusty coping is making that a bit tricky) but have to be mindful as to how far I can go. Top tip for the top sheets / riding surface… if you got some mix up wood glue with a bit of water and ‘paint’ all the edges before laying them. That way you seal the edges so when it gets wet and the water finds it’s way in to the small crevices between yours boards you got some protection stopping the water getting in to the veneers. If you can paint the boards before you lay them (both sides) you’d increase the weather protection further. I’ve done none of these things but will be when I need to re-skin next time. I’ve found the smooth masonry paint on top of the stain works really well too.
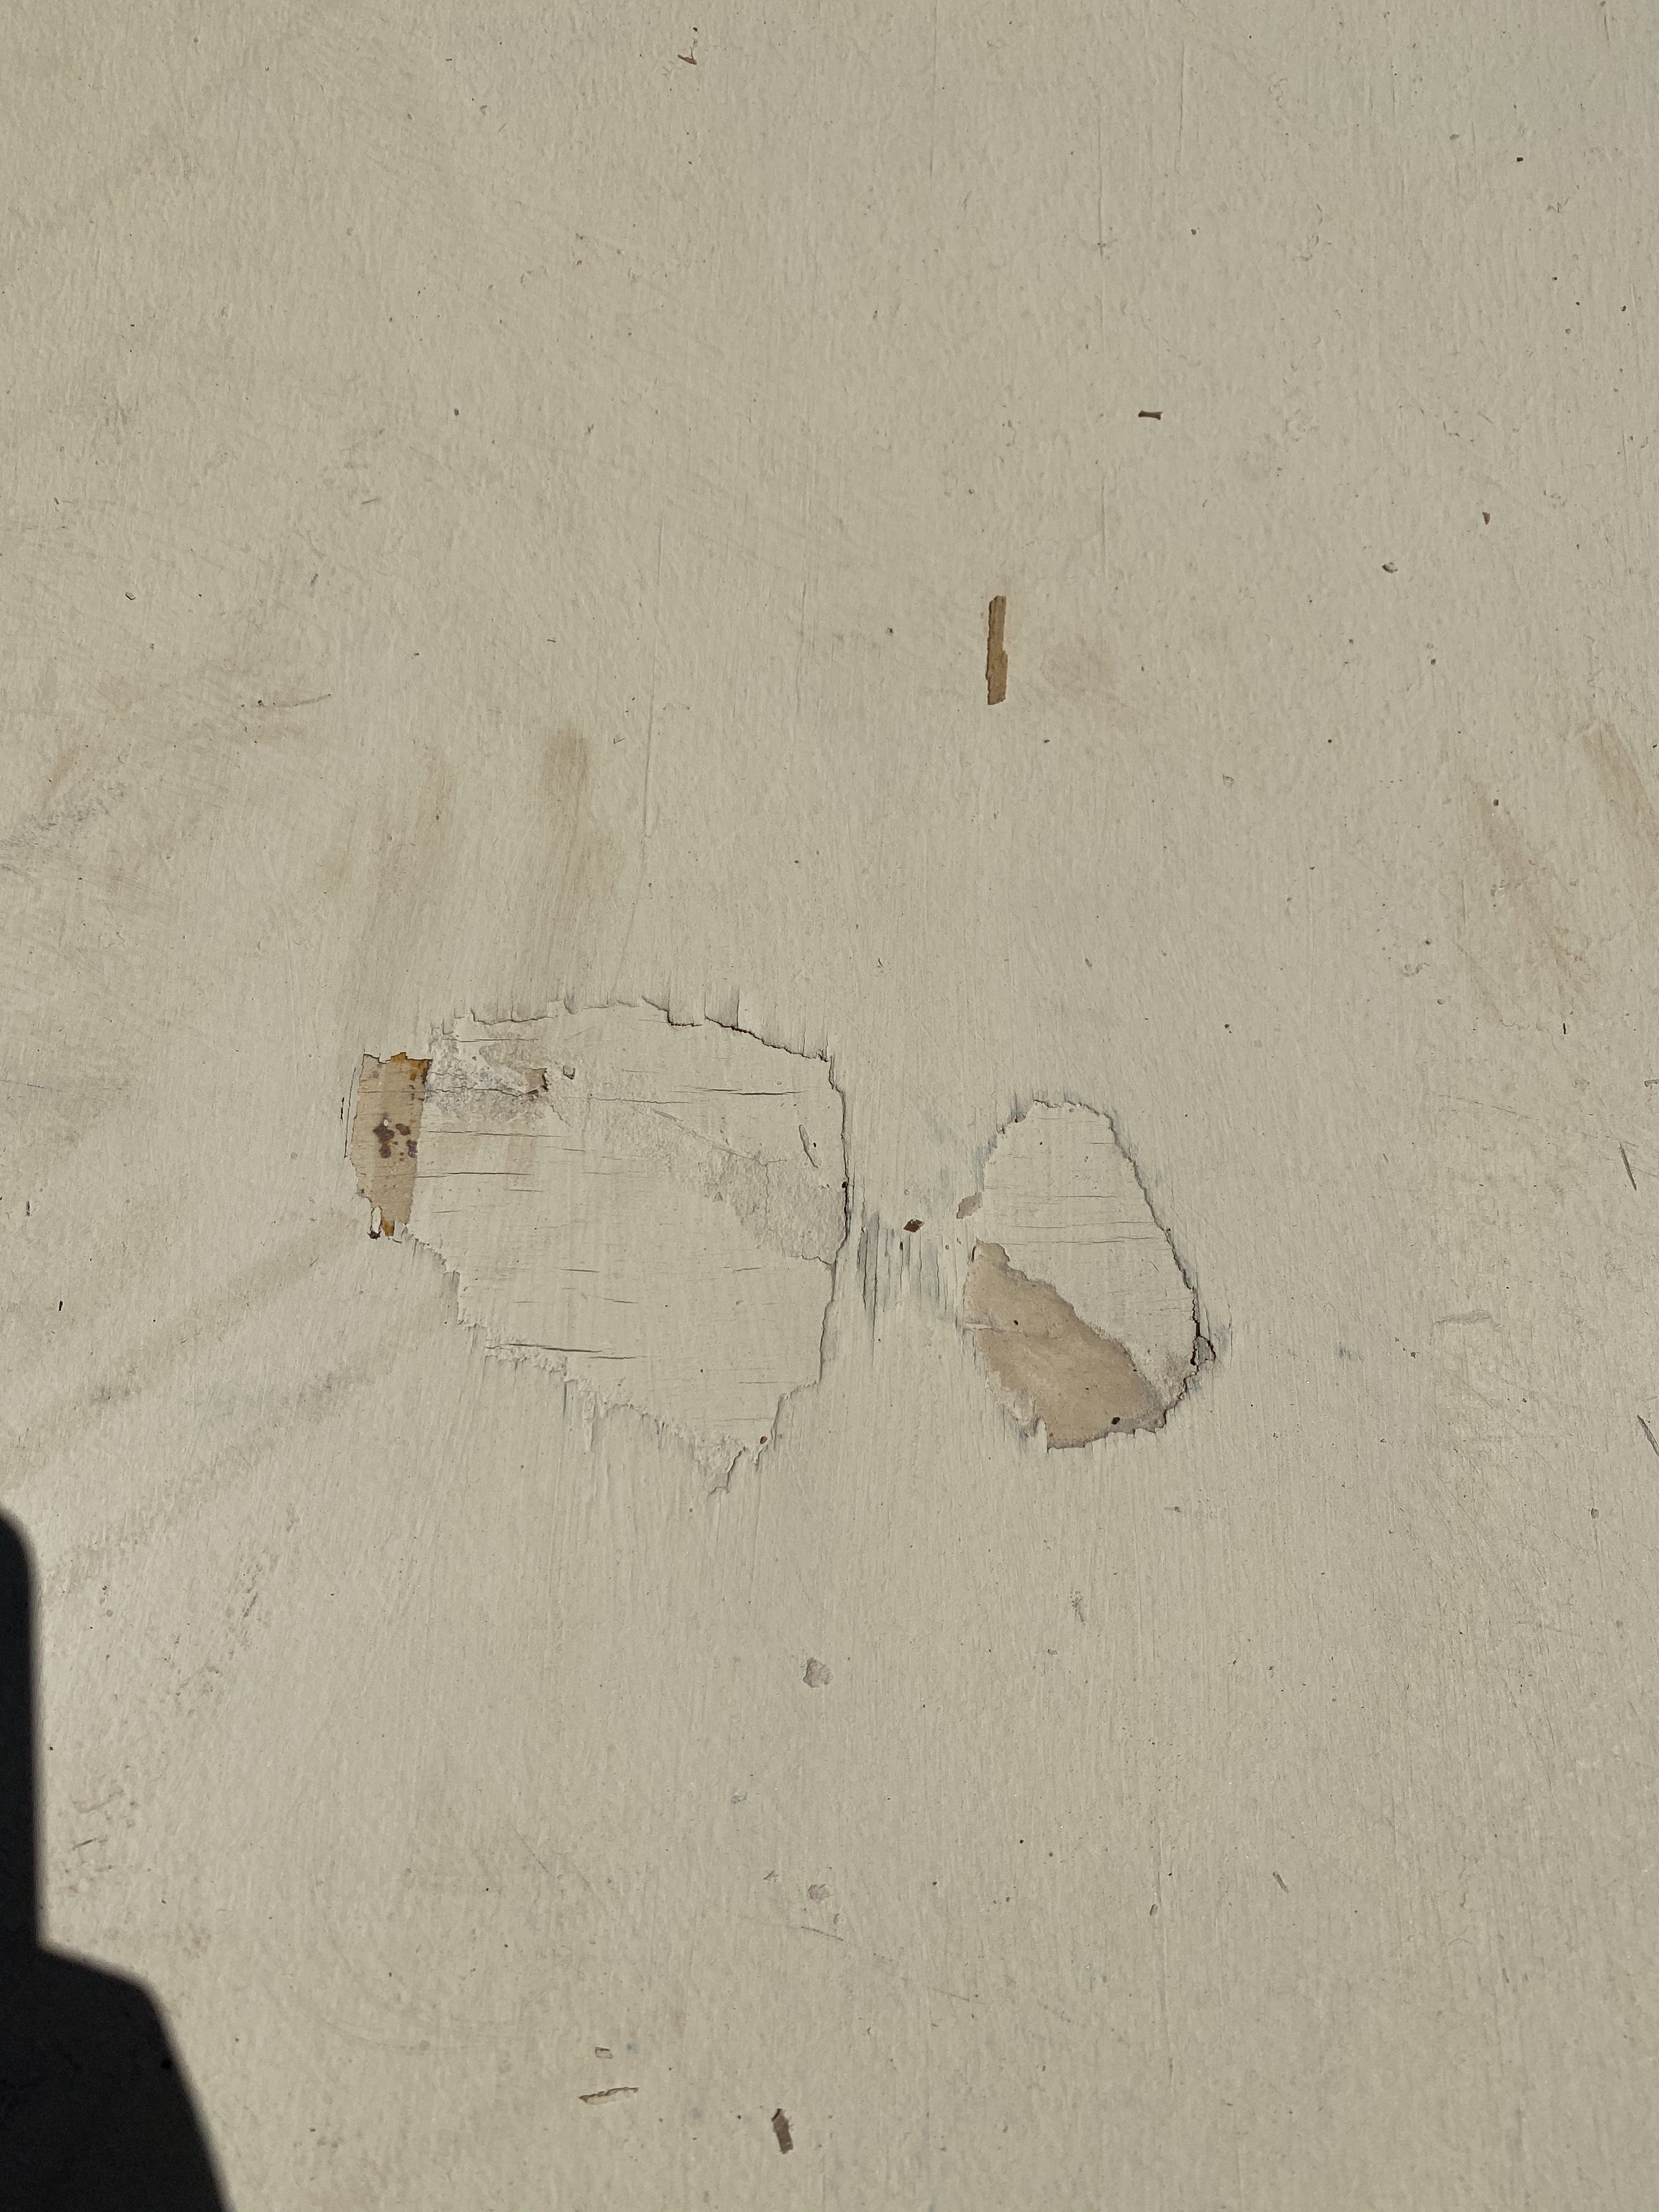
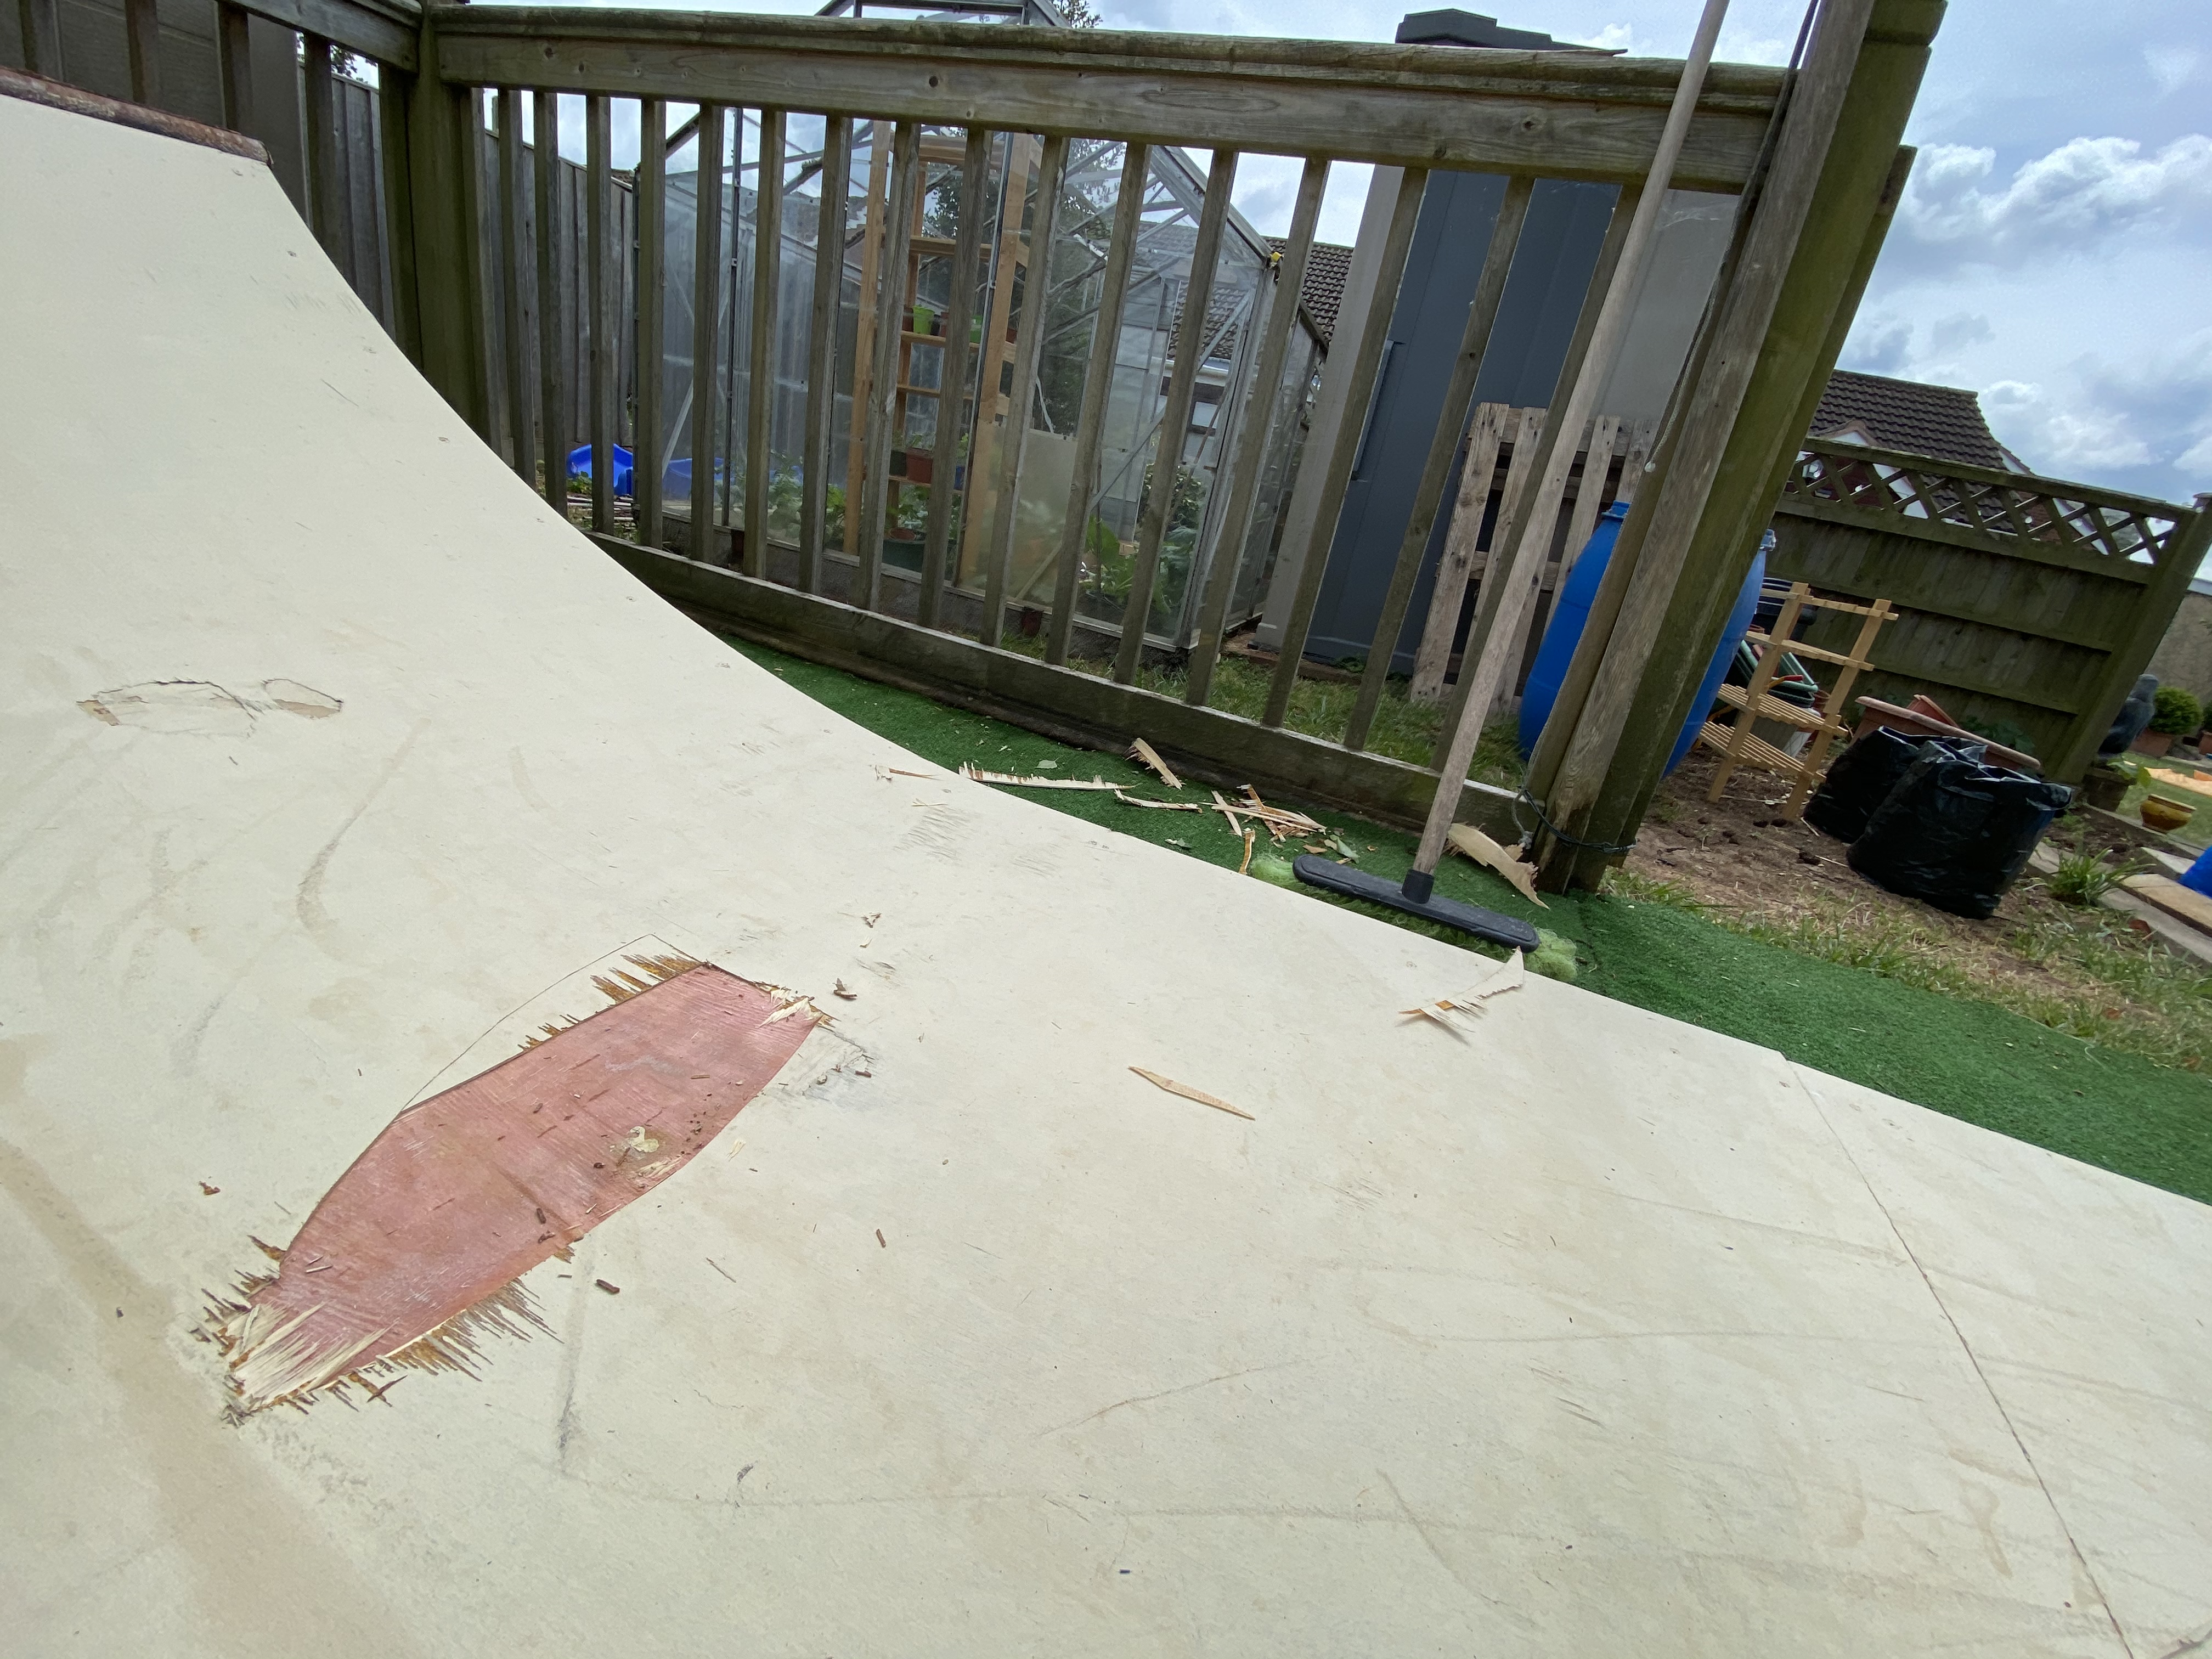
Bit of an update. I’ve found that one of the top sheets has a slight issue. It appeared to ‘bubble’ and the thin top veneer lifted. So I kinda picked at it like a scab, sanded it back neat’ish and whacked more masonry paint on it. That was a week ago and it’s not got worse. Doesn’t cause any issues when riding - still fun as hell! I’m thinking it might be due to when I laid it, and it started to bend, the top veneer for whatever reason on this piece lifted in a little area. Doing a bit of research and I think when I come to replacing the riding surface again I’d take more time prepping them.
Make up a wood glue / water solution and go round all the cut edges of the board. Then stain the edges and then paint the edges with masonry paint. That way as the rain collects in the gaps between the sheets they will be as protected as they can be. Before laying I’ll then cover them in wet towels in a bid to make the wood a bit more supple, then screw down taking the shape of the transition. Once in position push filler in to all seams and paint over with a coat of stain and then two coats of masonry paint. There’d be no additional costs (apart from a bit of glue) to that I’ve already spent just a bit more time.
The coping is rusty and kinda acts like Velcro when the trucks meet it! I was originally going to coat it with a lacquer but figured after one grind the metal would be exposed so didn’t. Don’t fancy going back the idea of plastic as I couldn’t find a decent thick pipe locally of the type of diameter I wanted so will be attempting to remove with white vinegar in a bid to keep the costs of upkeep down. Once I got some I’ll post up pictures of the mess I’ll undoubtedly make!!
angle grinder, wire wheel, zipppppppppppppp. 2mins
Hi - yeah I haven’t got a grinder. Tried a wire brush on a drill and it worked but was a bit tedious. Don’t think my makita drill spins up fast enough to do it quickly. Maybe I’ll see if I can borrow one. Thanks niallc!
No worries, ramp looks great. the less time you can spend on maintenance and the more skating it the better.
Hey Pocalyptix,
What a beautiful ramp! The updates have been very useful and insightful also.
I was looking to build one in the UK also- I’m a bit tight for space so only really have room for 4ft x 10ft ramp at 3ft height, so a cool little mini (I hope)
How much did you end up spending and mainly what length 4x2 and how many did you use? as I’ve read loads of different people saying different amounts and having a hard time estimating!
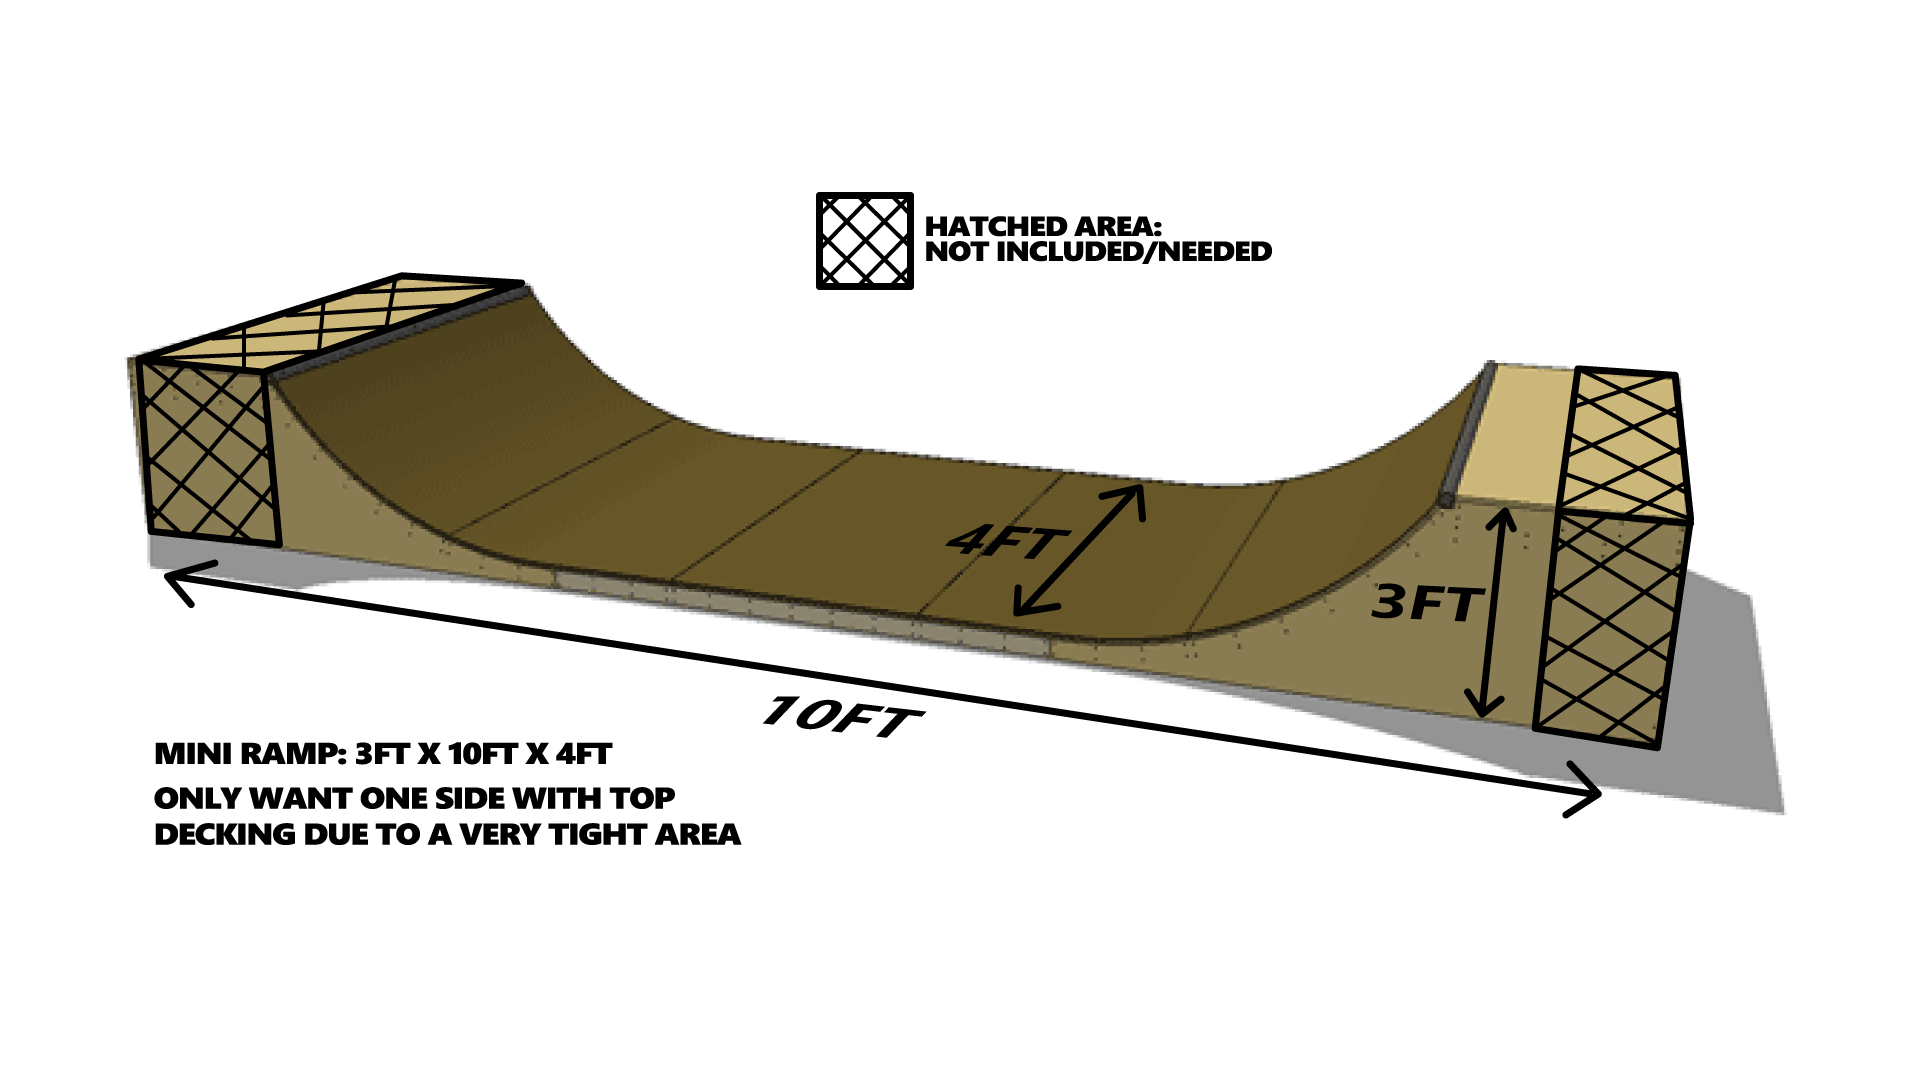
Neat micro idea!! I think any type of skate ramp, or even a nice flat area to roll about on it worth the effort. Anything that keeps you actively skating! Now I used 2.5” by 1.5” cheap 8ft lengths of wood from wickes. They always have them at the front of the local store where I live for £2.50 - £2.75 a go. I bought 40 (approx £100 worth) and used two screws in each side of the transition at (I think) 6” intervals. The 40 struts did the whole thing including the bracing across the back of the ramps transitions (under the deck and across the bottom) and also the pieces I used to make the support in the middle. I had to do the last part because 2.5” x 1.5” 8ft lengths flexed. Once supported however they were more than strong enough to span 4ft. If I did it again I would use 2 x 4 like most people would suggest but at the time I didn’t know how much I’d use it and didn’t want to throw a massive amount of money at it. That said I certainly think what I used has held up well and is more than adequate in my unprofessional opinion - it’s a quality thing I suppose. Good thing for you is as your ramp will be 4ft most lengths come at 8ft so you’ll be able to get two out of each one. The osb board (2x 18mm and 4x 9mm) 4 x 9mm ply top layer, mild steel coping and screws (you need twice as many as you originally think lol) brought the total up to around £400. I used cheap stain for a tenner and bought masonry paint to go over the top of that for £15 in b&m.
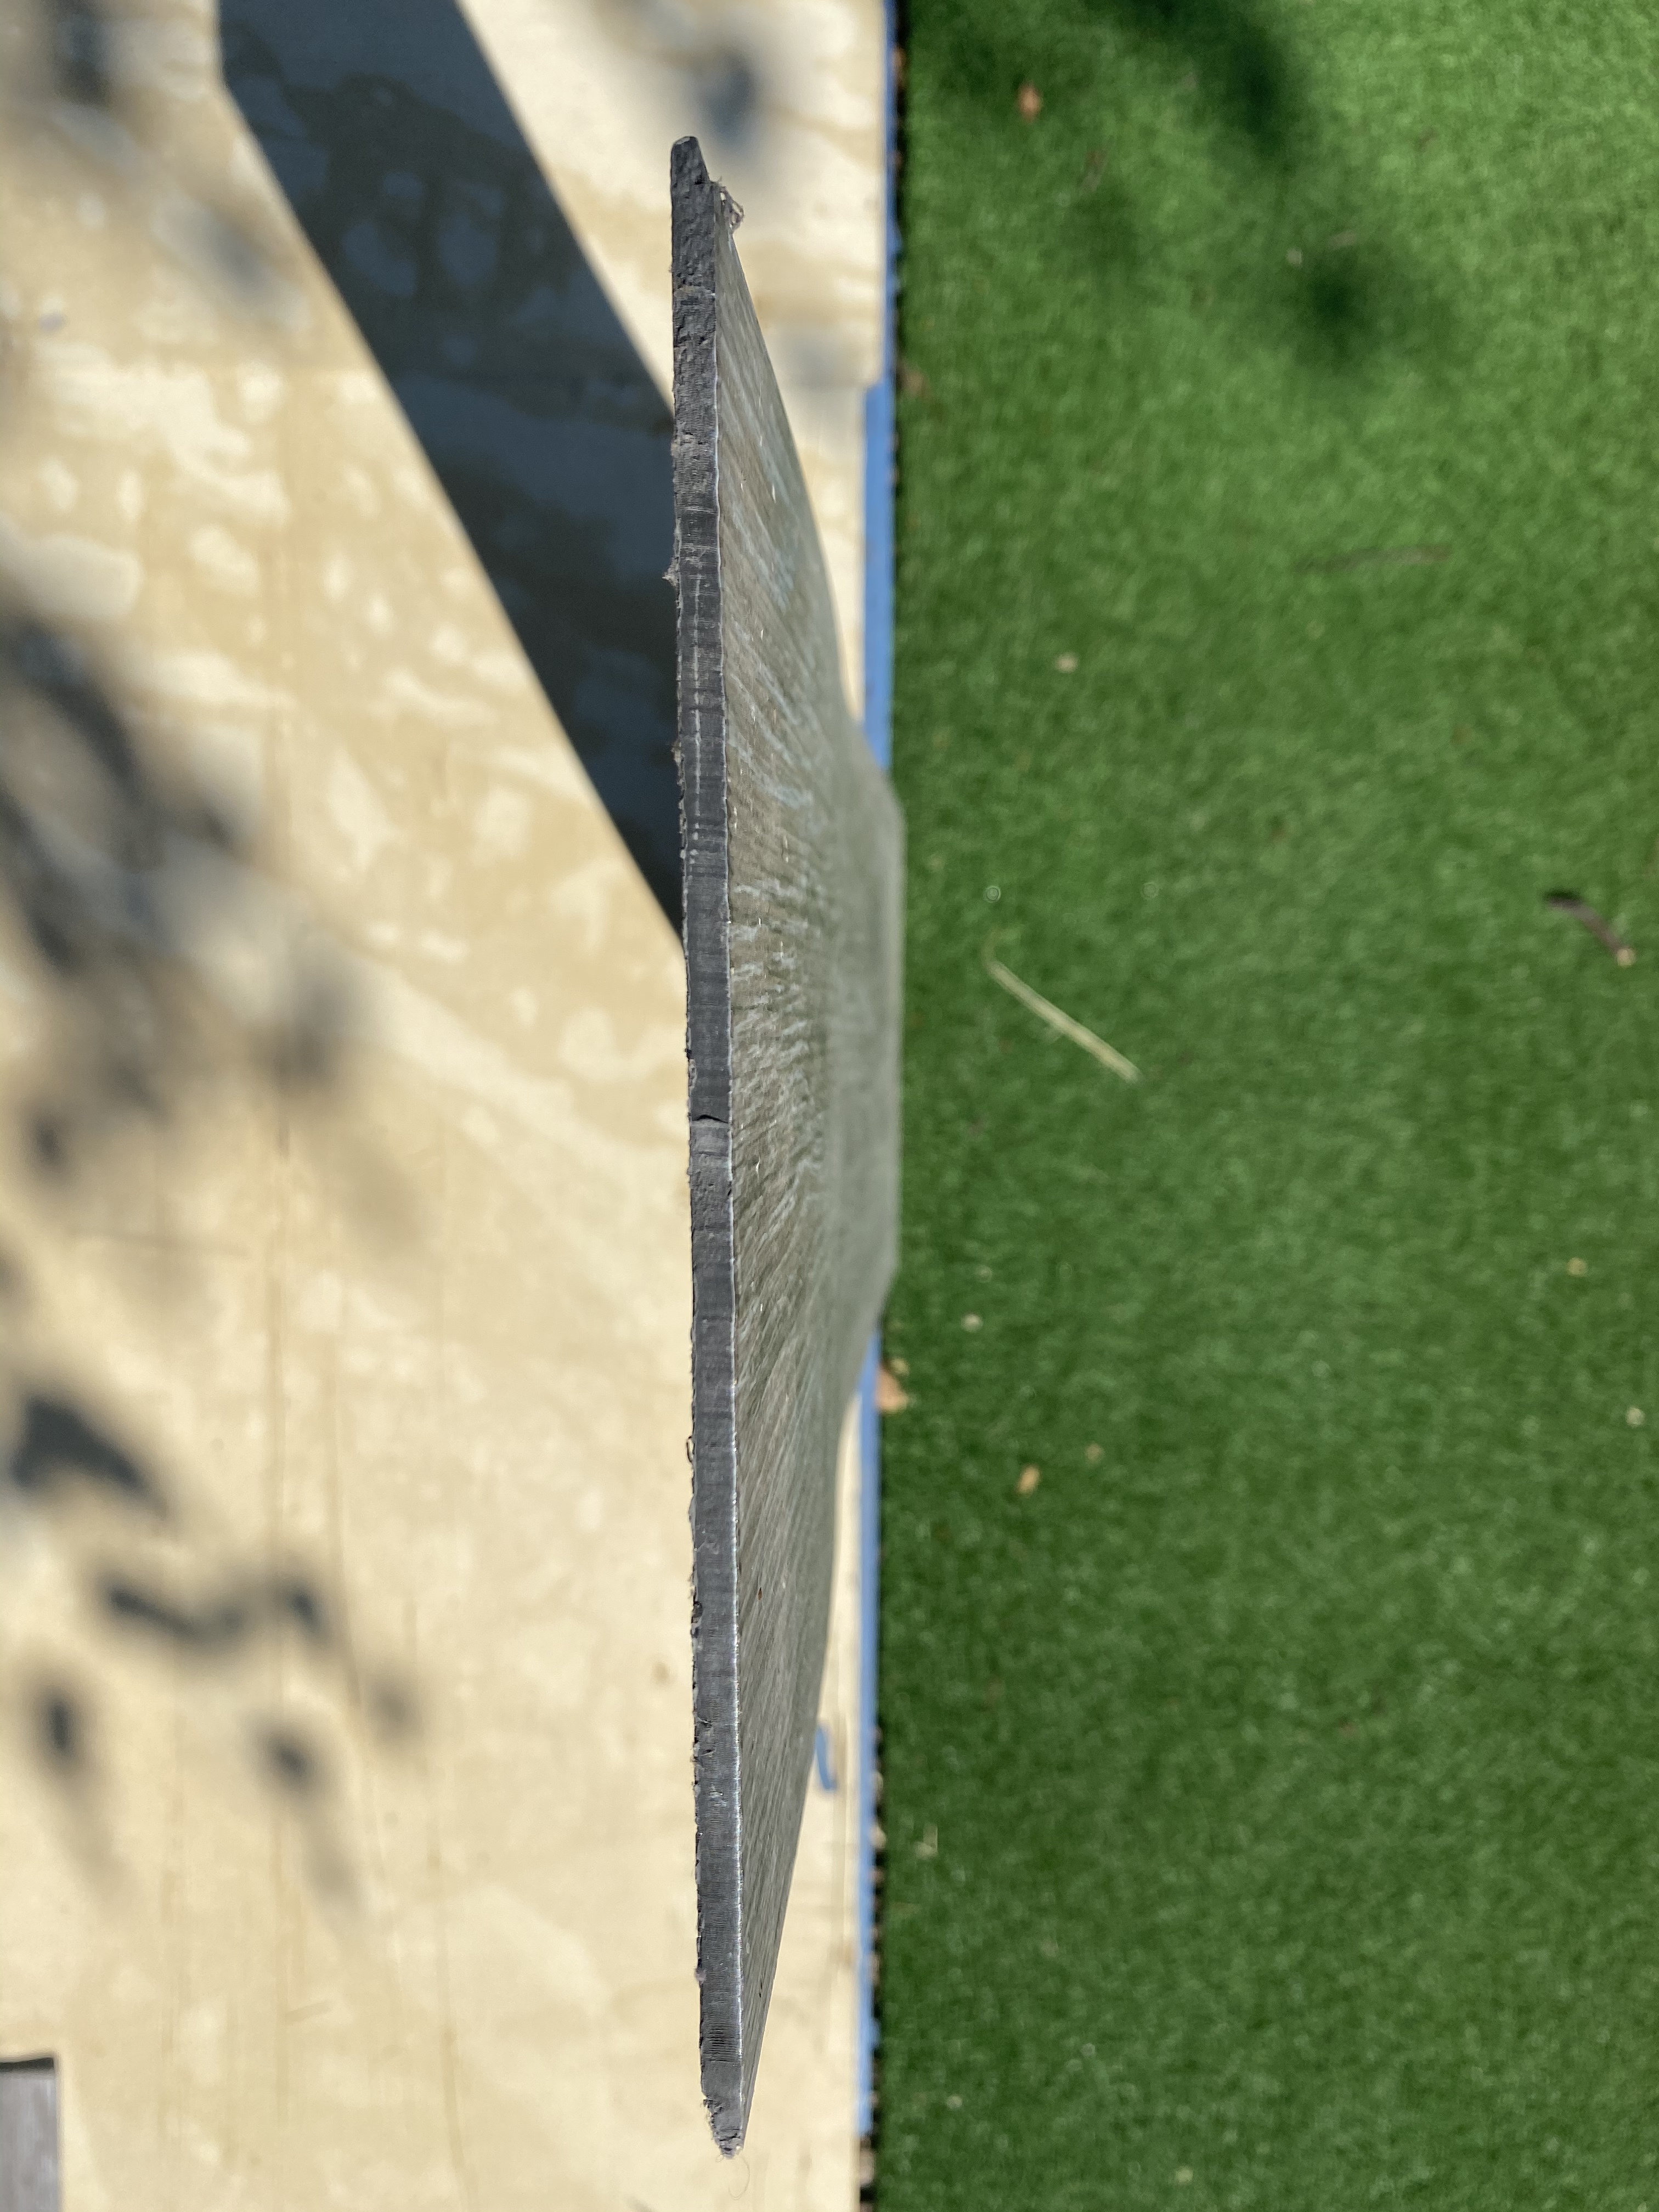
I’ve been constantly thinking of top layers. Thinking what else could work and, whilst clearing out my garage, came across what I laid on my kitchen floor. I’ll post a picture of it tomorrow but it’s like a very thin, very bendy plastic, almost rubber like backed strip of wood effect ‘laminate’ style flooring. It’s waterproof, hardwearing, non slippy (much to the annoyance of my wife I was attempting power slides whilst she was making a cuppa) and when clicked together has hardly any gap. It doesn’t come apart once clicked in place and doesn’t lift when it’s done correctly. Possibly reduce the amount of screws needed too! Each piece is coated and as it’s not wood there’s nothing to delam or anything that rainwater could bother. Now I’m thinking it just might, with a coat of masonry over the top, be a potential option. It was a cheap floor covering too so price wise I don’t think it’d be much different to ply. Covering wise I’m thinking if I did do something like that I’d lay it on a 45 degree angle. If I’ve got enough I’ll see about making a little area with it, paint it and give it a whirl. Question is - has anyone else ever tried with anything like this and what was the outcome?!
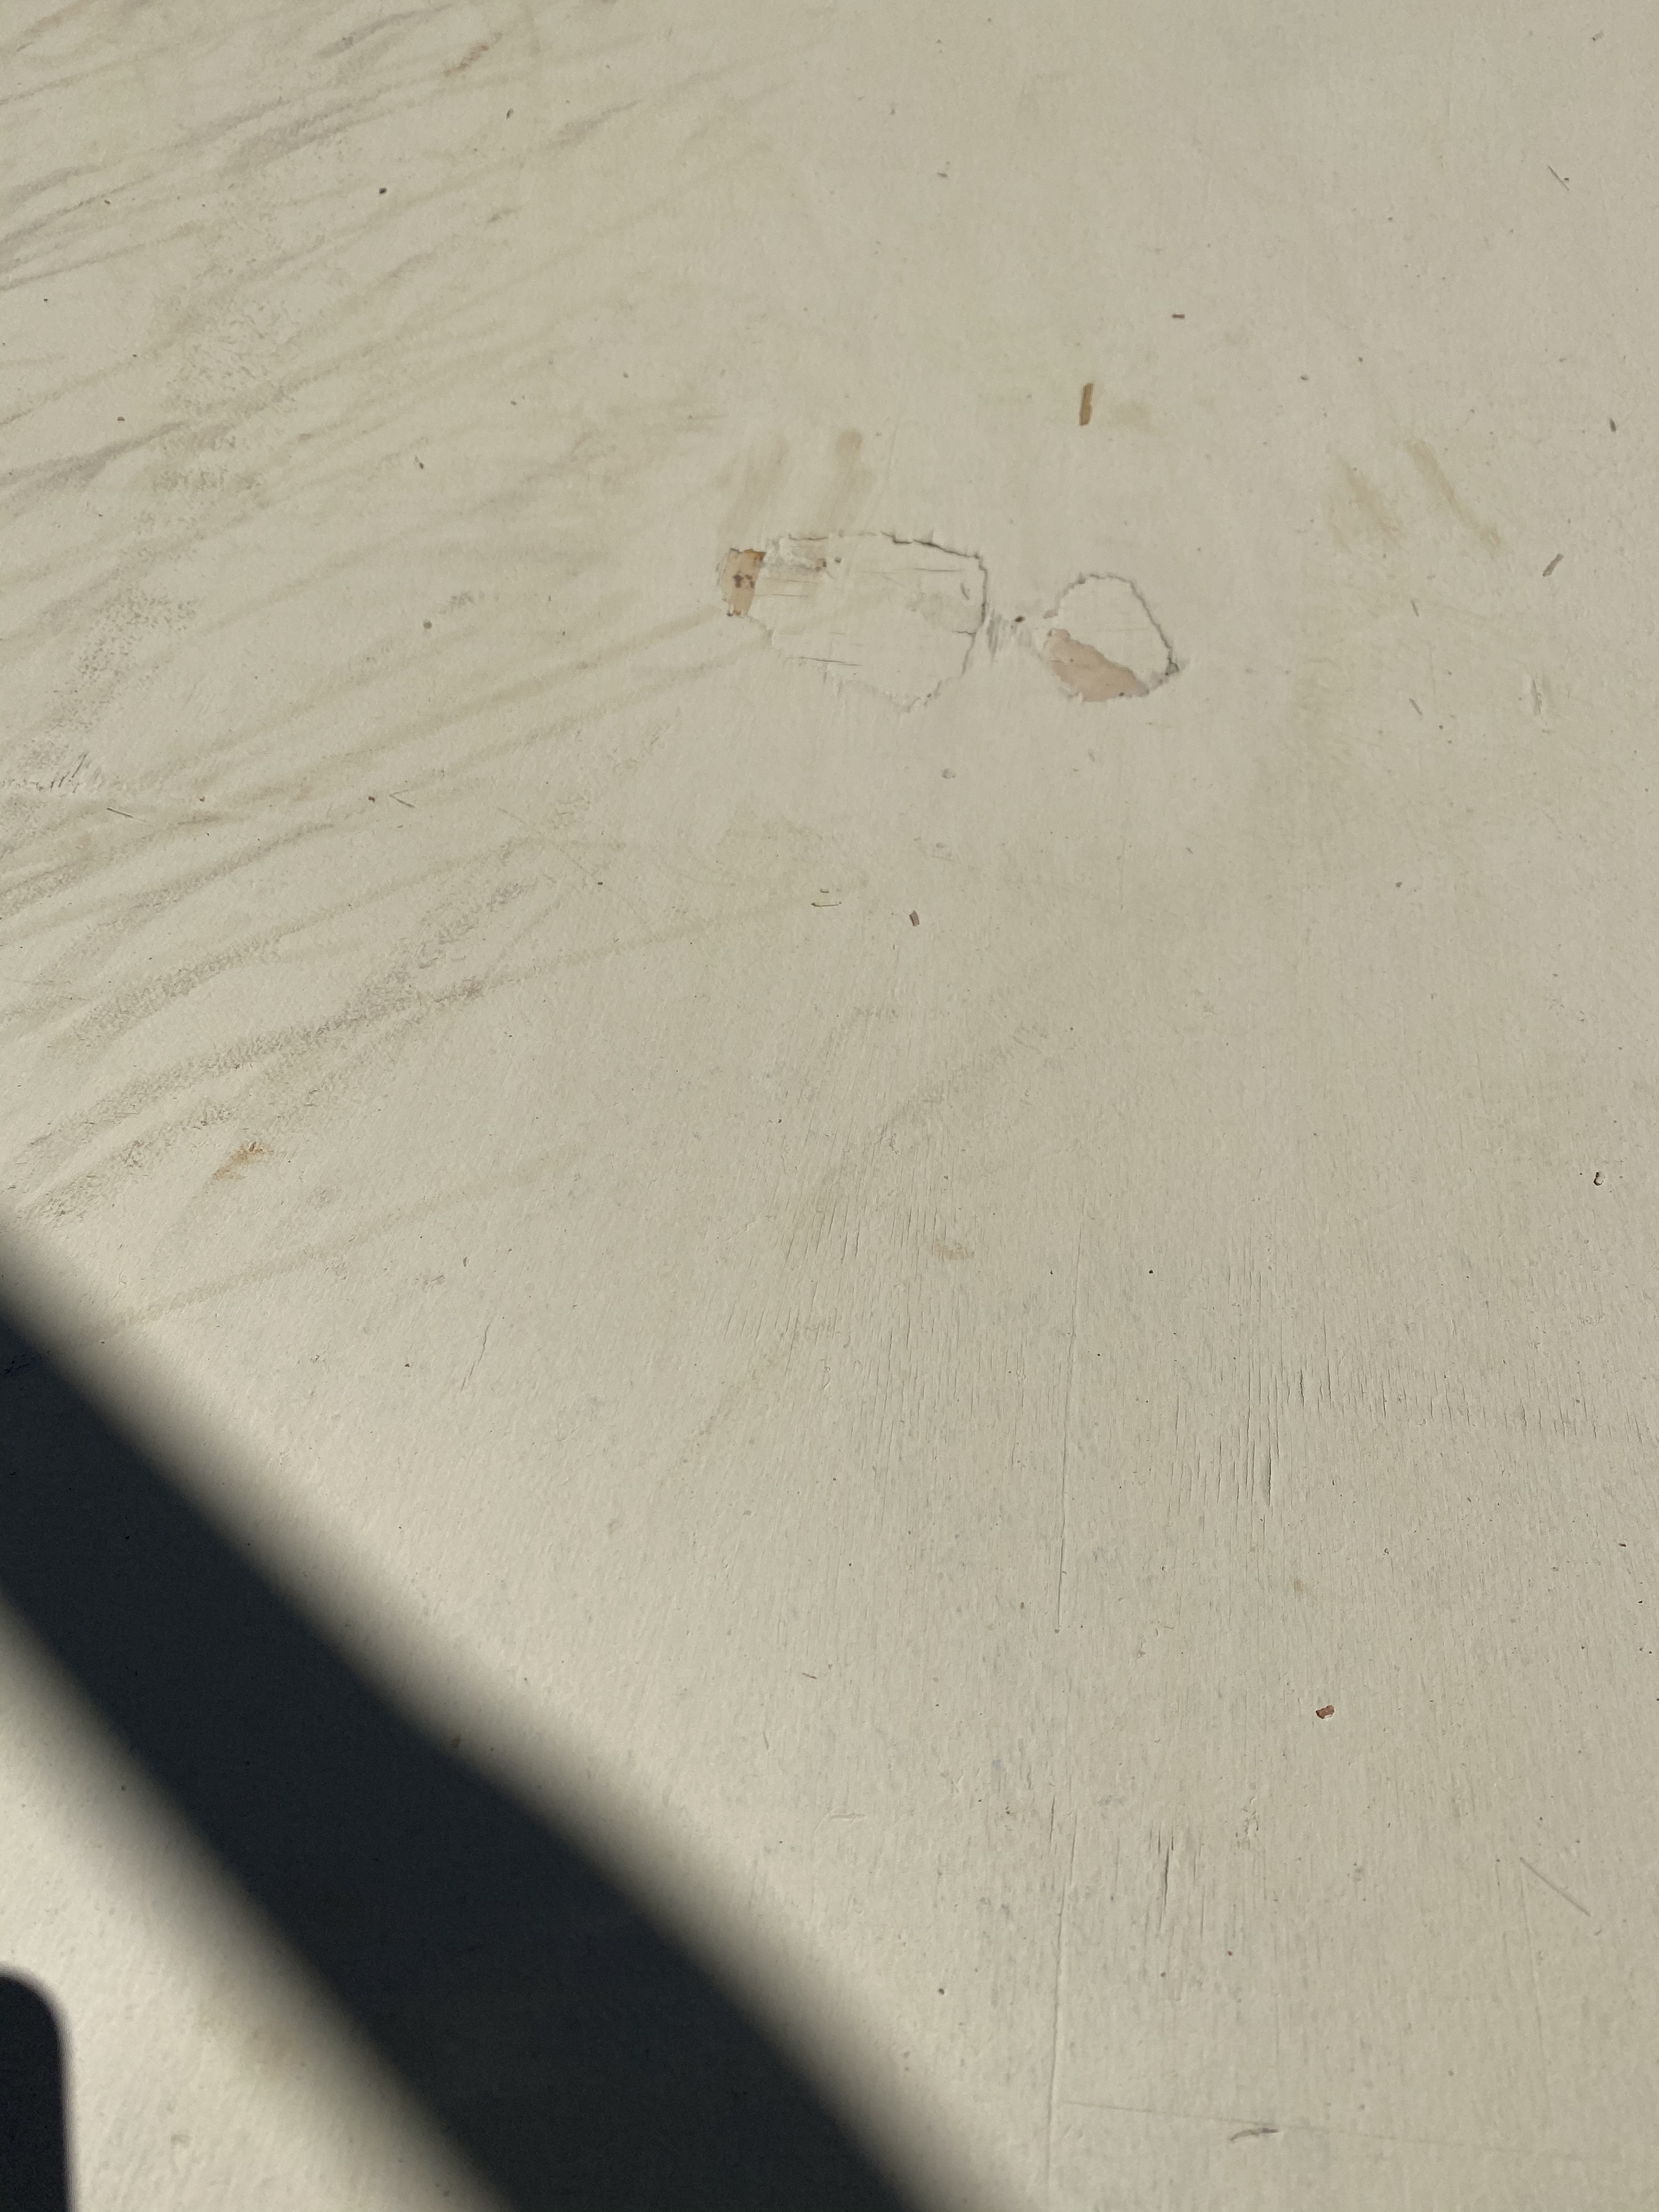
Hmmm… so the wpb board is good’ish. Now I don’t know if it’s because we’ve had some serious heat or whether one piece is a bit shonky ‘but’ one de-lammed… so I cut out the bit that blistered and filled with no-nails…
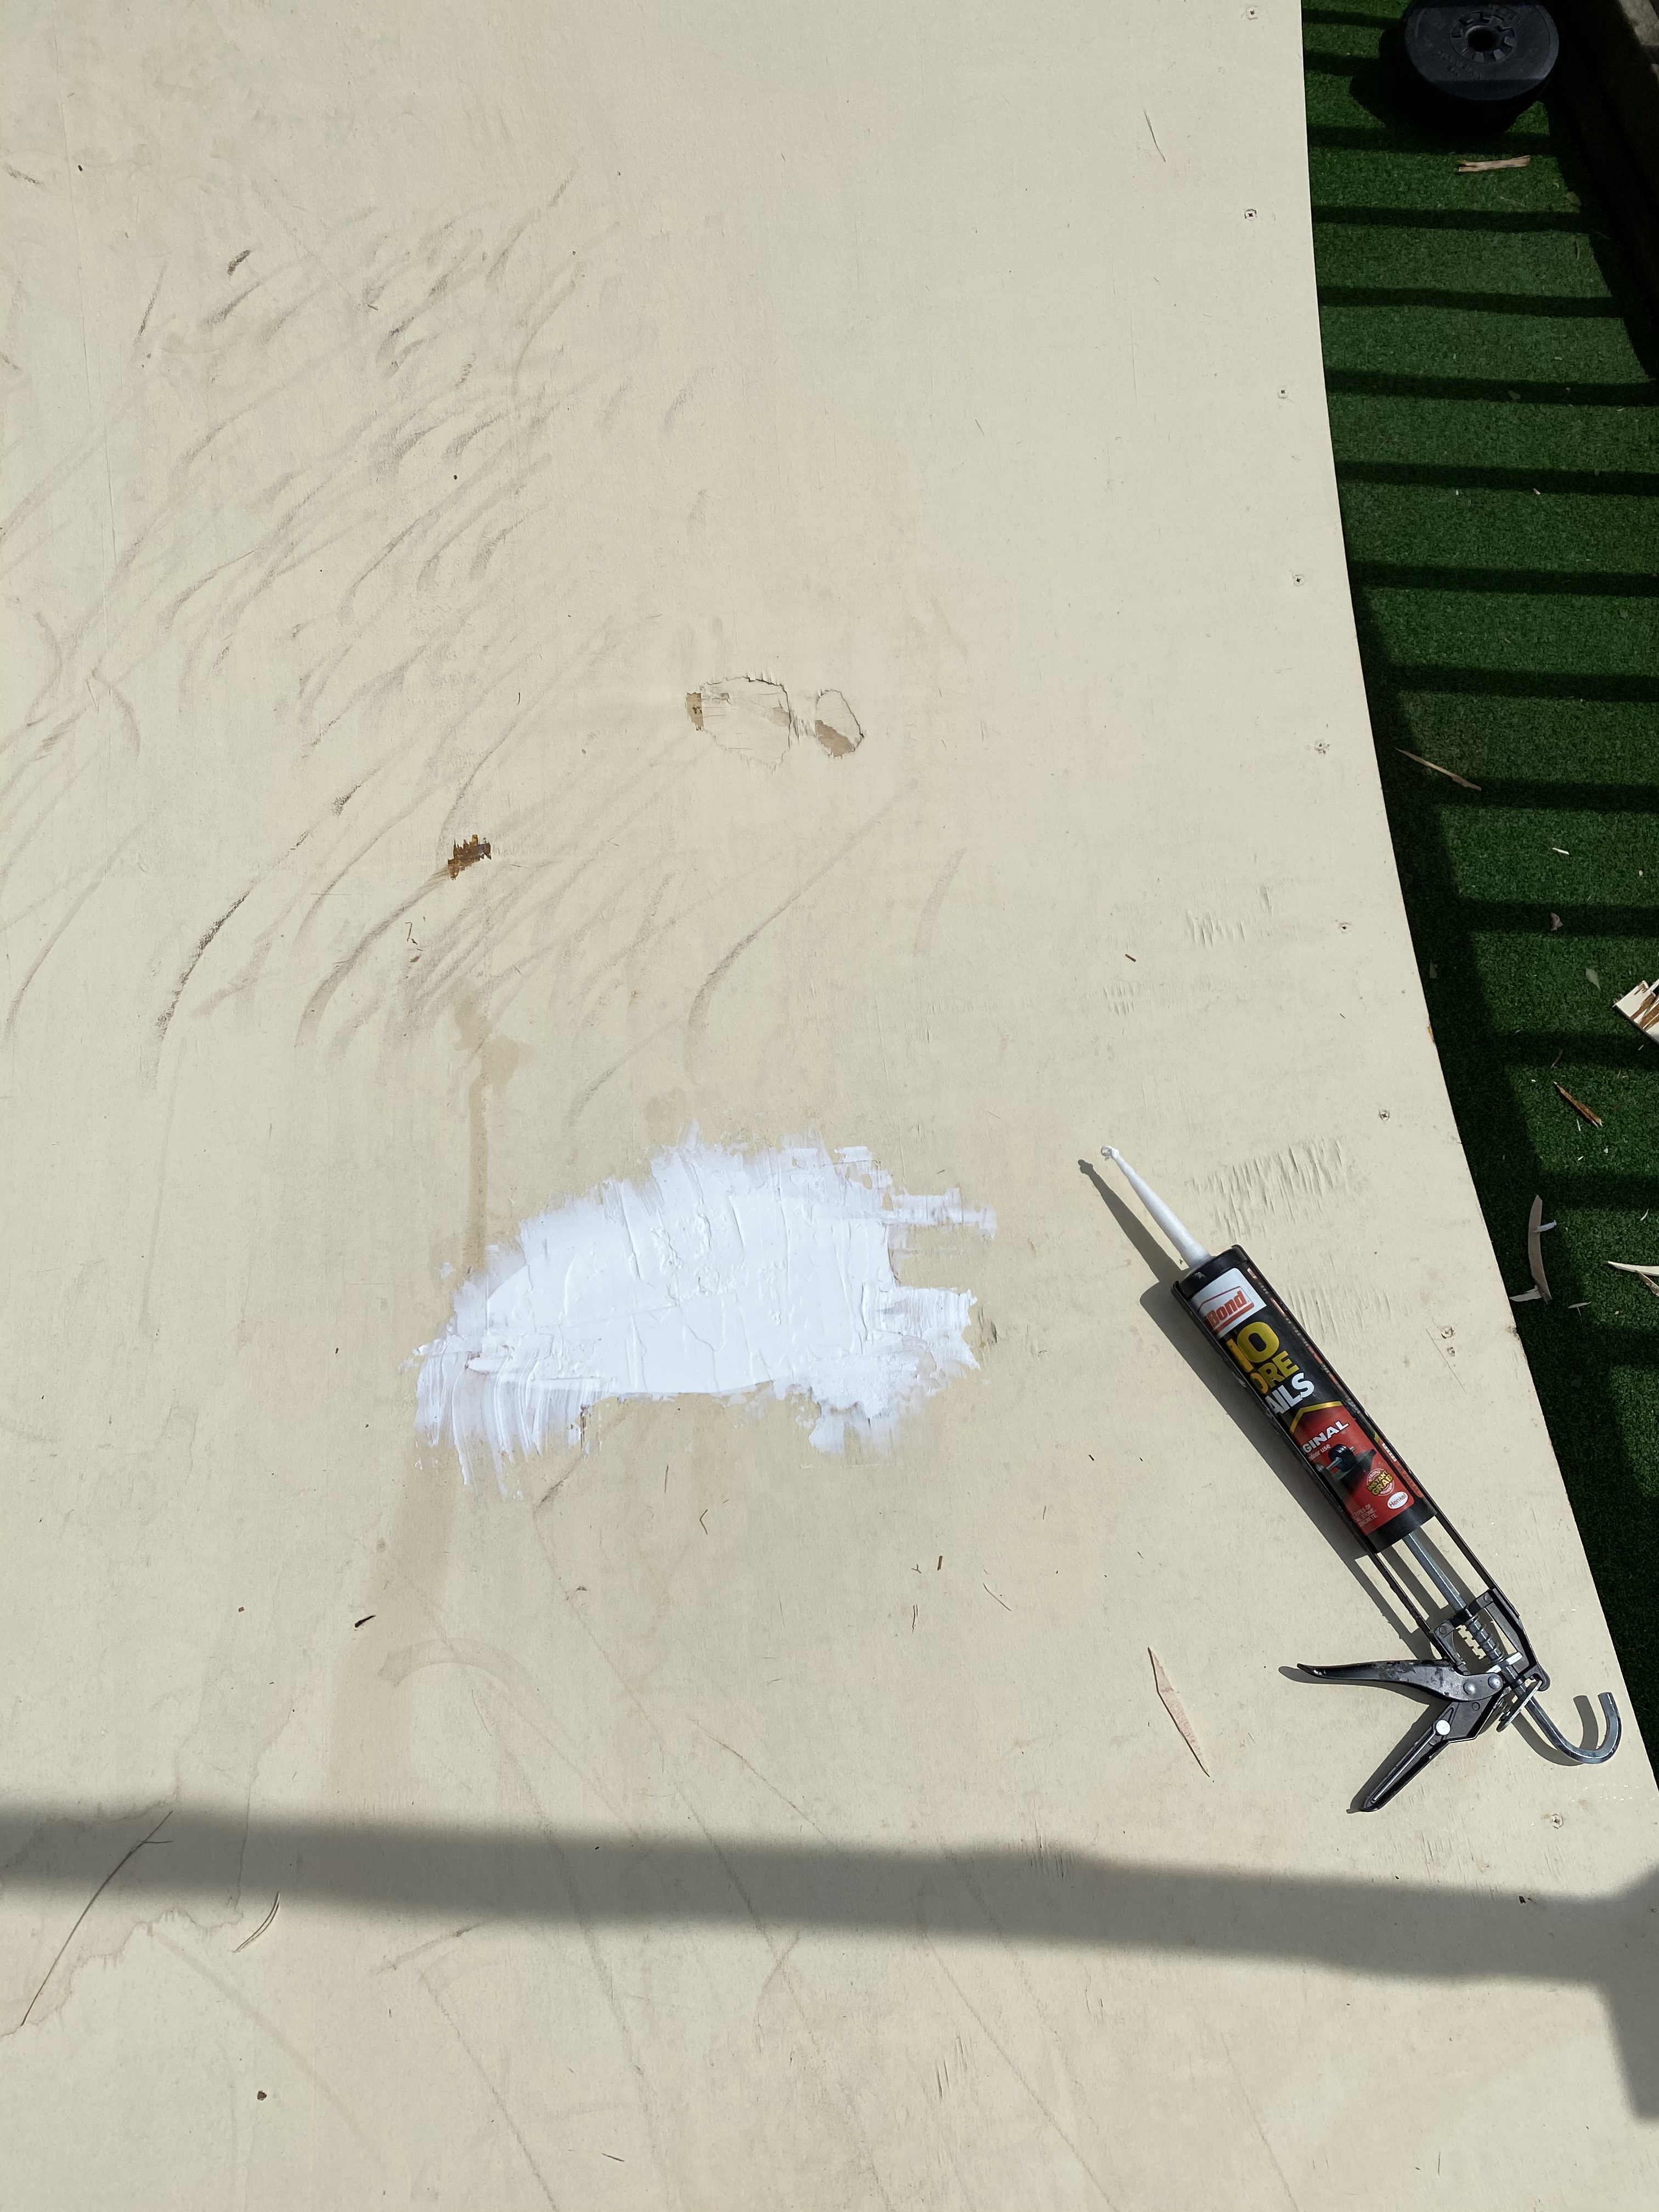
Cured nicely, has flex so it’s not separating, which is good. Cheap and easy way to fill dodgy bits - I’ll keep ya posted…
So had a chance to lay the offcuts of the kitchen flooring over the ramp. It’s not made of wood it’s called LVT which stands for Luxury Vinyl Tile. Looks like a wood laminate plank but is thin and bendy although very dense - there’s no give; same as ply. It’s essentially multiple sheets of pvc vinyl pressed together with some other compounds and is 100% waterproof. Finish wise it also has a urethane coating. Once clipped together I’m thinking I could hold it in place by running screws down the outside of both sides as the weight of it (surprisingly heavy) should hold it in place. It’s relatively inexpensive and even though I don’t think it’s slippy at all there’s always the option of whacking a coat of masonry paint over the top. As it’s so thin, 4.2mm, I reckon I could lay it straight over what’s already in place.

1 Like
Now I’m more interested in the 18 hole crazy golf course than the ramp.
If you’re referring to my awesome bit of AstroTurf… I found it whilst clearing out the garage so fitted it to the deck as the tip ain’t open and I couldn’t find anywhere to hide it. ![]()

Iam in a similar position to you in many ways, 45, should know better, not skated in 20 yrs, recently rekindled my fondness for skating, amazingly with encouragement from my wife ended up with this in my garden, again luck enough to have plenty of room at the back for it, now then, I am having to overboard as currently only 1 layer of ply, from your previous experience and from the comments/advice do I just go for the marine ply or do I treat the structural ply I have and use that? I have also tarp’d Will take your tip of pallets for air flow
1 Like