Not really shed related but I figure this is the best place for it; found a potential DIY spot the other day, already has a small block there but it’s pretty rough, doesn’t really work well for grinds or nose/tail - started going a bit better after rubbing it with a brick and caking it with wax but still needs work so gonna head back soon, scrape it all off and hit it with an actual rub brick then lacquer it w clearcoat. Question I have is would it be worth hitting it with a coat or two of spraypaint prior to the clearcoat?
I’m not sure. It’s all acrylic. The paint might be a bit thicker. Just layer it up and give it plenty of time to dry
Given a choice I’d go with Rust-Oleum spray paint. It’s got primer in there too. The enamel is durable as.
No don’t paint it first. Or wax it. The clear coat actually bonds with concrete and hardens it. So clear coat and let dry before painting.
Ty for the info! Had to spend some time scraping off as much wax as possible then rub bricked the shit out of it, which at that point it was already going pretty well without any lacquer or wax. Dusted off, hit with two coats of clear, two of paint then another two of clear. Might be overkill, might be the completely wrong way to do it but it turned out great.
very hyped on the place, lot of potential.
Looks amazing! You probably don’t need the paint on the grindable edge, lacquer and wax is enough…but paint obviously helps for any areas that wheels come in contact with.
Also, worth mentioning that if you don’t have a ‘rub brick’ you can use any piece of broken concrete, brick or rock that is lying around. It works just as well ![]()
I used some concrete sealer (two coats with a roller) on some curbs that me and my fellow middle aged crew found recently and they grind pretty much perfectly without wax.
Comes in a big tin like house paint and I just grabbed a heap of replaceable small roller heads and a handle and it’s been great. Concrete was pretty fresh and new though.
Yeah same stuff as lacquer really - polyurethane resin - just less easy to chuck in your backpack!
Yeah in all honesty it didn’t even really need paint but as you can kinda tell from the picture with the clearcoat it looked a bit haggard, plus I have a shit ton of paint and caps leftover from doing graff years ago. Astro caps had the whole thing painted in about 10 seconds lol.
Looking for a bit more DIY advice if anyone has time - most of us in our group have a decent/beginner level of experience with it, couple of us with woodwork plastering etc experience but when it comes to buying actual products, what is the go to for just premixed gear? Accidentally bought some premixed concrete that had a shit ton of large aggregates which obviously can’t really be smoothed out and we don’t wanna make that mistake again. As far as I can tell it boils down to -
cement - one part of the mixture which is then mixed with water/sand and other aggregates if needed
concrete- same as above but premixed
mortar - cement water and sand
i’m guessing the best bet is buying cement and sand (which basically works out the same price as premixed conc) and mixing at the spot? absolute rookie questions but any info is appreciated
If you’re doing a lot ( 10 bags of cemmo or more) getting premix can be the same price. And easier depending on access.
I’d say always use aggregate just get small stuff <10mm.
Use a resin / wood trowel after you’ve got it all in and shaped. This pushes the aggregate down and leaves the fine stuff on top.
Then let it rest and finish it with mag then steel .
- you can arguably skip the mag at a diy
- none of this is gospel
- first thing we built had no aggregate or rebar and it’s lasted 15yrs so far
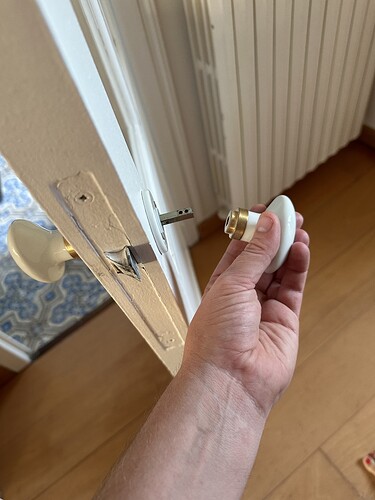
Is there a little screw that goes through the handle into the square bar?
Finishing up my kitchen and I don’t have quite enough worktop, how wanky is it if I inset a marble tile specifically for making bread on?
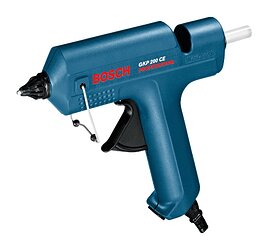
Definitely don’t use superglue.
I’ve fucked our bathroom door handle right up.
These fix lots of things.
Although my Mum’ll tell you (as she did Teenage Me) not to use them to hem your cut offs - especially if they’re going to go through a hot wash. ![]()
There’s probably a screw on that knob somewhere to fix it properly though.
Should be a small hole in the handle somewhere, I think it might need a grub screw or the old one has fallen out. They’re usually a small hex key had (no, truck bolt key will be to big).
If the old grub screw is lost you should be able to get a new one from a hardware store or eBay, but you might have to get a few different ones on it you can’t work out the size
Sounds like a lot of hassle, probably easier to just move
Serious PTSD of the last house I rented.
I’m not clinking that link.
Bots post on forums for various reasons, often driven by the objectives of their creators. Some bots are designed for malicious purposes, such as spreading spam, phishing for personal information, or disseminating malware. These automated programs can infiltrate forums to exploit vulnerabilities, manipulate discussions, or generate fake engagement.
On the other hand, certain bots serve more benign purposes, such as automating routine tasks or providing information. For instance, search engine crawlers index forum content to improve search results, and social media bots may share relevant content. Additionally, companies may deploy bots for customer support or to gather feedback.
In the context of social engineering or political influence campaigns, bots may be employed to sway public opinion by amplifying certain viewpoints or creating the illusion of widespread support. Recognizing and mitigating the impact of these bots on online communities is crucial for maintaining the integrity and authenticity of forum discussions. Efforts to combat bot activity often involve advanced algorithms, user authentication measures, and community vigilance.


